Chesed

Amazing Grace

I’ve been reading through Matthew the last while and loved that my reading serendipitously correlated with Easter.  Sometimes the stories we love best are so familiar it’s easy to just read over them, the familiar words a gentle cadence.

But this time when I got to verse 3 of Matthew 27 I was stopped short by how horrified Judas was when he realized Jesus was about to be condemned.  I can’t even imagine how stricken he must have felt.

It’s easy to think of Judas as the bad guy.  We don’t read a lot about him.  He’s not outspoken like Peter.  Not a super close friend like John.

But hardly was he some evil monster or he wouldn’t have been called to be one of the twelve.

Judas heard the the quiet call of an itinerant preacher and followed.

He was sent out with the other eleven to preach and heal and cast out devils.

Judas wasn’t evil, but he had a sin nature.  Just like you and I do.

He sinned. Once in particular.  His love for money grew bigger than his love for Jesus.

In a moment, he sold Jesus for thirty measly pieces of silver. The Jesus he loved (just not as much as money).  The Jesus he has followed and learned from.  He’s watched Jesus feed the five thousand and escape from angry mobs.

Maybe he thought he could have Jesus and money, too.  Maybe he thought he could be Jesus’ friend and simultaneously betray him behind his back without repercussions.  Could he really have watched Jesus talk to the woman at the well about her husbands and thought that Jesus would assume the chief priests plotted again on their own?

What went through his mind we don’t know.  But it’s so clear he didn’t think he was committing Jesus to die.

One sin.

One night of selling your soul.

Lord Jesus, have mercy on us all.

Because haven’t we all been Judas? Haven’t we all loved something more than we loved Jesus at some point?

How can we fathom this God of redemption who works through evil to bring forth good?

How can we fathom this God of mercy who still reaches down to people, takes their hand and lifts them up to make them whole?

How can we fathom a God who hears the dying words of a hardened criminal on the cross and whispers gentle words of complete forgiveness?

May 14 (6 of 155)

We are completely undone, yet completely immersed in His glory.

We are broken beings turned into shimmering mosaics of His beauty.

We are wretchedly unworthy, made messengers of His grace.

May 14 (11 of 155)

We are His.

Chosen.

Loved.

Redeemed.

All because of His amazing grace.


WFMW: Cinch Sack Tutorial

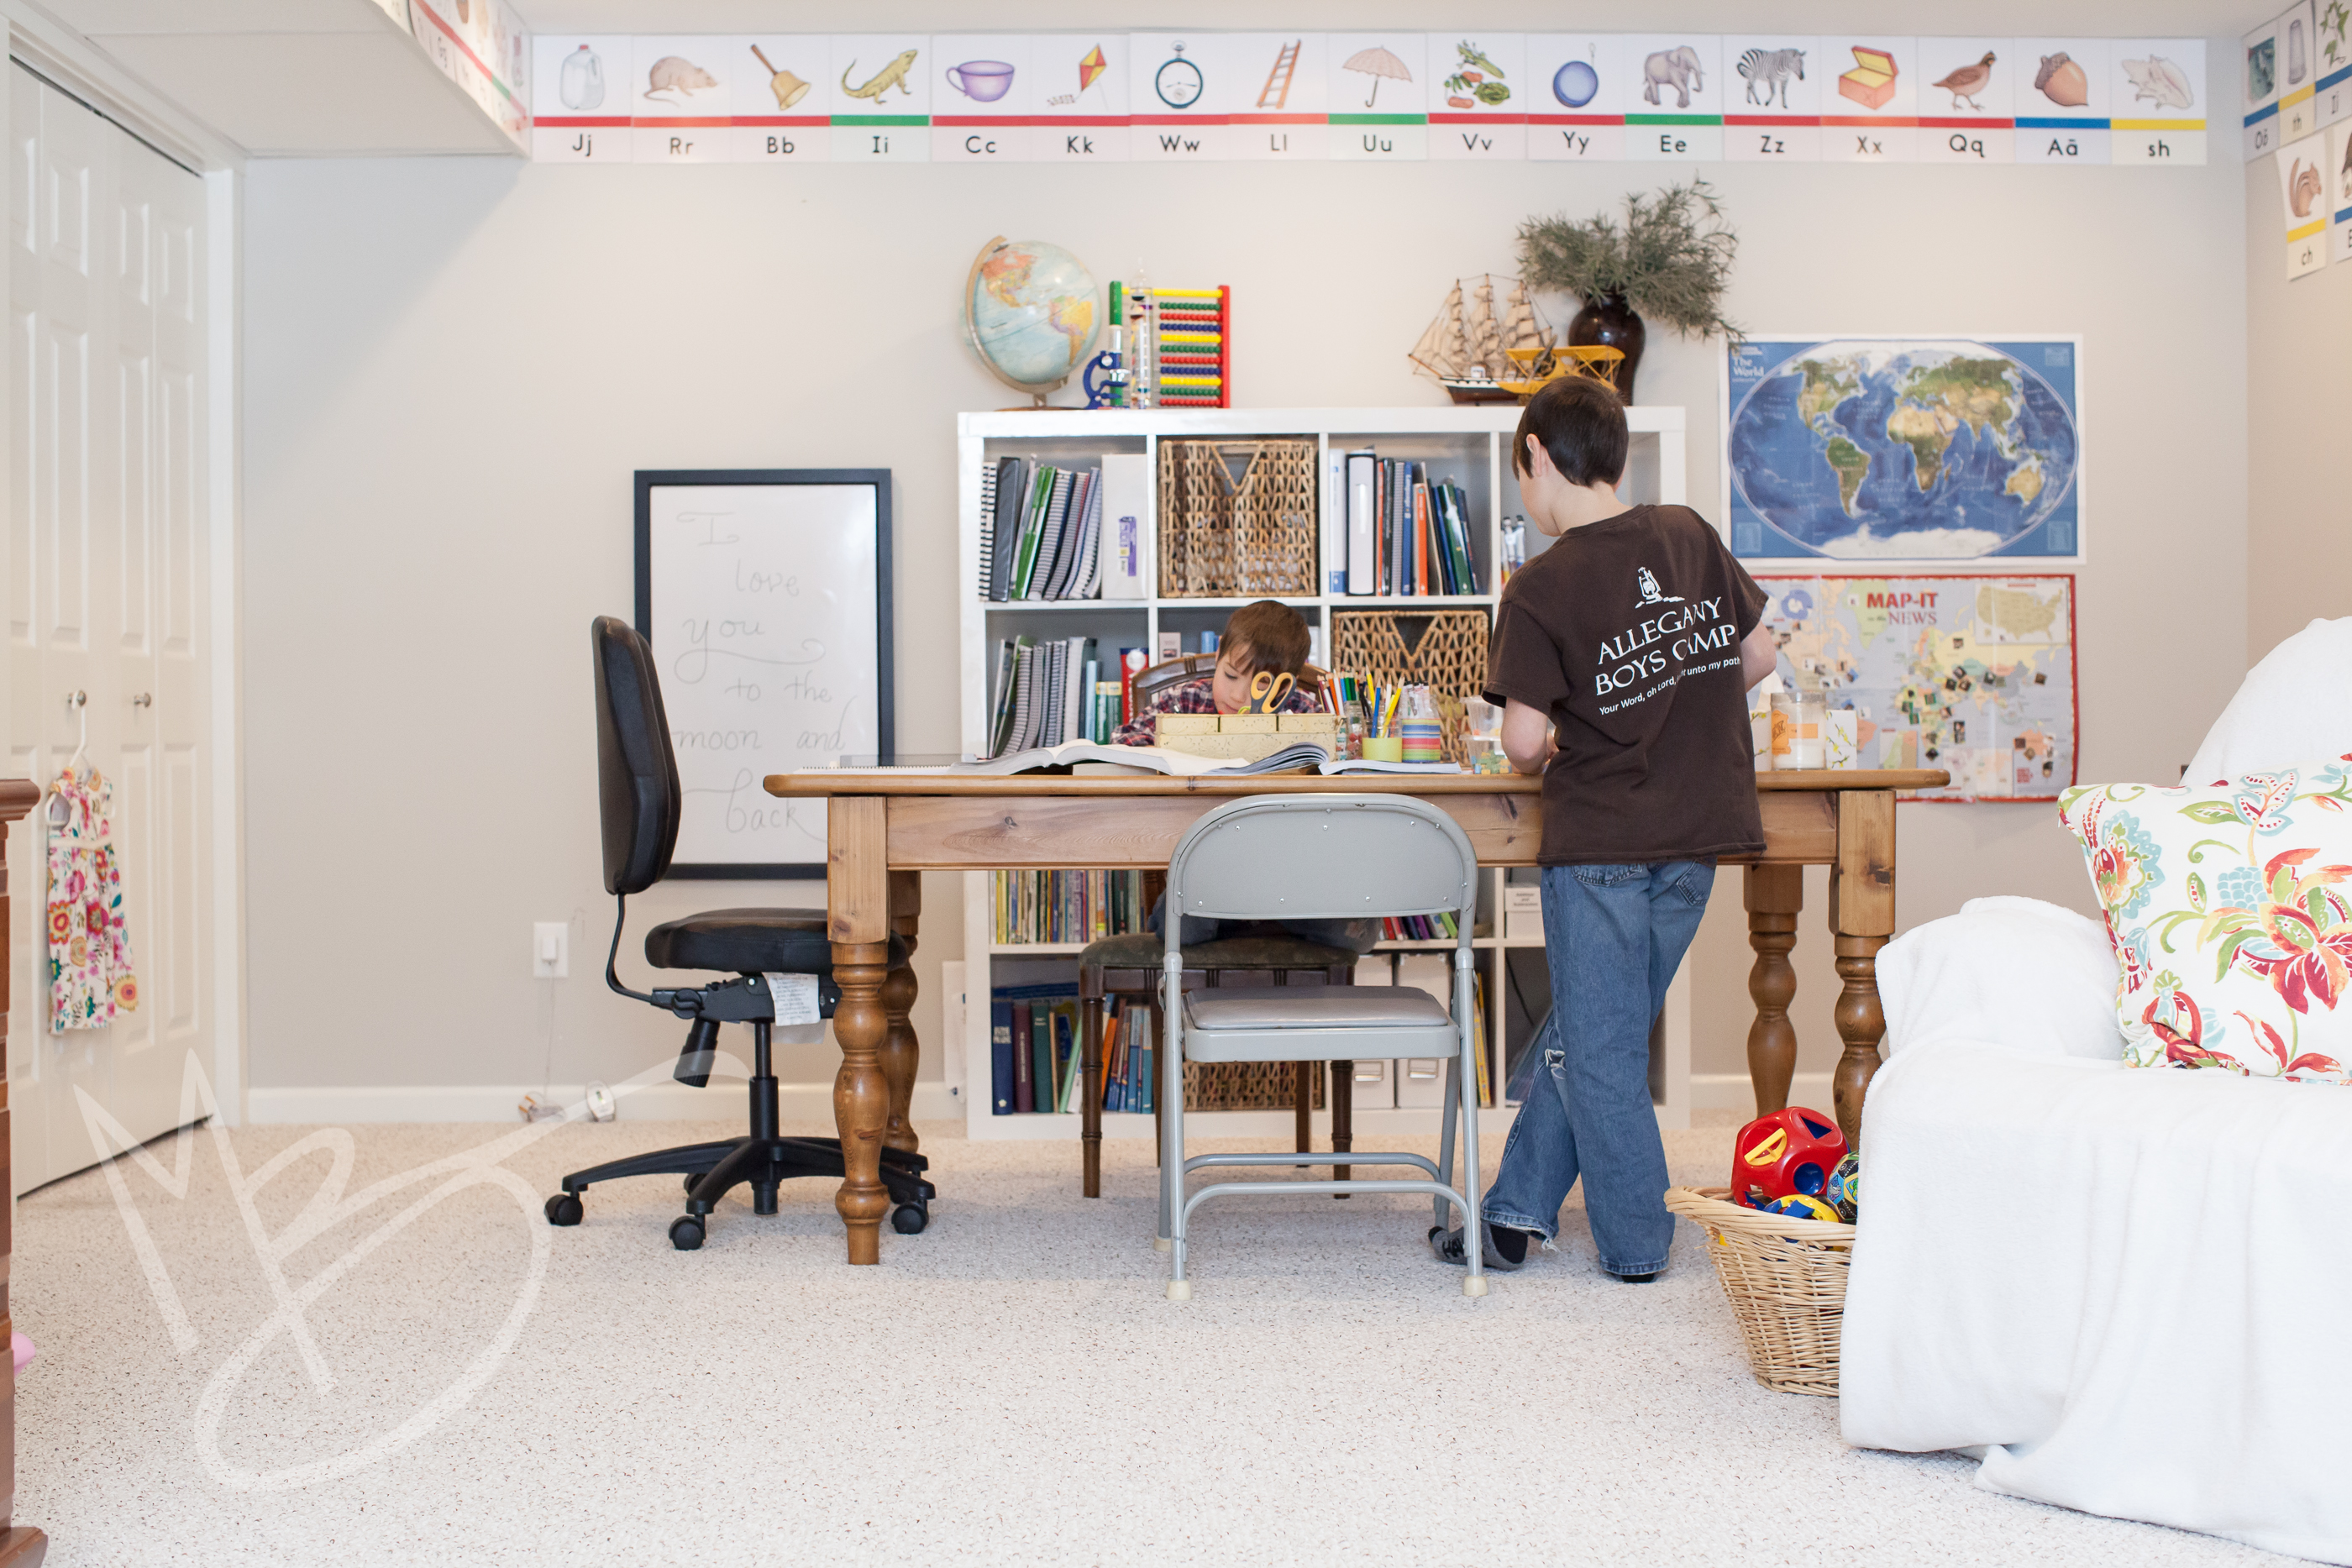
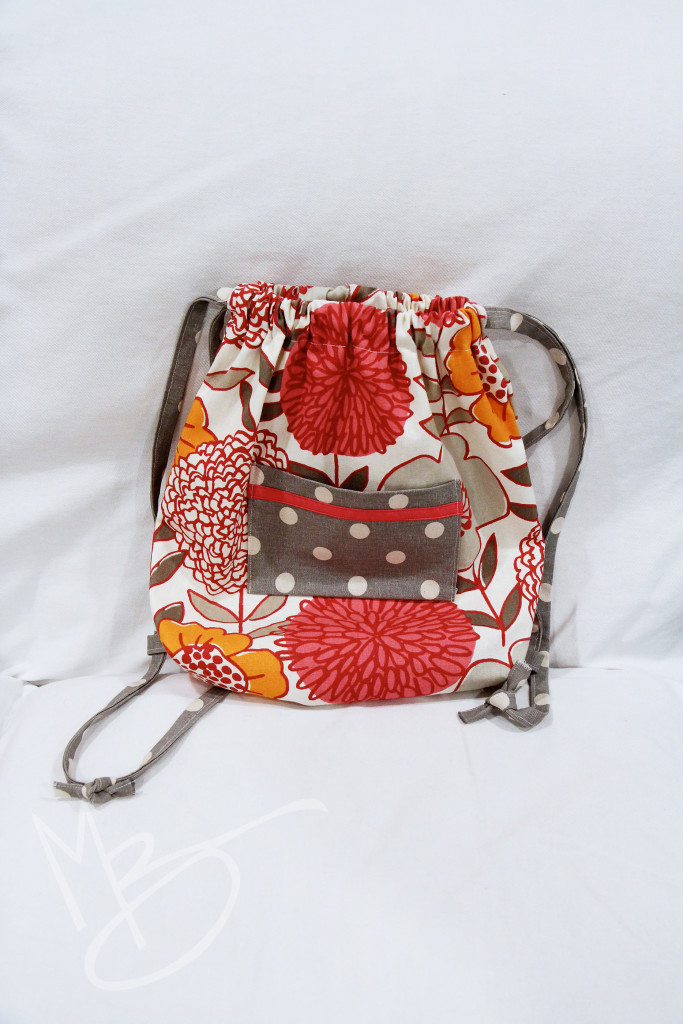
For our craft exchange at Allegany Boys Camp last Christmas, I made a backpack style cinch sack.  It reminded me of one of those easy sewing projects that would have been so much fun as a girl learning to sew.

I thought it would be fun to write a little tutorial with pictures.  If you’re an experienced seamstress, you can skim this article once and head off to your little sewing corner.  But I thought it would be fun to do a spelled out version in case there are any twelve year old girls out there just itching to sew a project on their own!
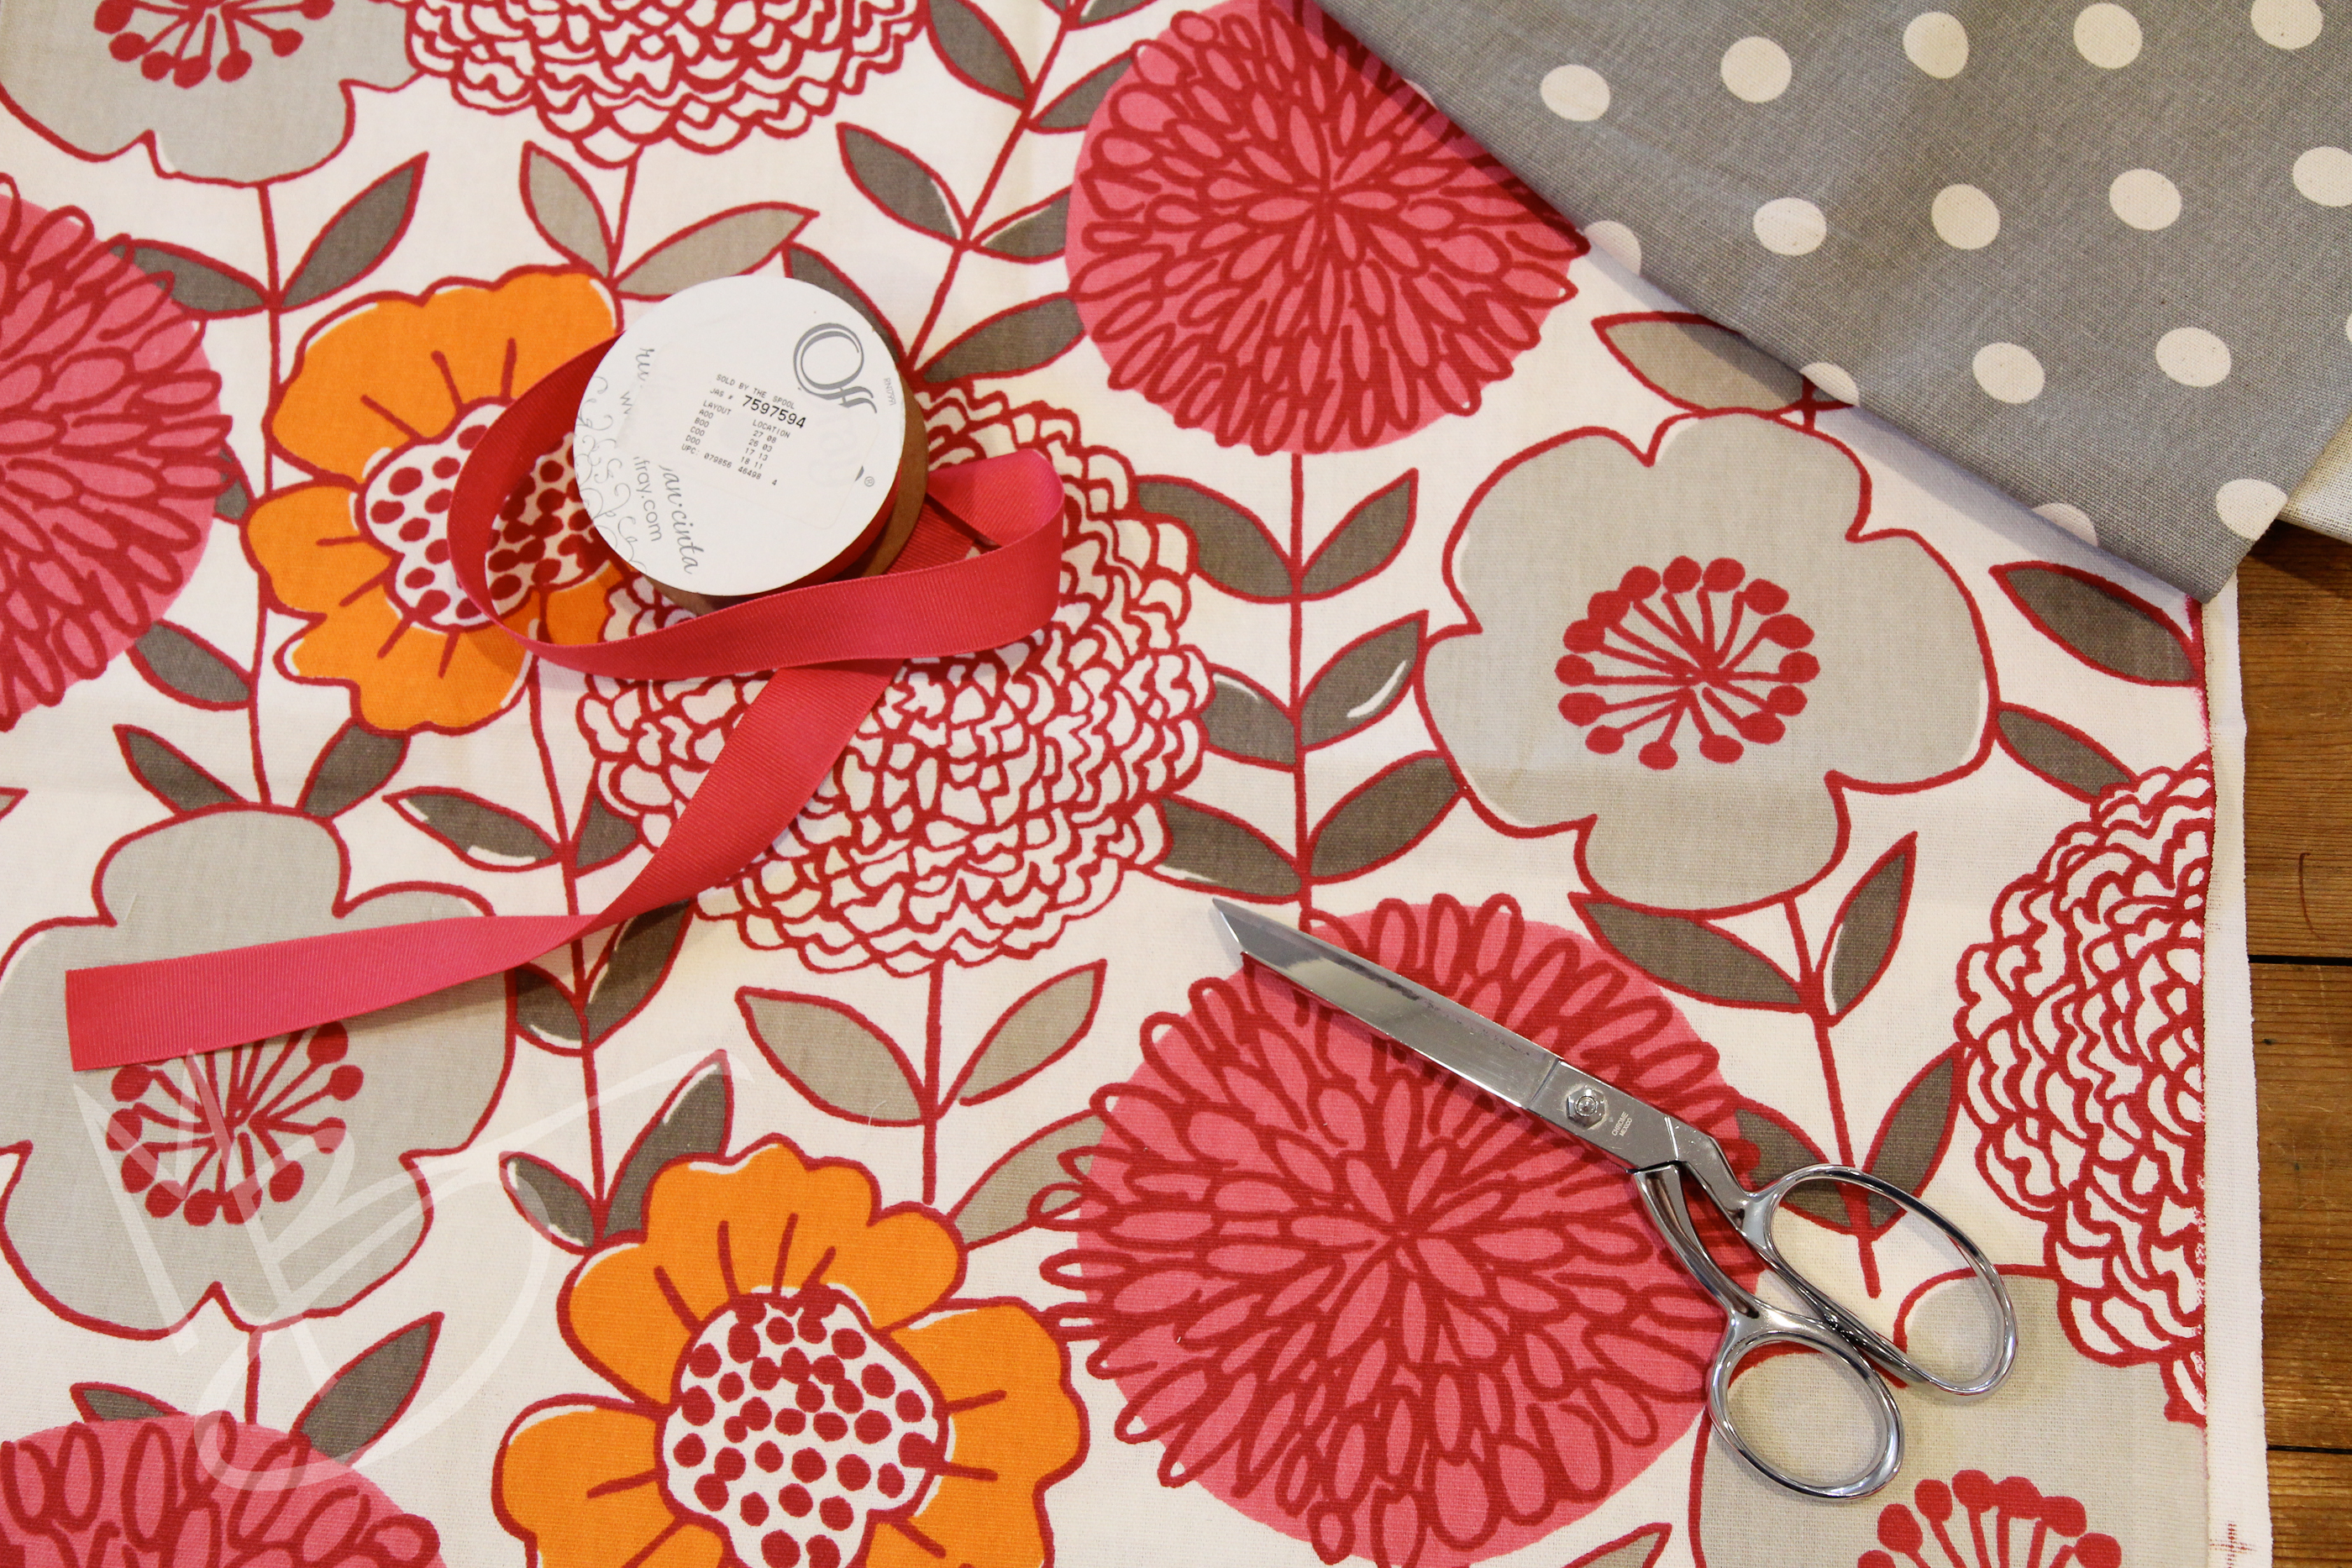
cinch sack tutorial (1 of 41)

You will need:

1/2 yard of fabric

1 – 7″x10″ piece of a coordinating fabric

2 – 2 1/4″ x 60″ strips of a coordinating fabric (I used the same for my pocket and strips but you could use three fabrics)

embellishments if you want them

ability to measure, cut, sew straight seams and buttonholes

**********

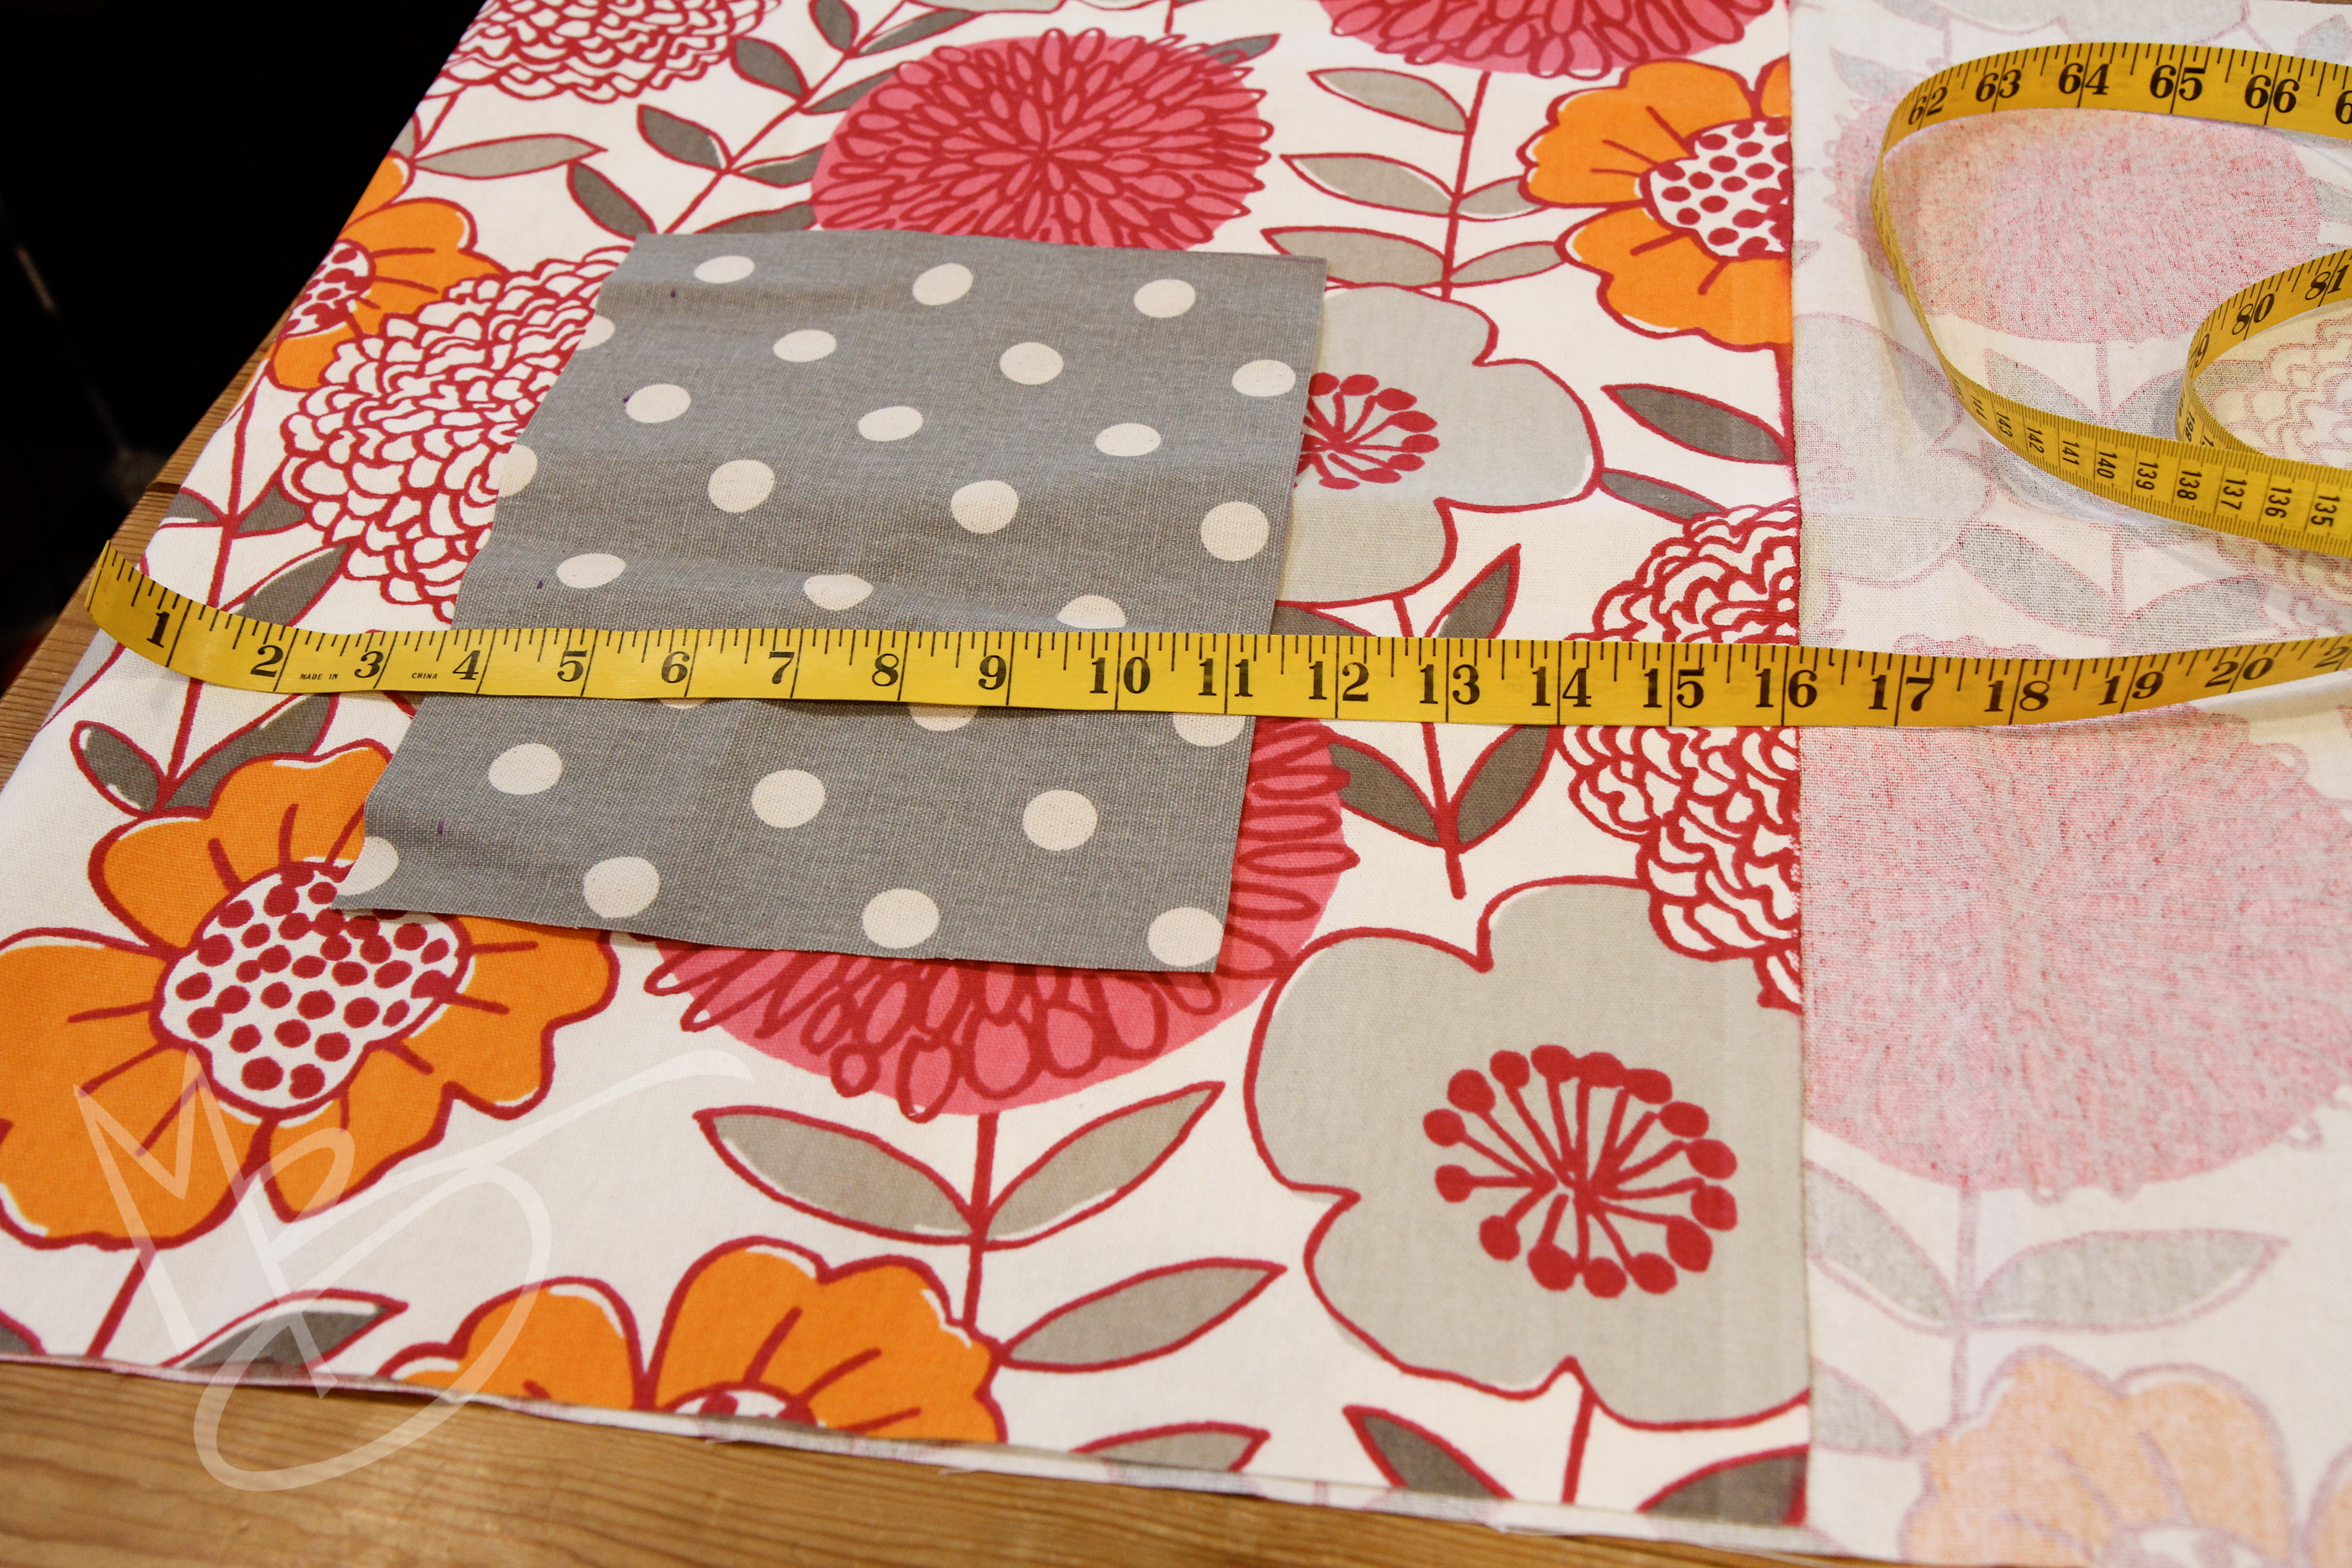
To get started, cut 2 large rectangles 16″ x 18″ of the main fabric.

cinch sack tutorial (2 of 41)

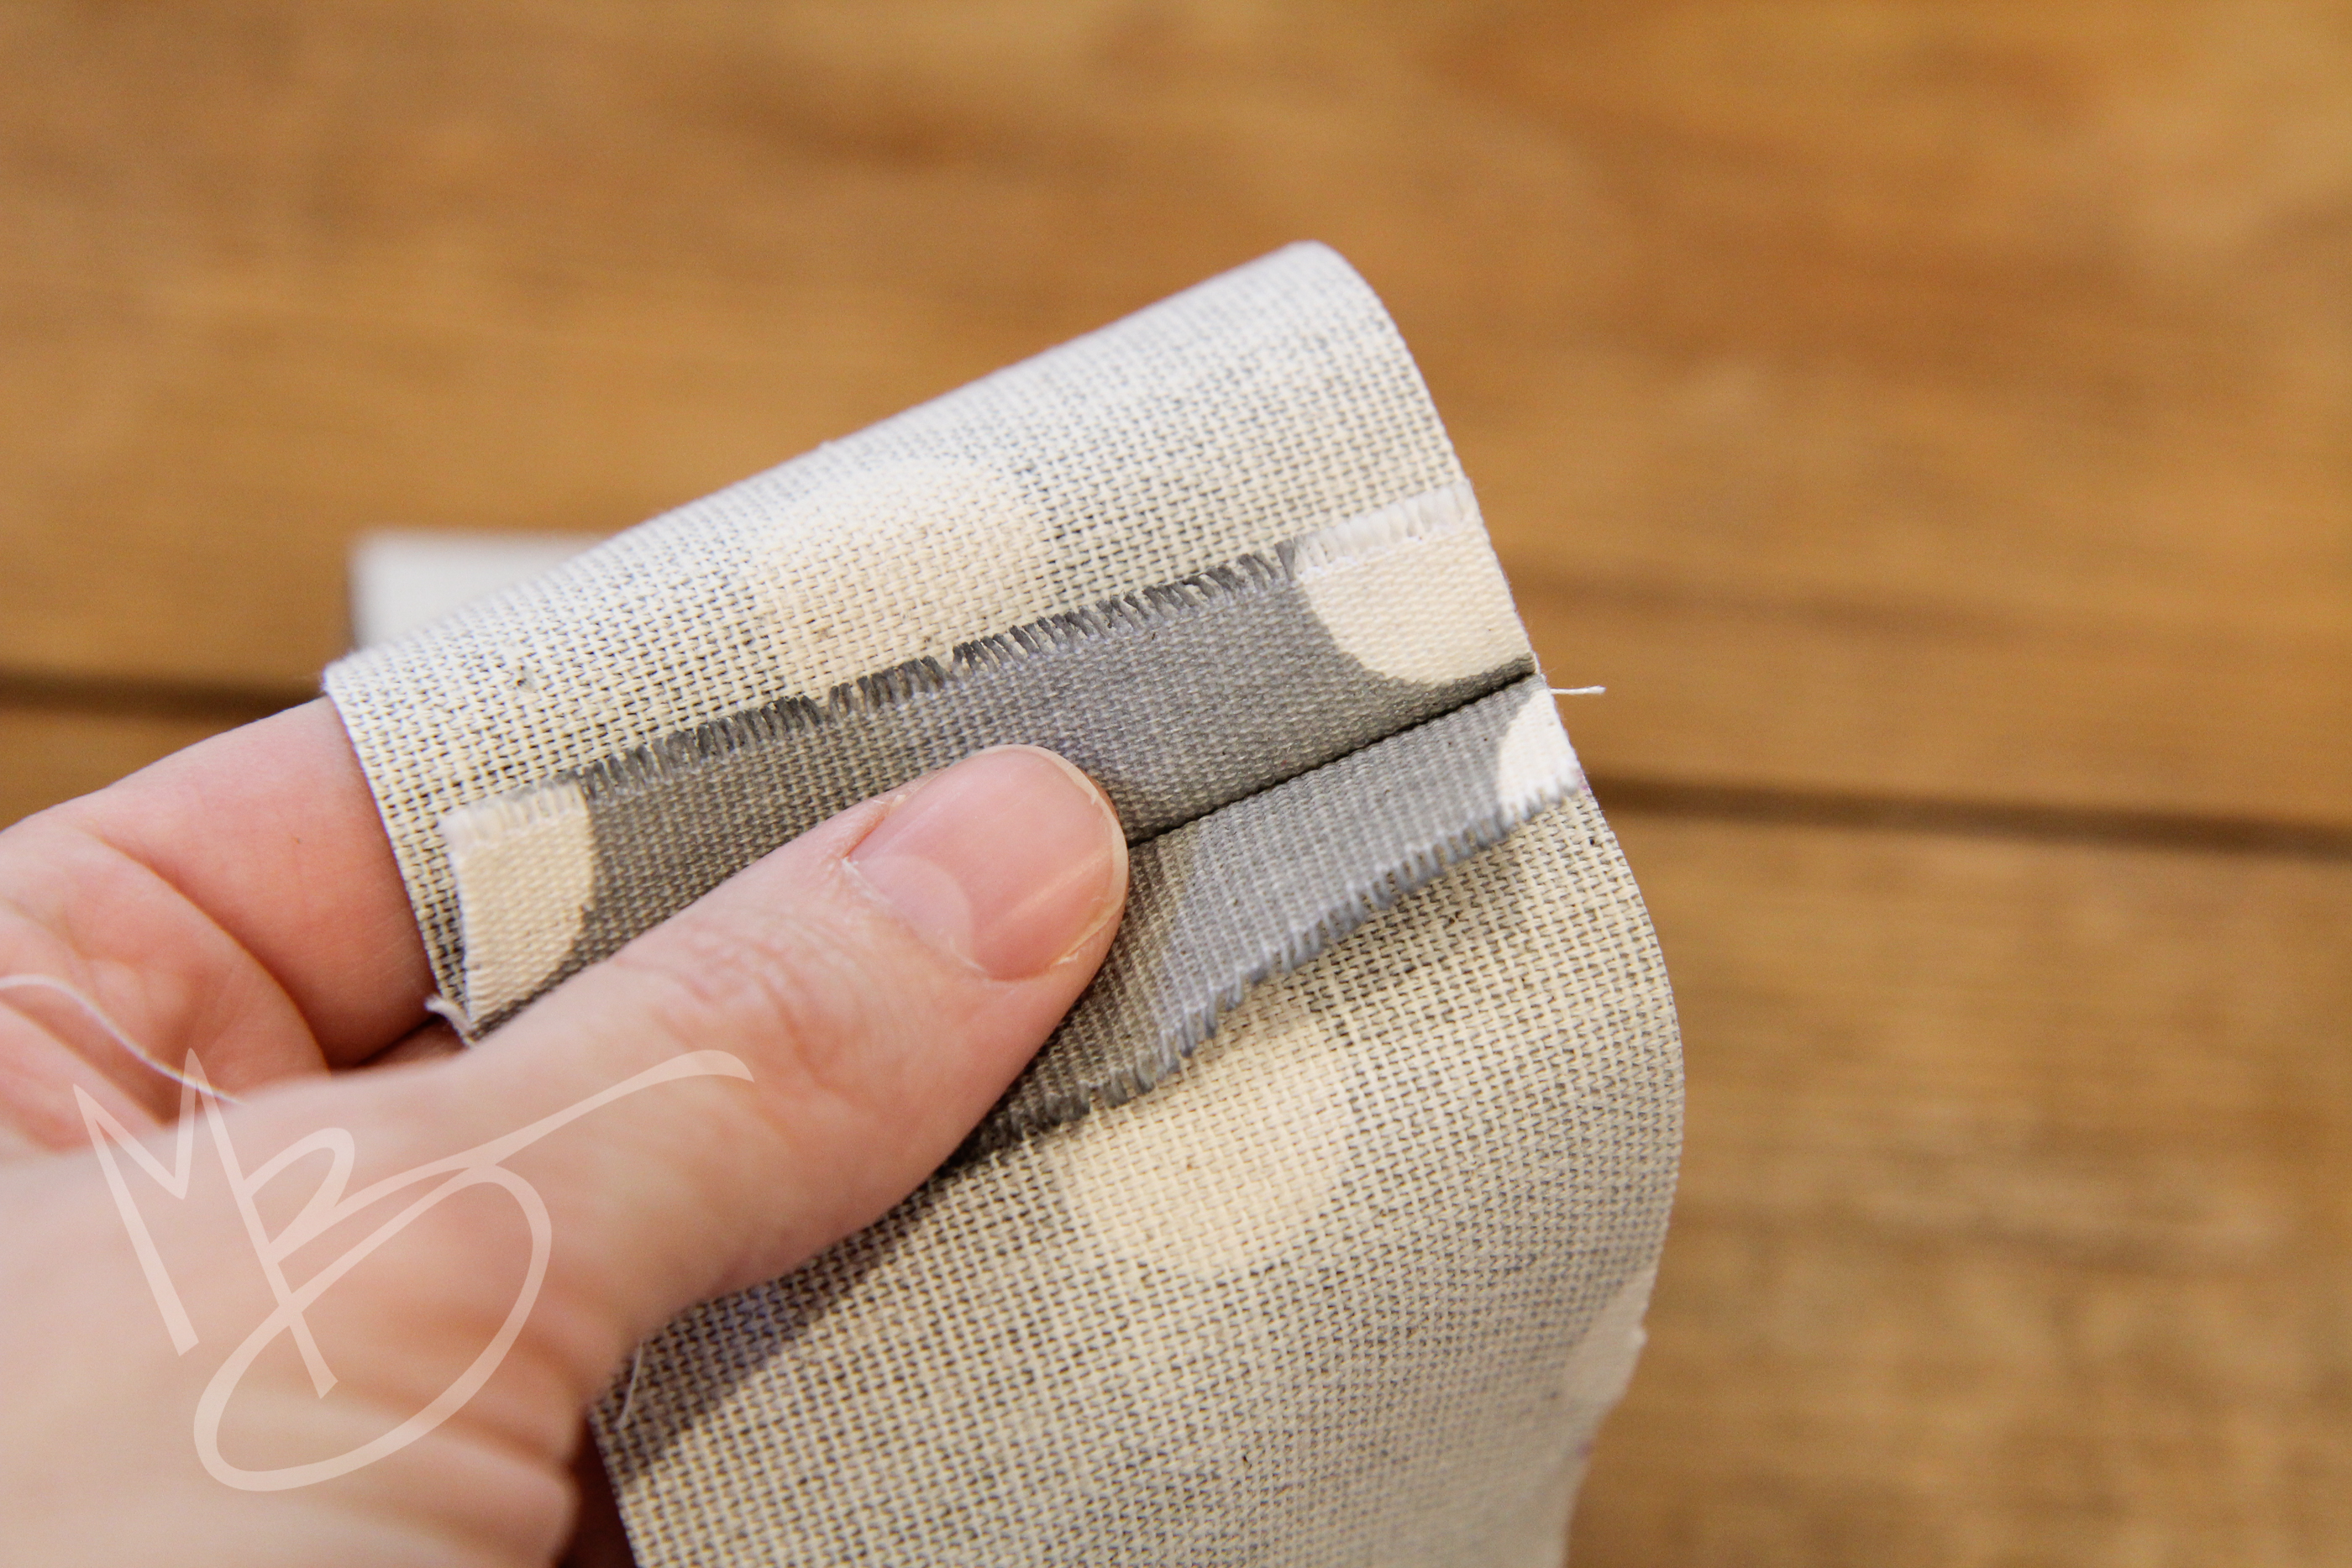
Cut the pocket and the strings.  You can splice fabric if your fabric isn’t wide enough.  Mine was 45″ wide so I had to splice.  To make a splice, line the edges up and sew a seam.

cinch sack tutorial (3 of 41)

Fold it open and iron it flat.  Most times in a bigger piece you would want to make sure the pattern matches up evenly.  For something this small, I didn’t bother matching.  I figure most people aren’t going to be giving strings the eyeball to make sure all the polka dots look exactly the same. 🙂

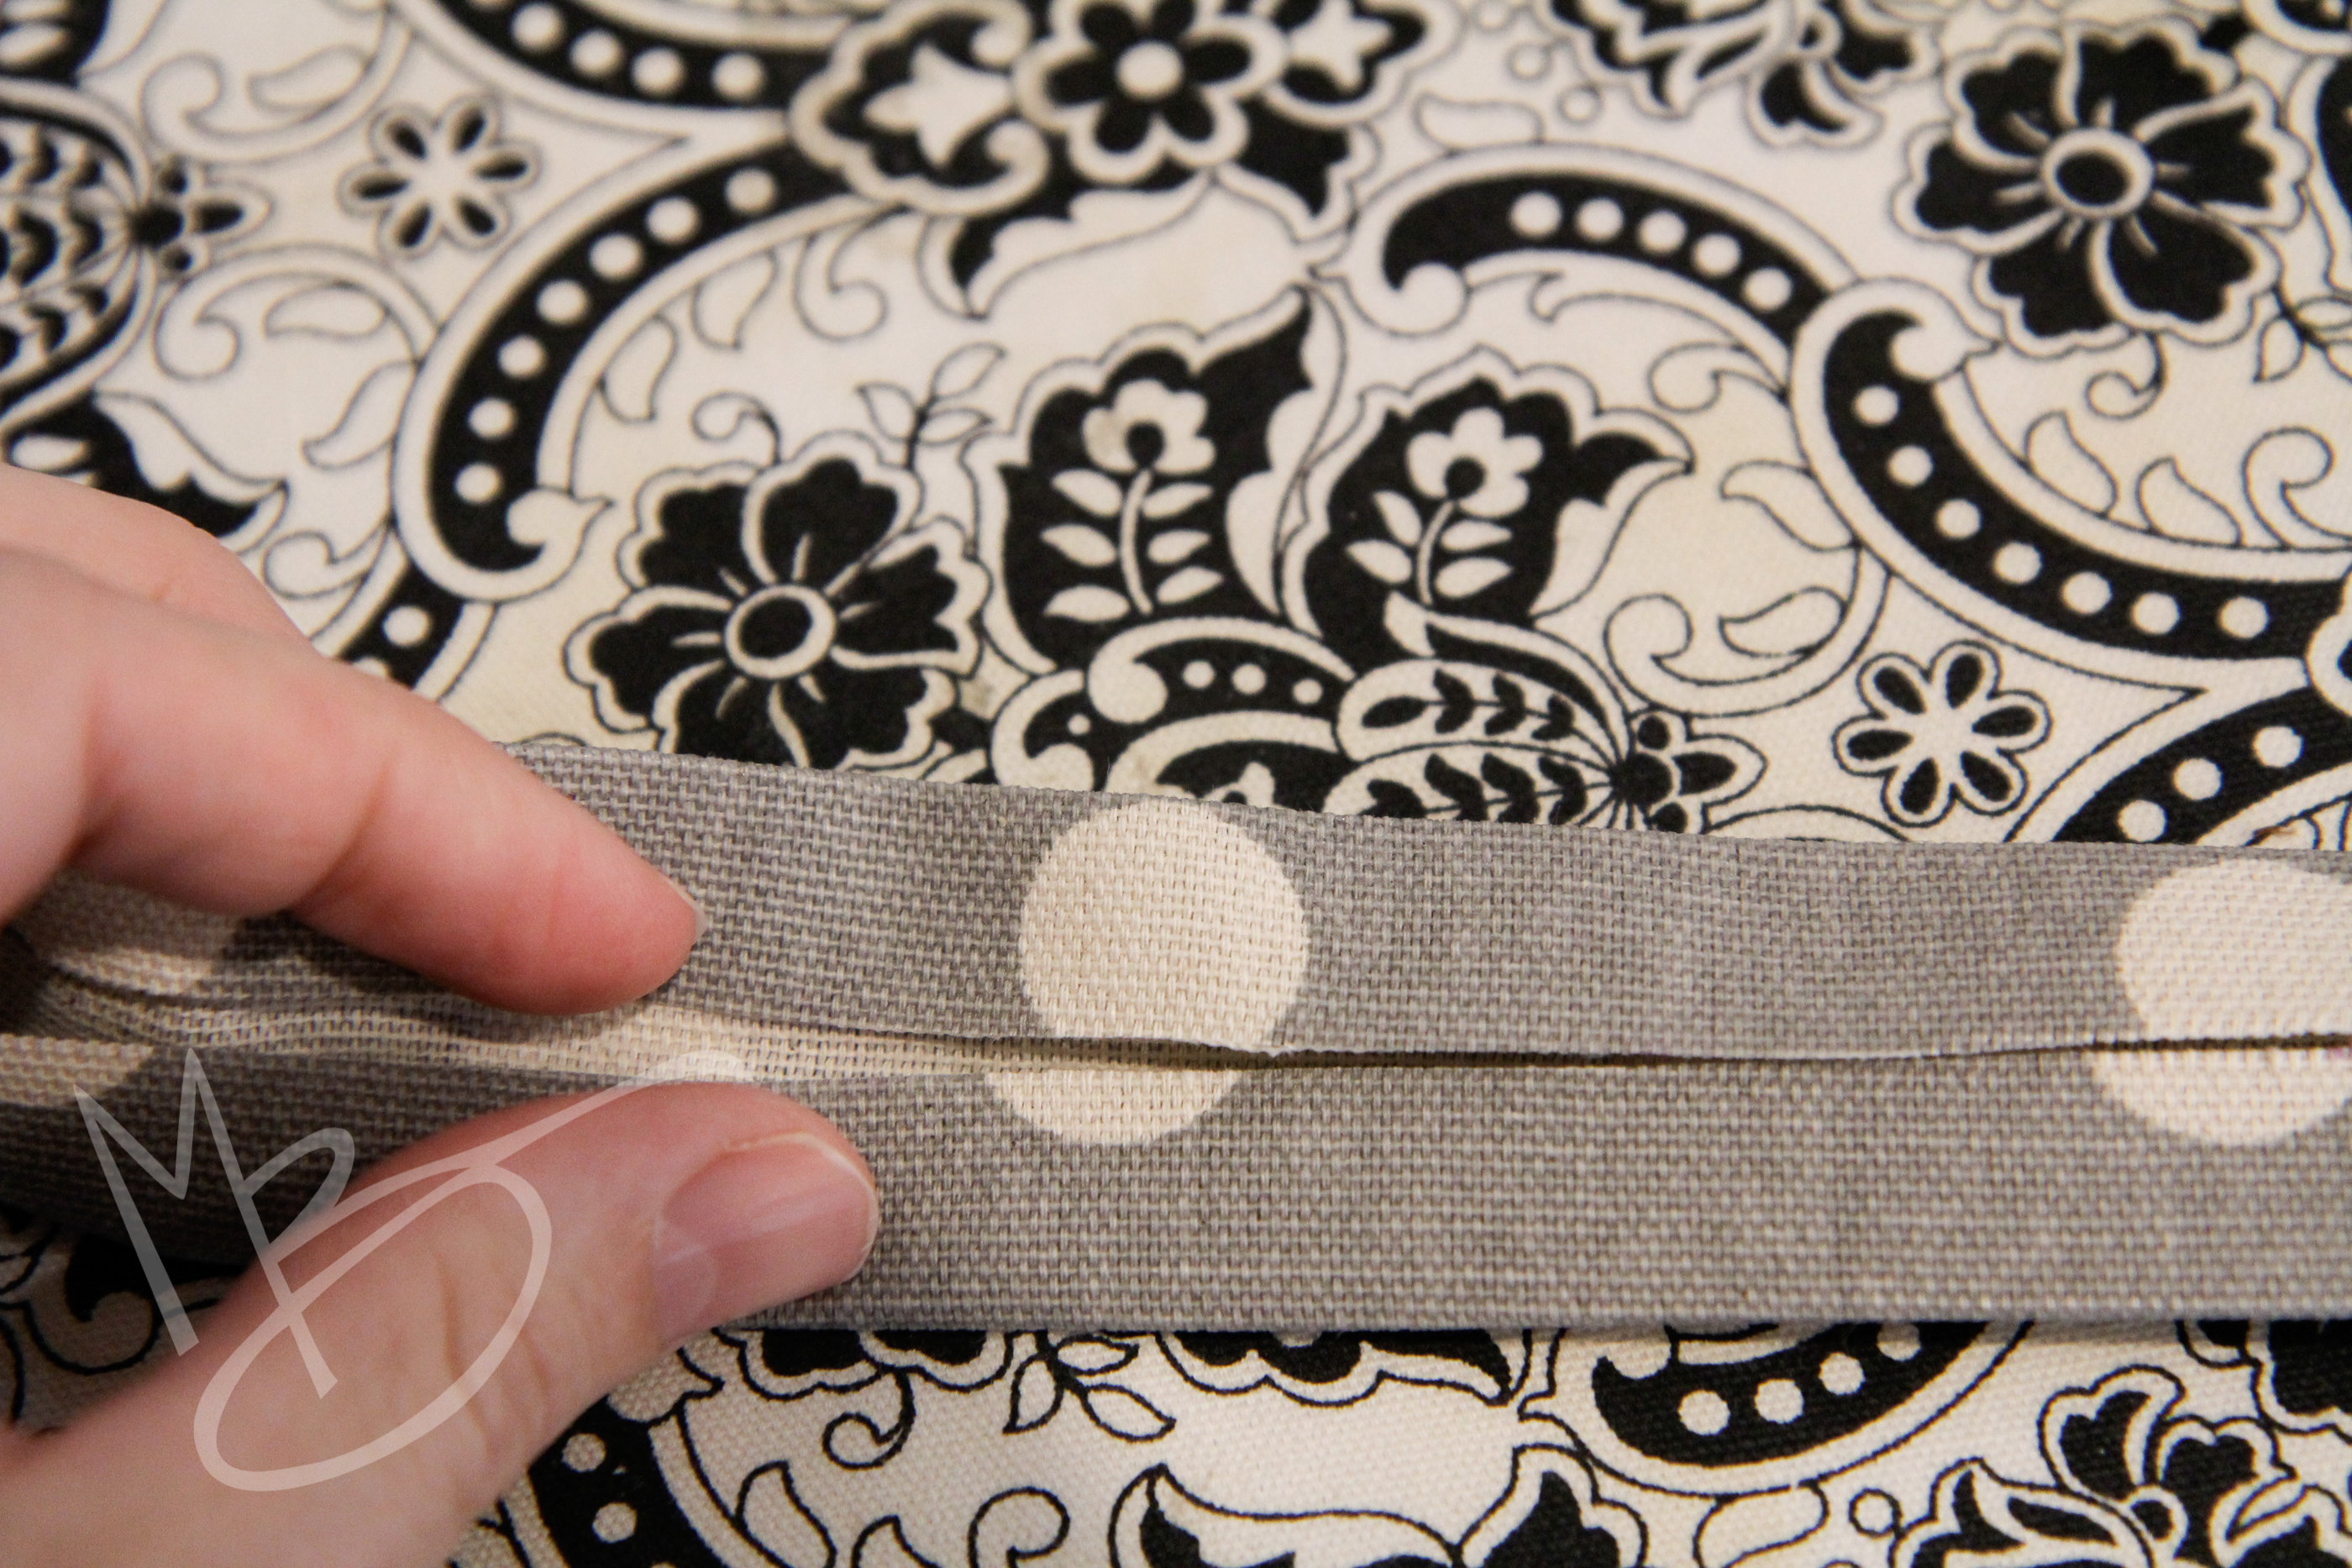
To make the strings, iron the strips in half to create a crease down the center the long way.

Next, open it and iron one side into the middle to line up at the crease.

cinch sack tutorial (4 of 41)

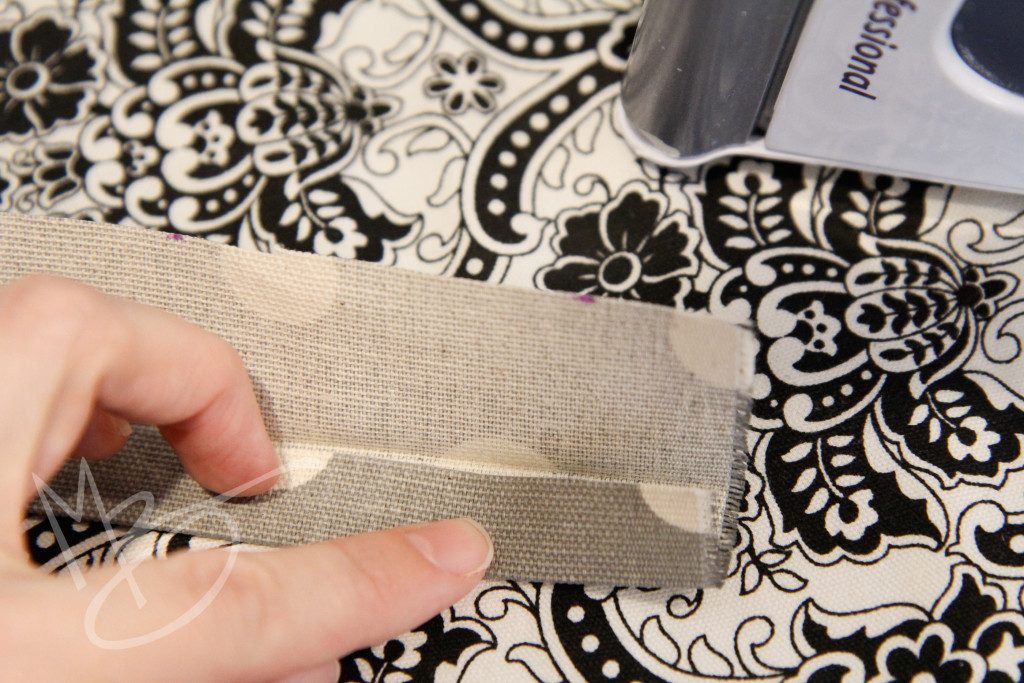
Then fold the other side into the middle and iron it, too.  This was the hardest part of the project because I kept burning my fingers with steam from the iron! Watch your fingers. 🙂

cinch sack tutorial (5 of 41)

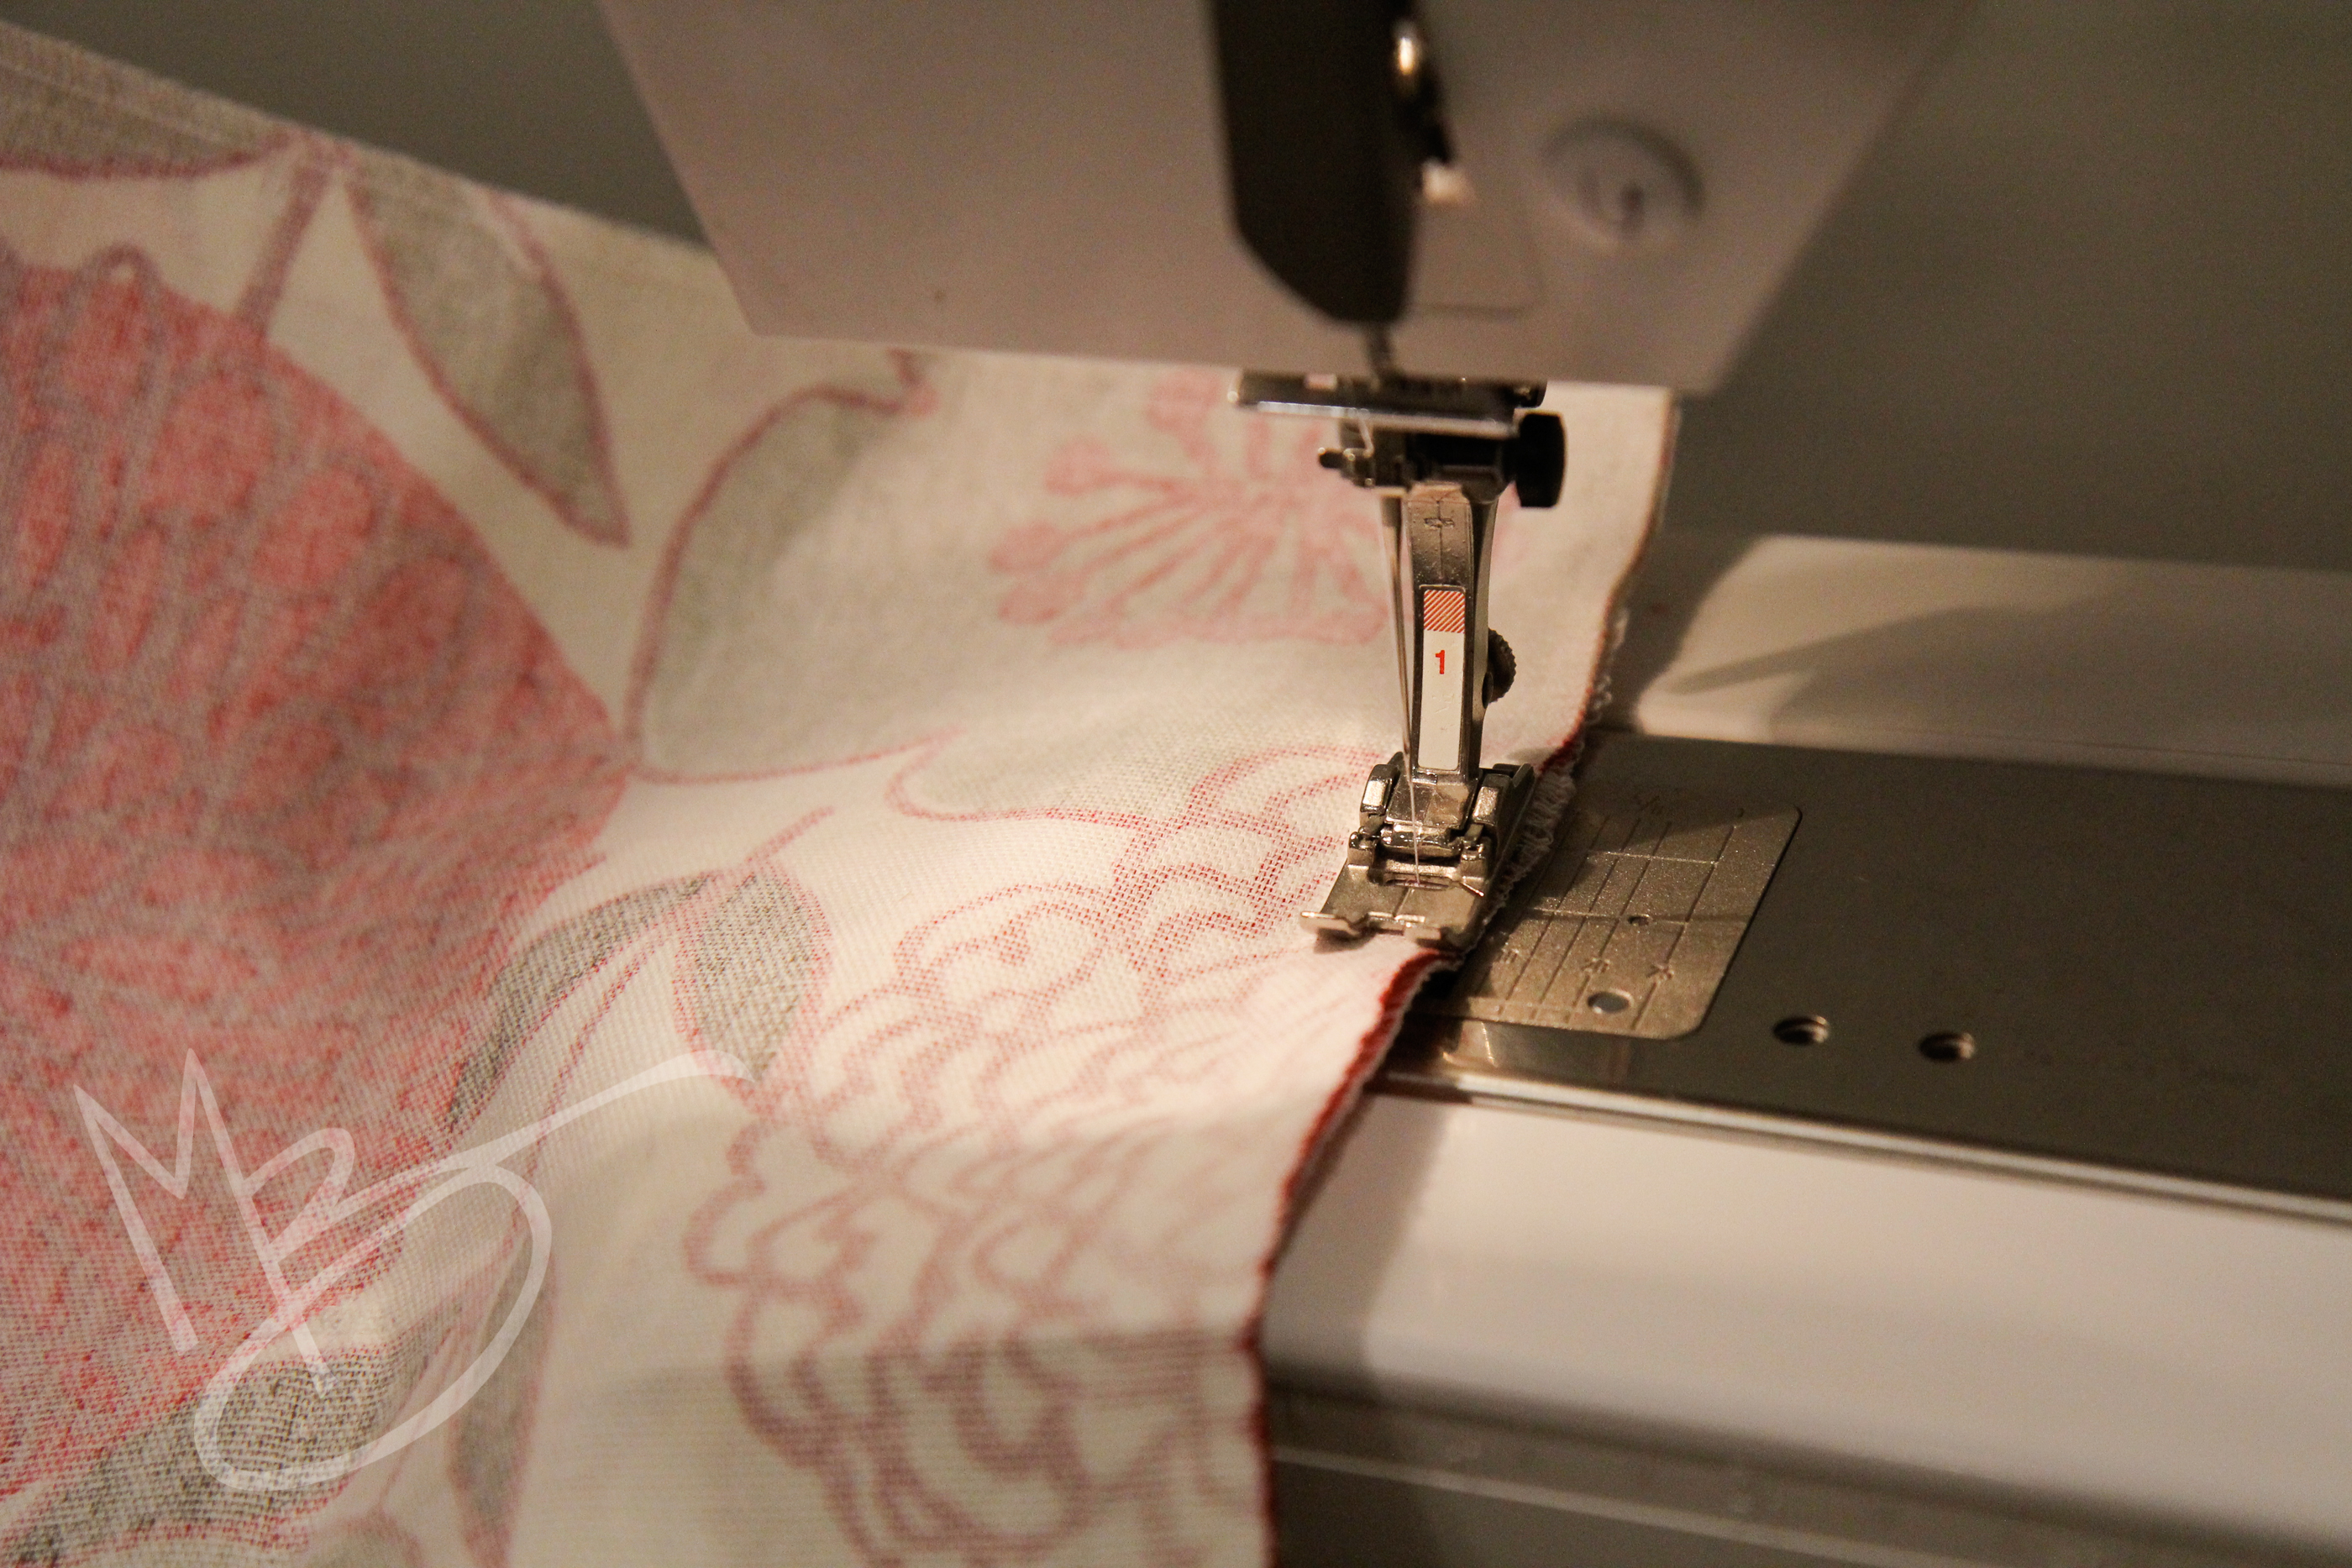
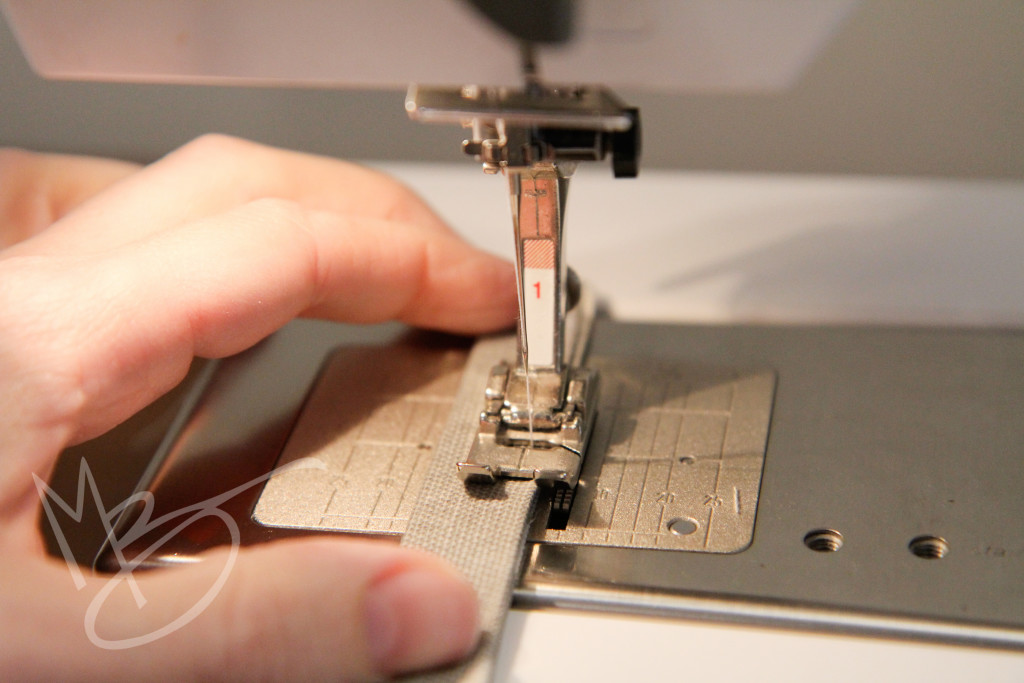
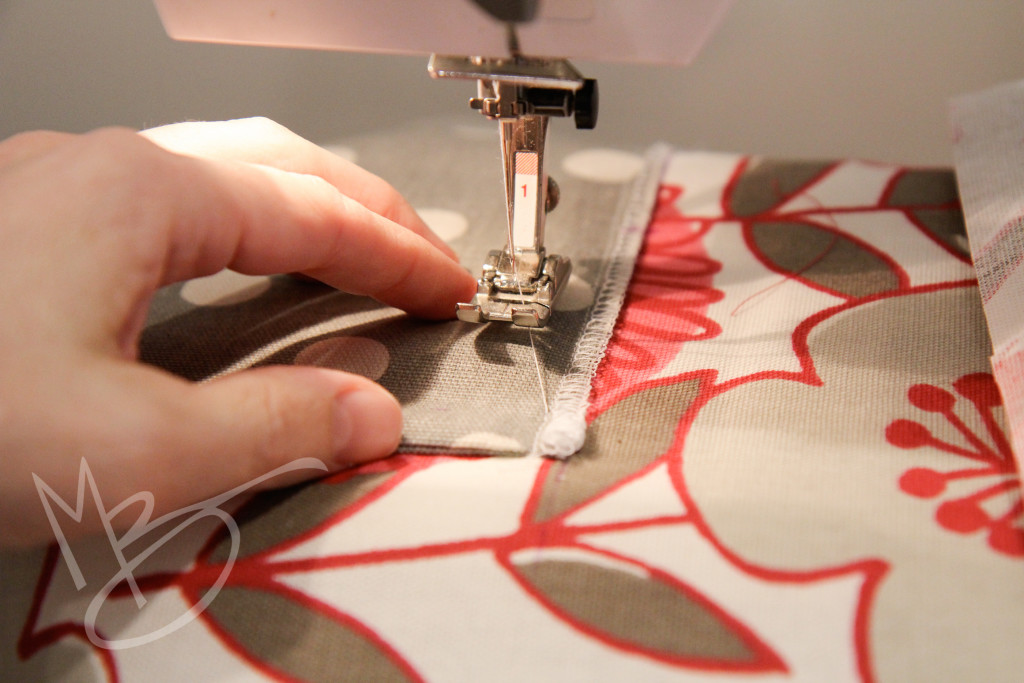
Sew close to the edge of the strip where the two folds come together. You can either move your needle alignment if your machine lets you do that or just feed the edge of the strip in as I did.  This will make a sturdy strap for your backpack.

cinch sack tutorial (6 of 41)

The strips should be about 60″ long.  Cut a 3 1/2″ piece off each long strip to use at the bottom of the pack.

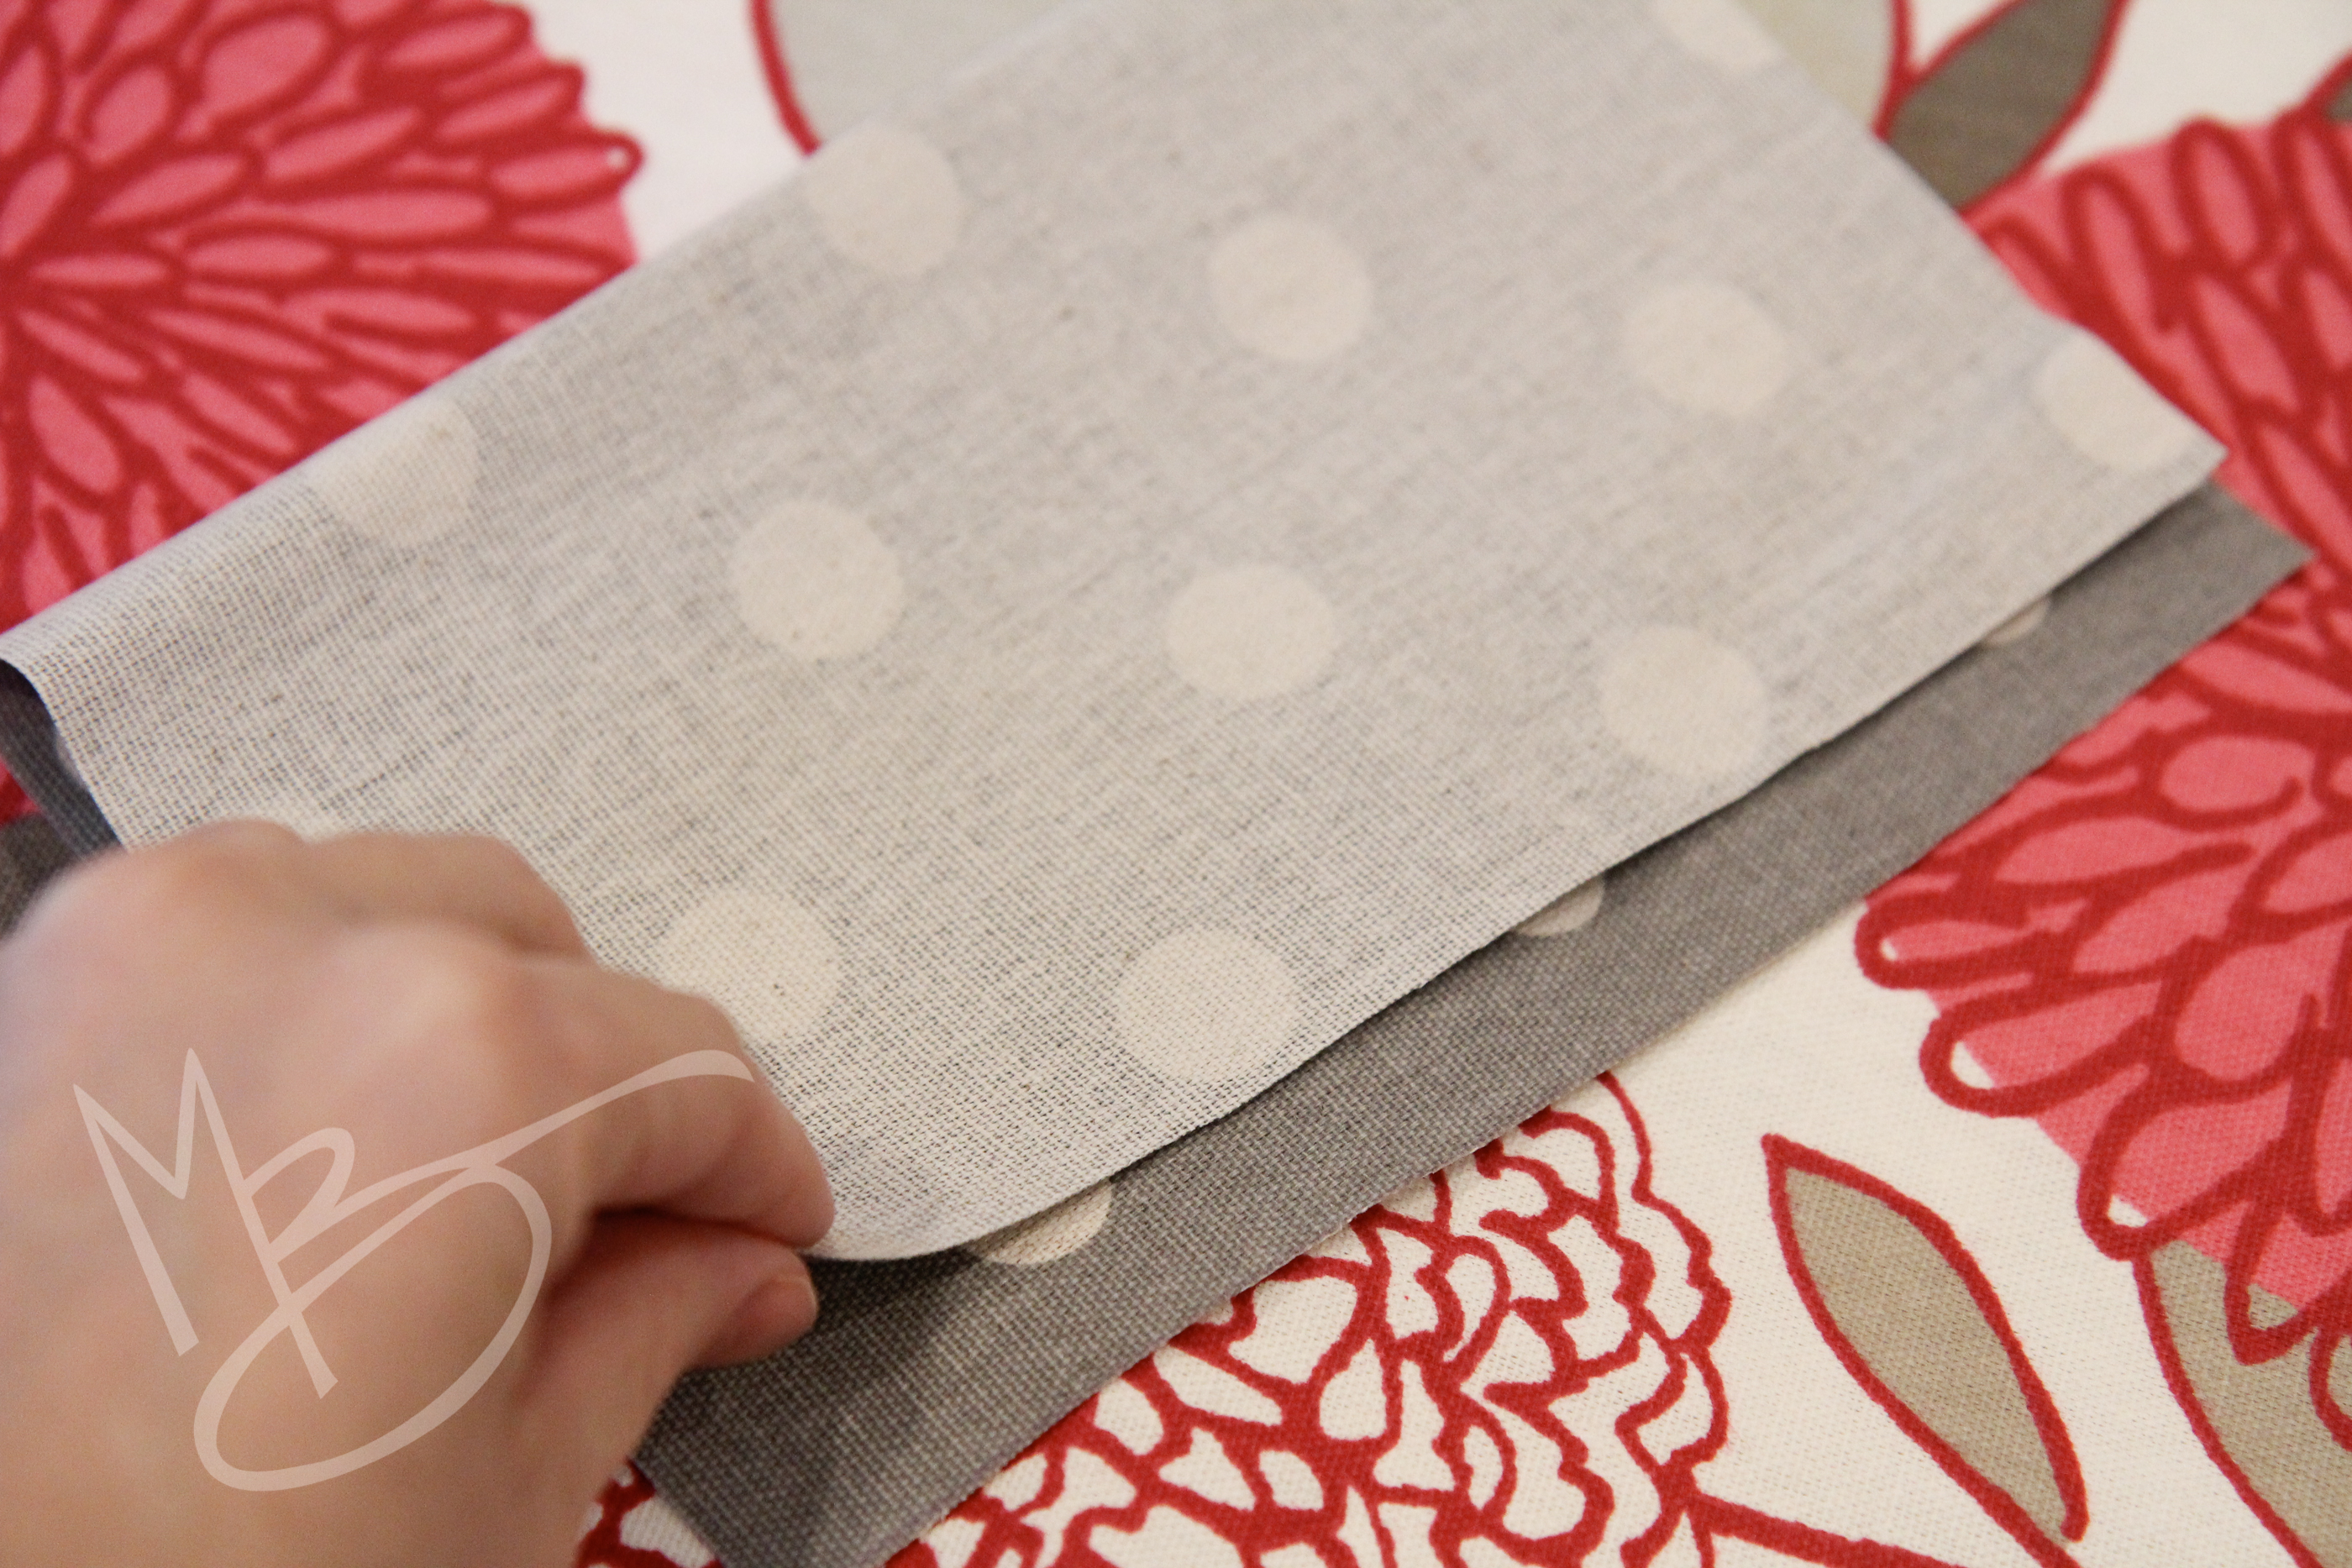
Now take the 7″ x 10″ piece of fabric and fold it in half the long way with the right sides of the fabric facing in.

cinch sack tutorial (7 of 41)
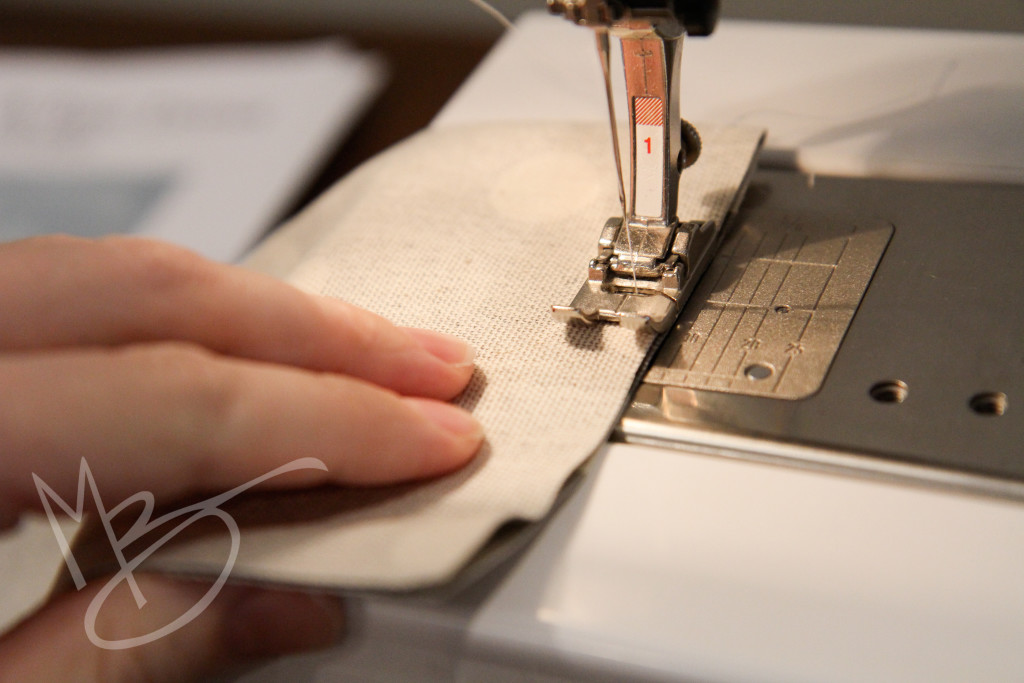
Sew along the raw edges at the sides, but not at the bottom.

cinch sack tutorial (8 of 41)

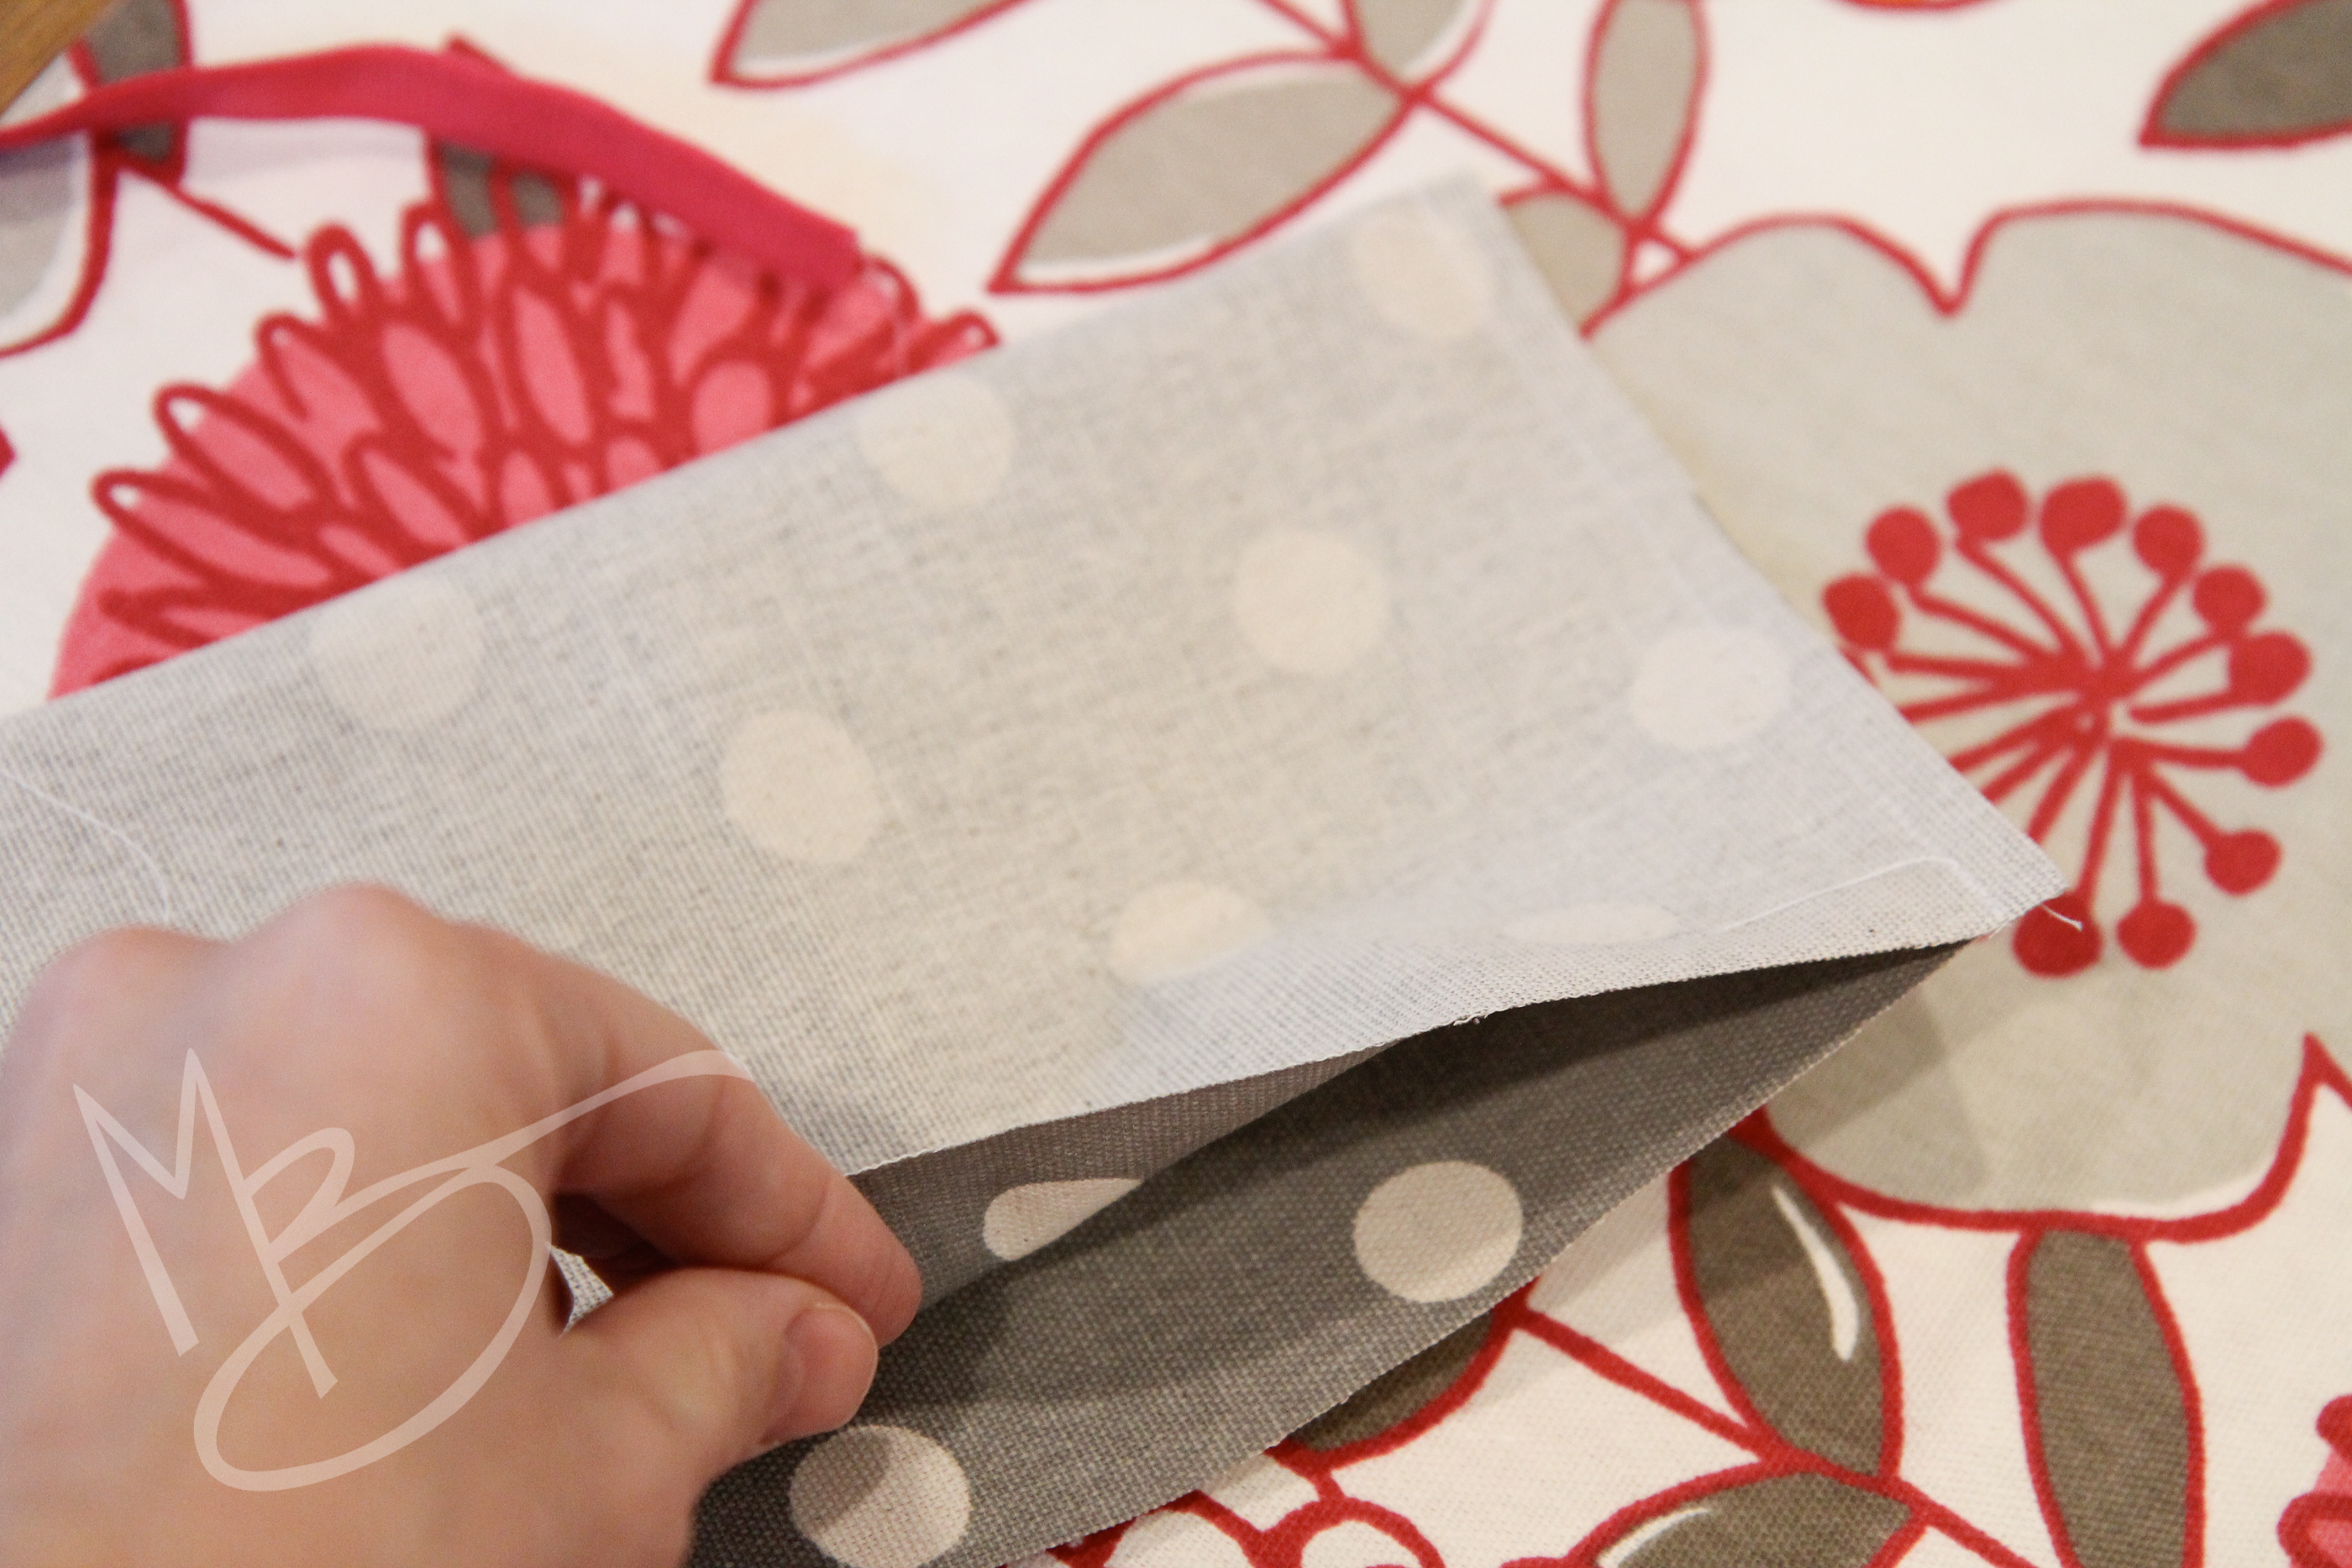
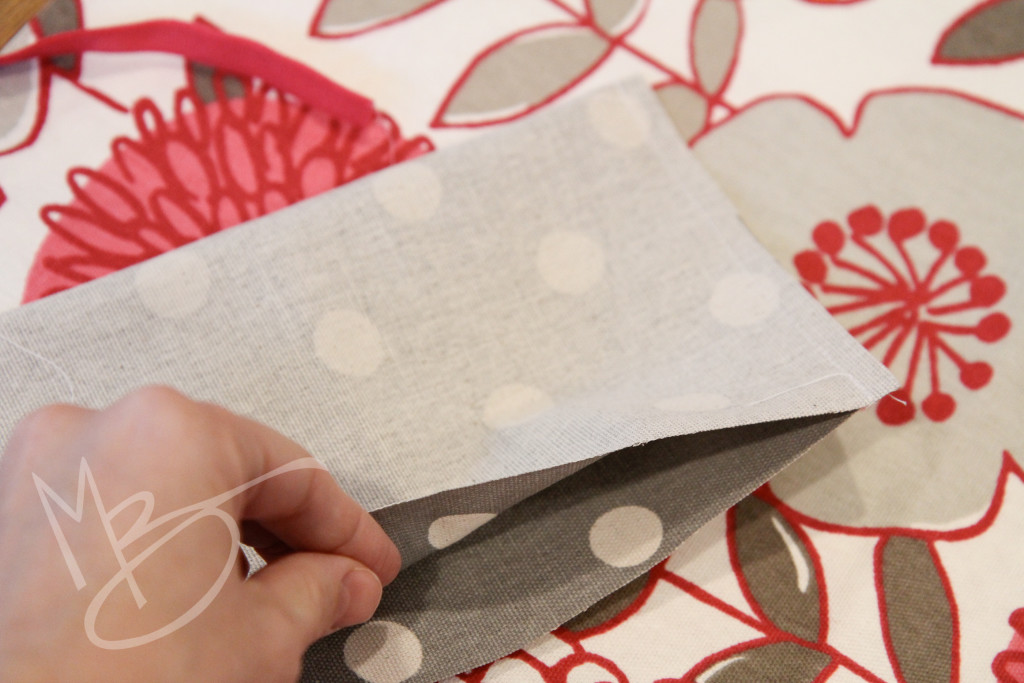
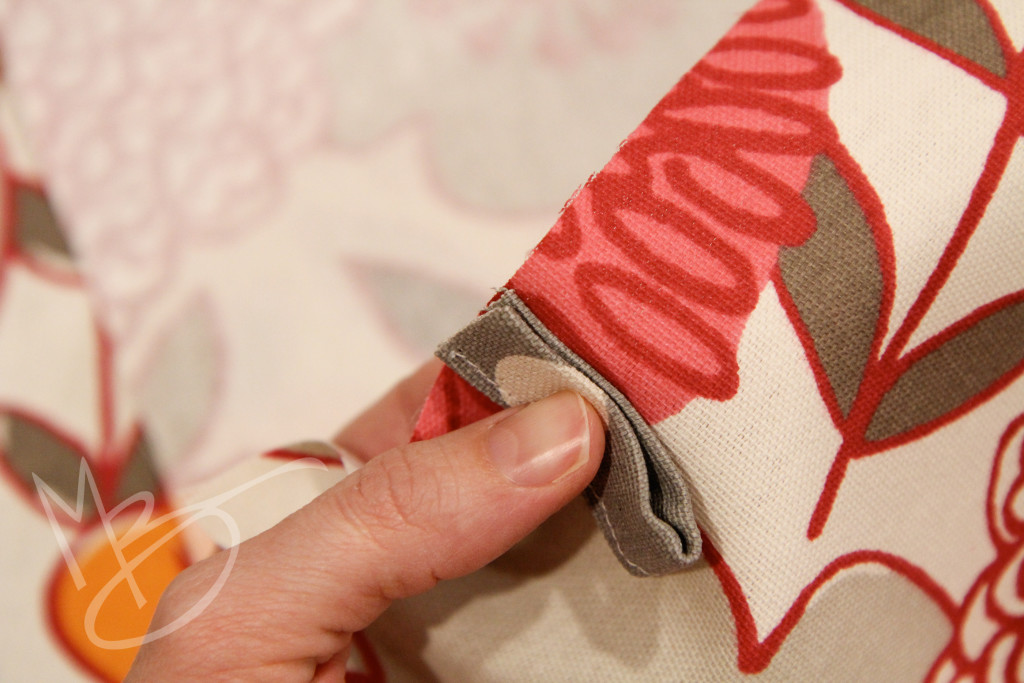
Flip the pocket right side out. Be sure to use something (you can even use the eraser side of a pencil) to push those corners out nice and tight. Press the edges lightly.

cinch sack tutorial (10 of 41)

cinch sack tutorial (11 of 41)
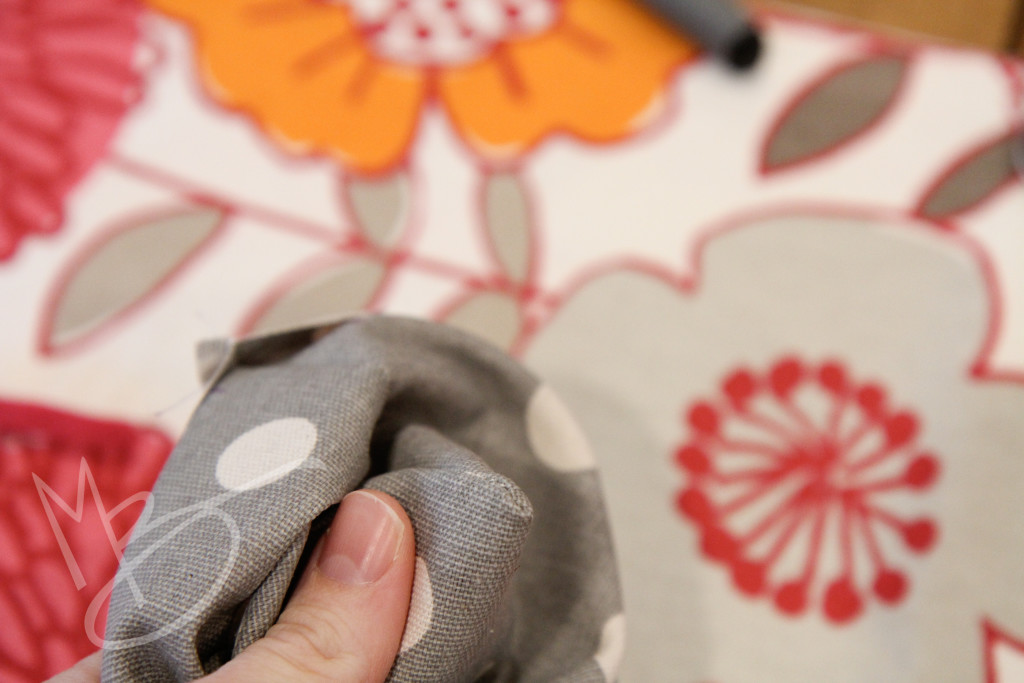
Serge the remaining raw edges together. If you want to embellish the pocket, add whatever you choose now.  You could add lace, ribbon, buttons, or even a fabric flower depending on what fabrics you chose.

cinch sack tutorial (12 of 41)

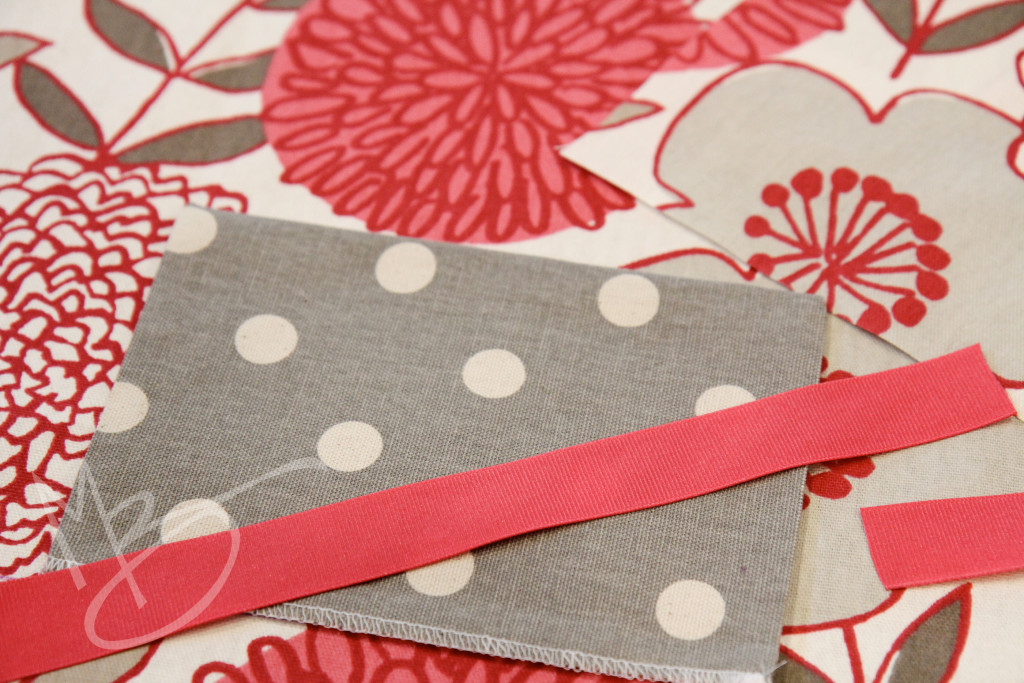
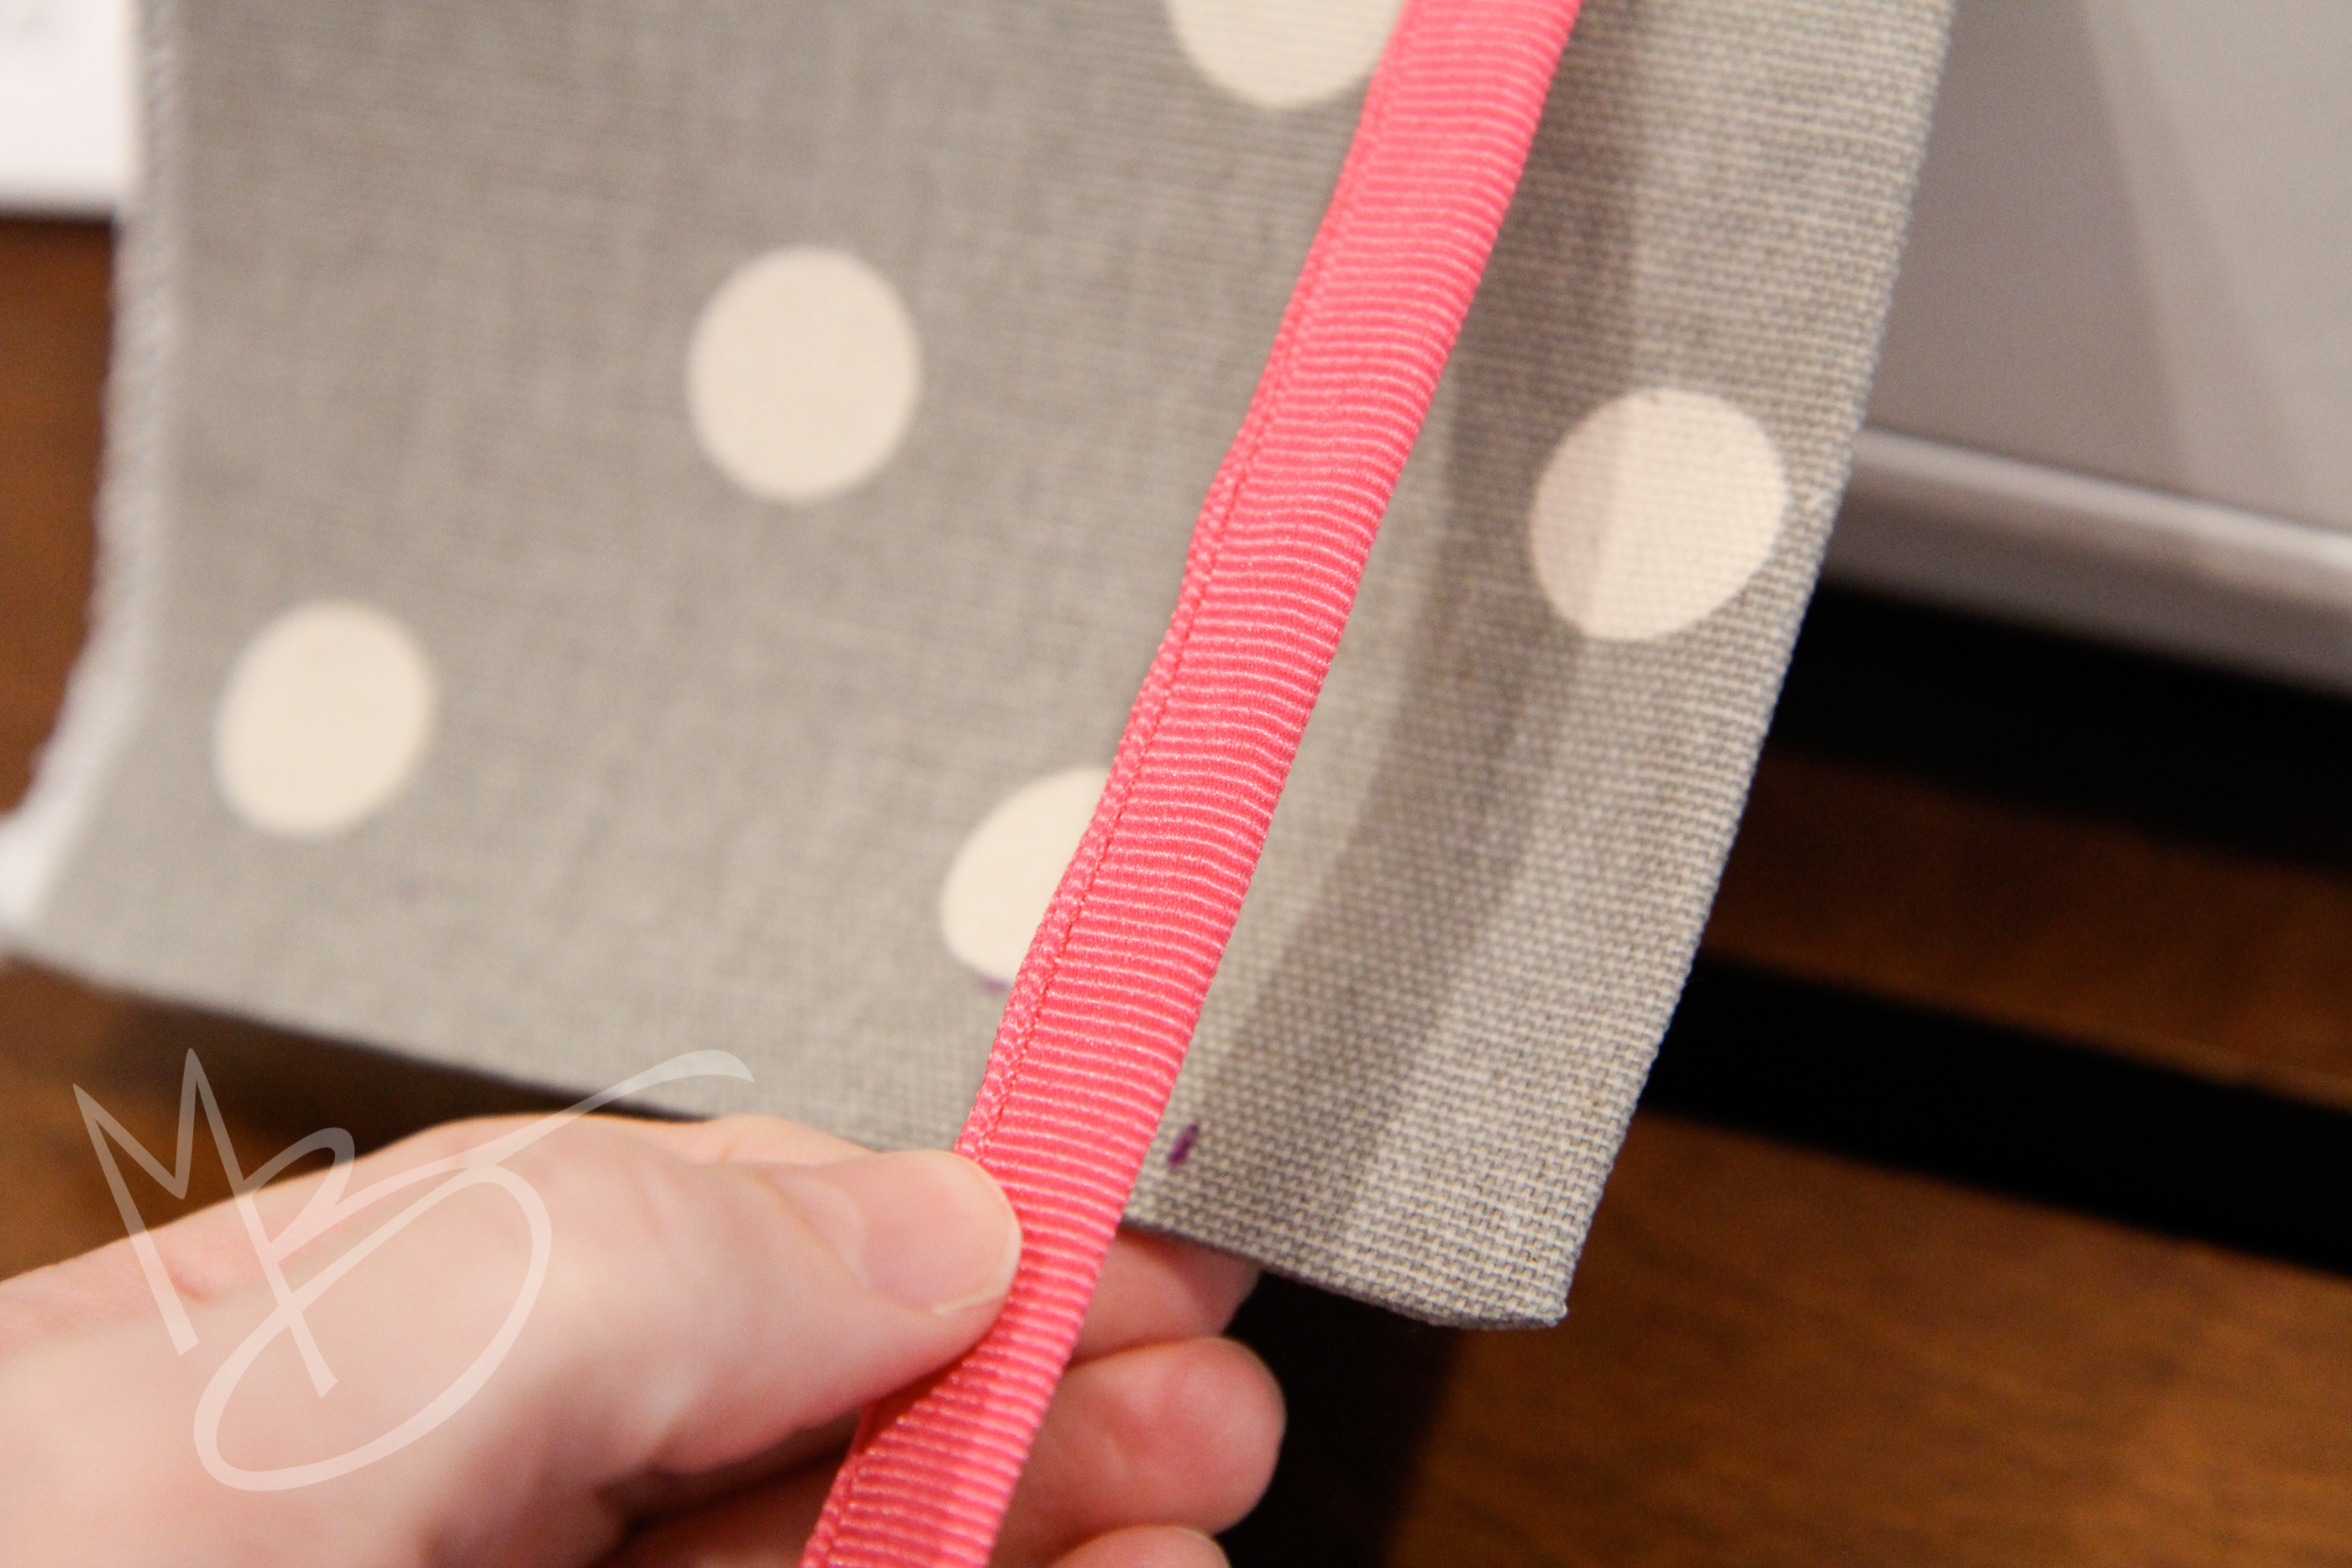
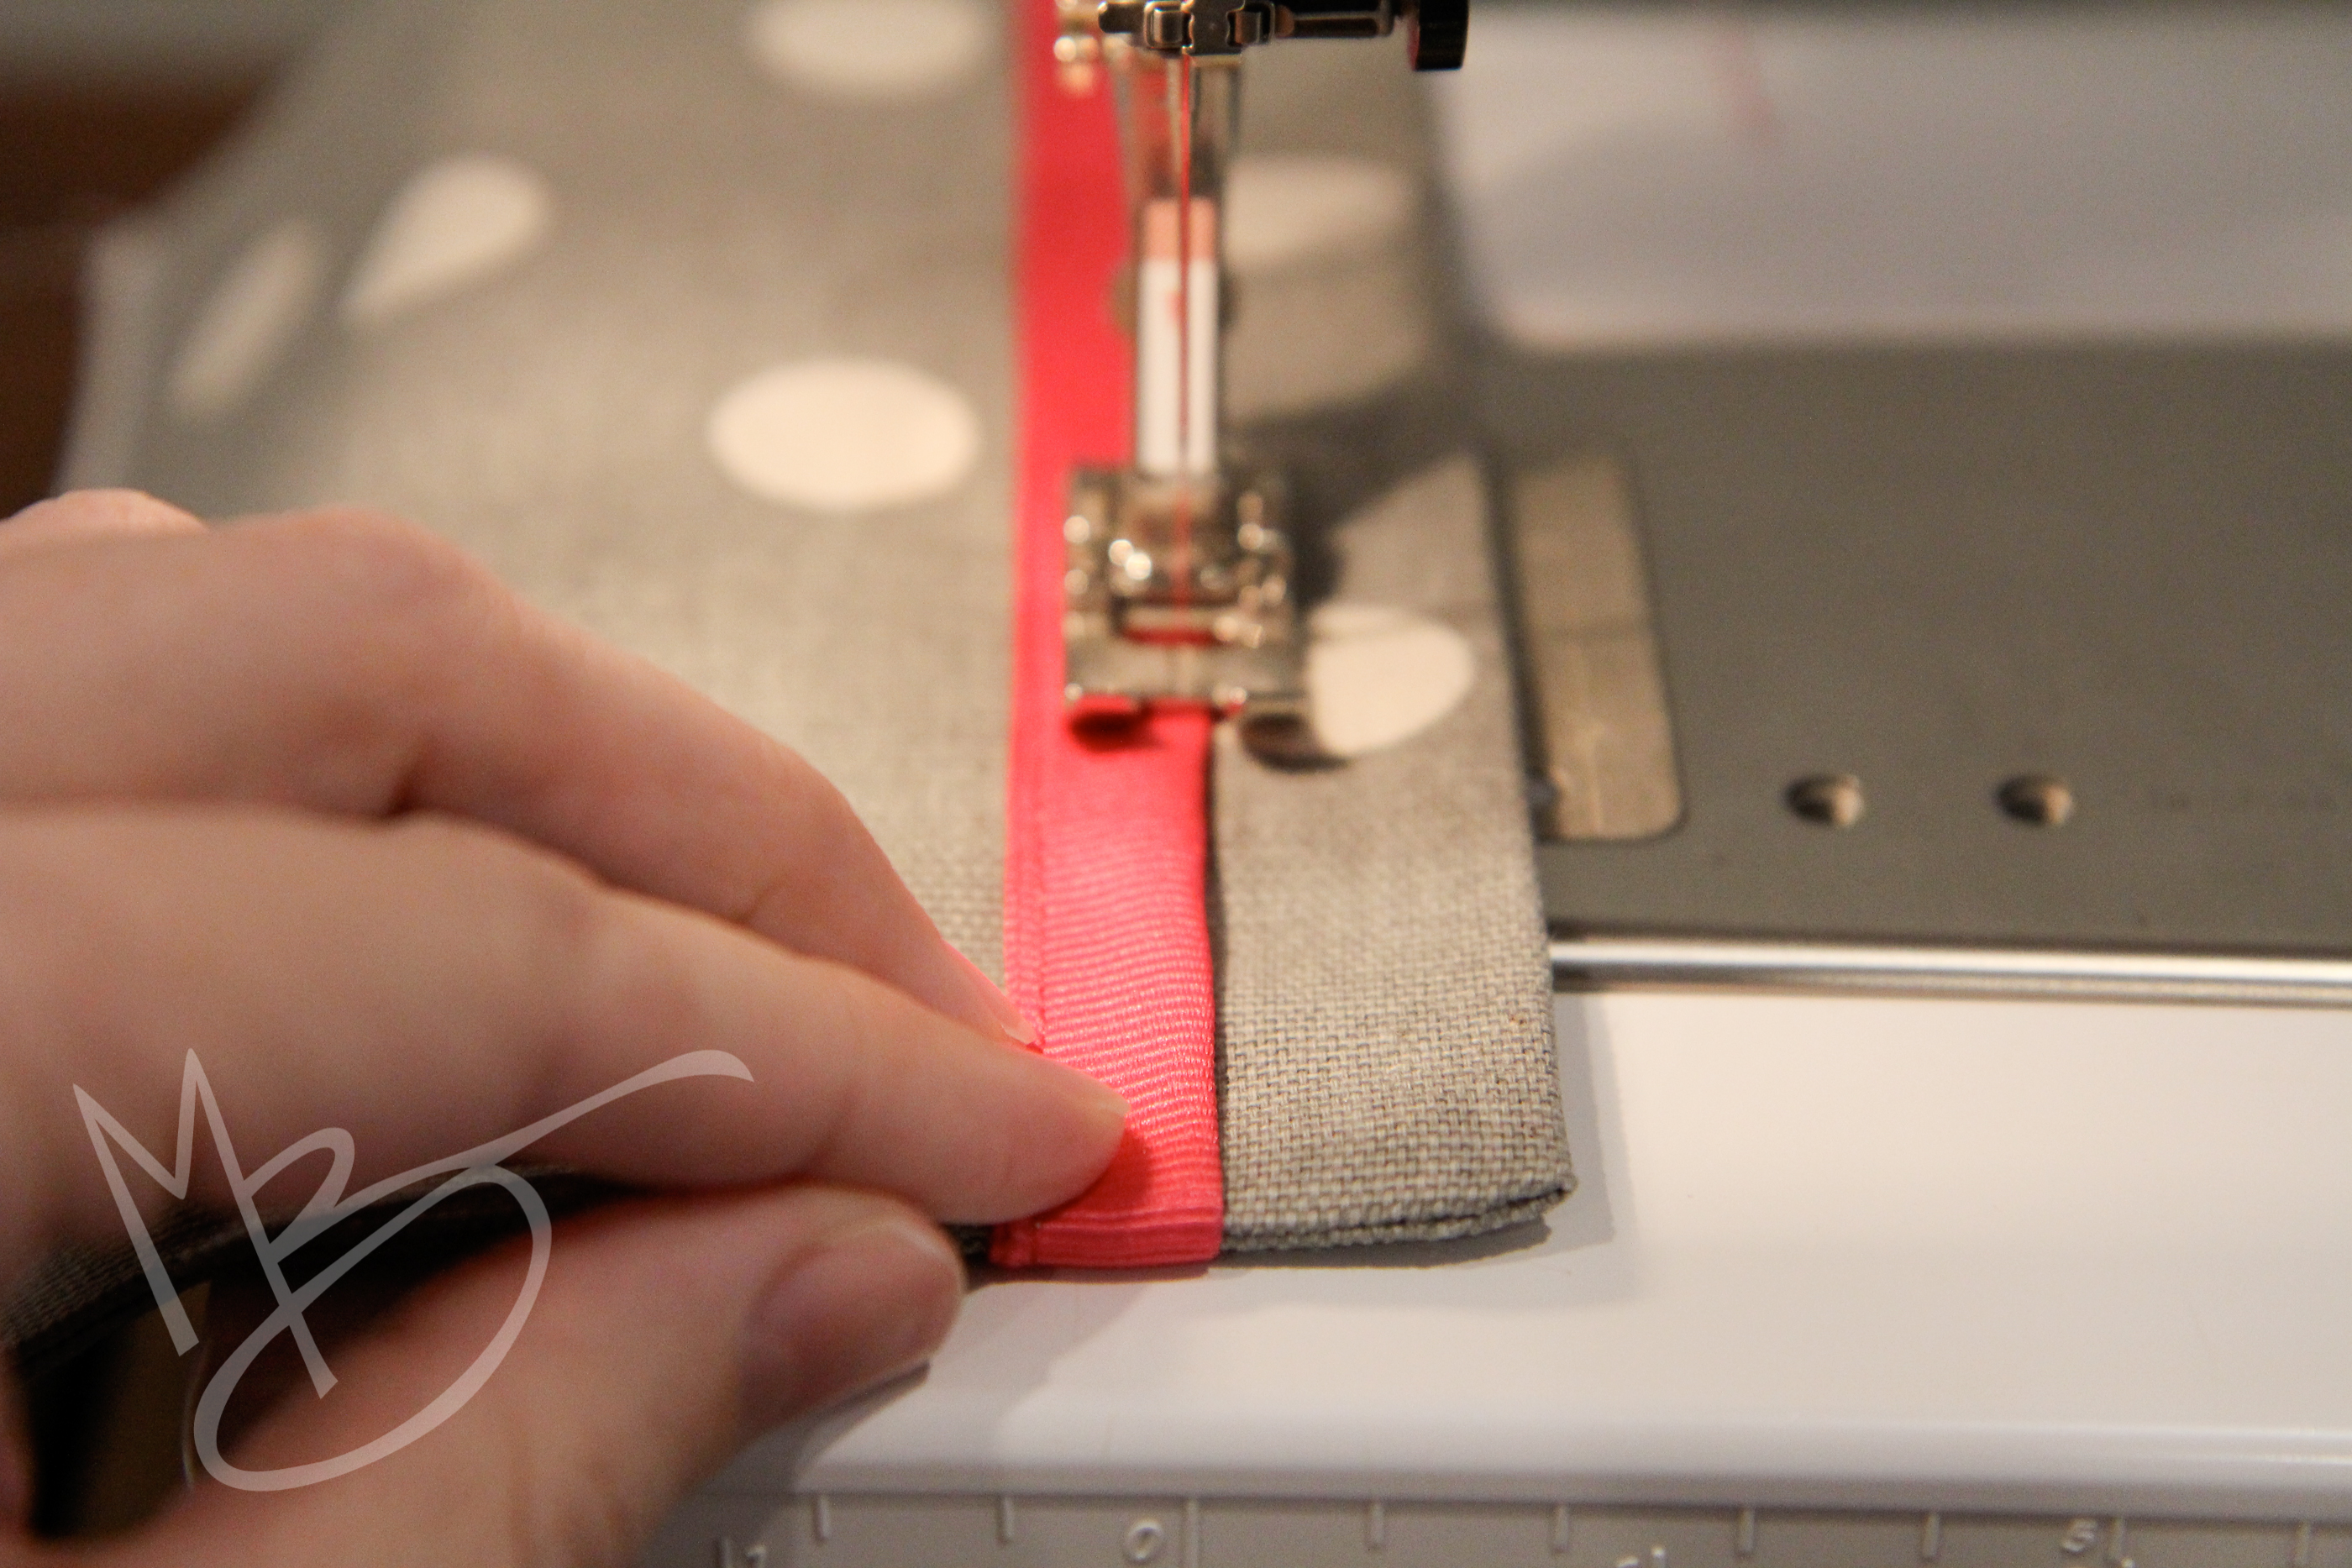
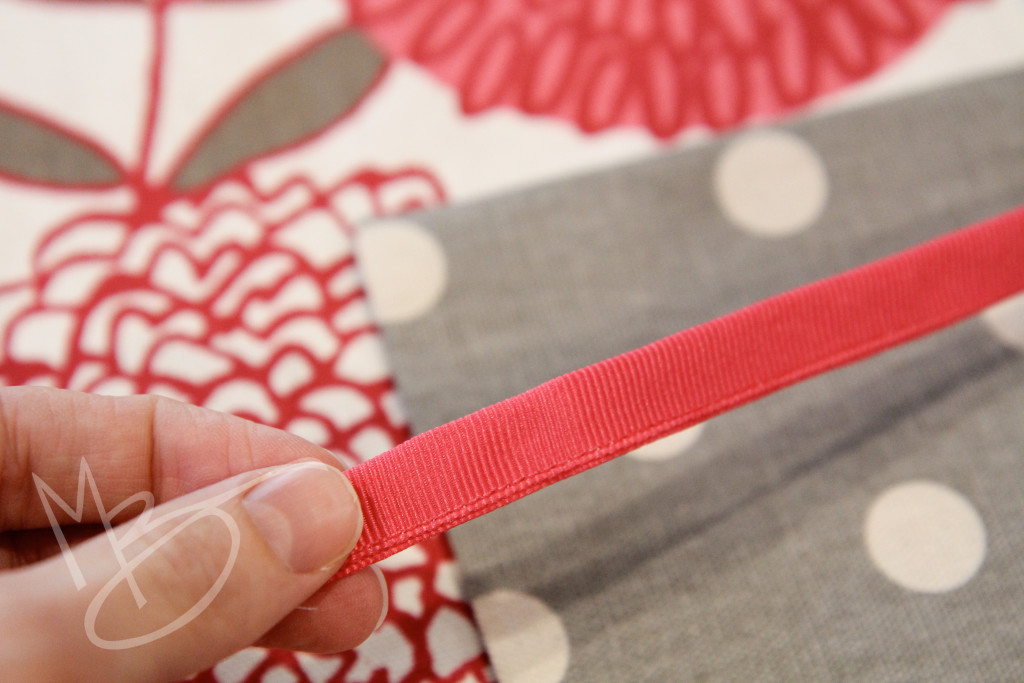
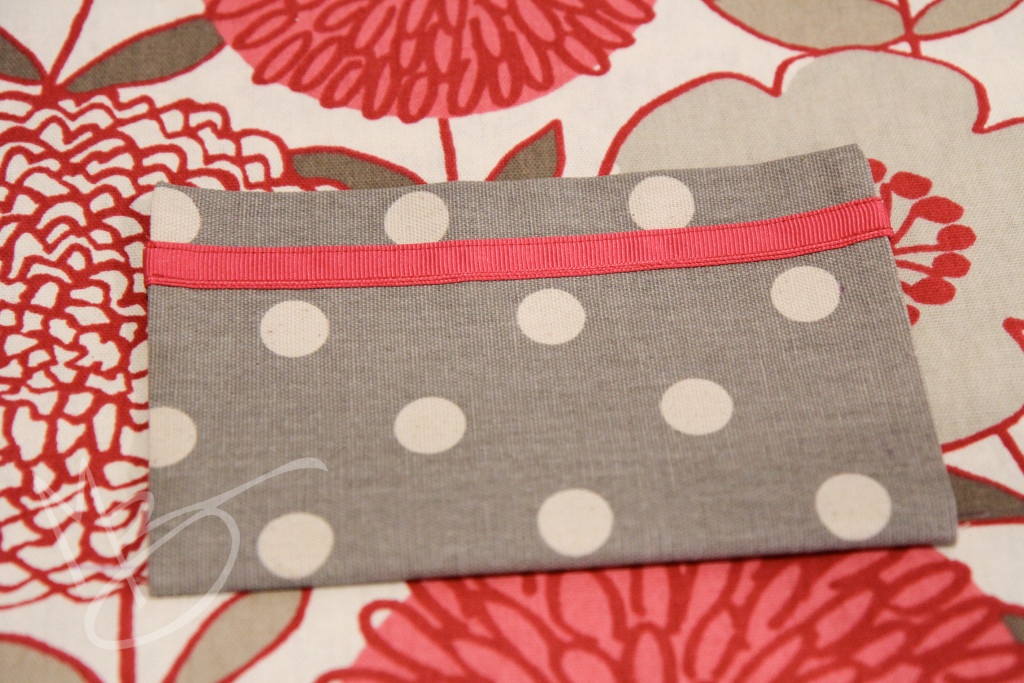
I decided I liked this pink ribbon, but it seemed a little wide so I chose to sew it in half to narrow it before adding it to the pocket.

cinch sack tutorial (13 of 41)

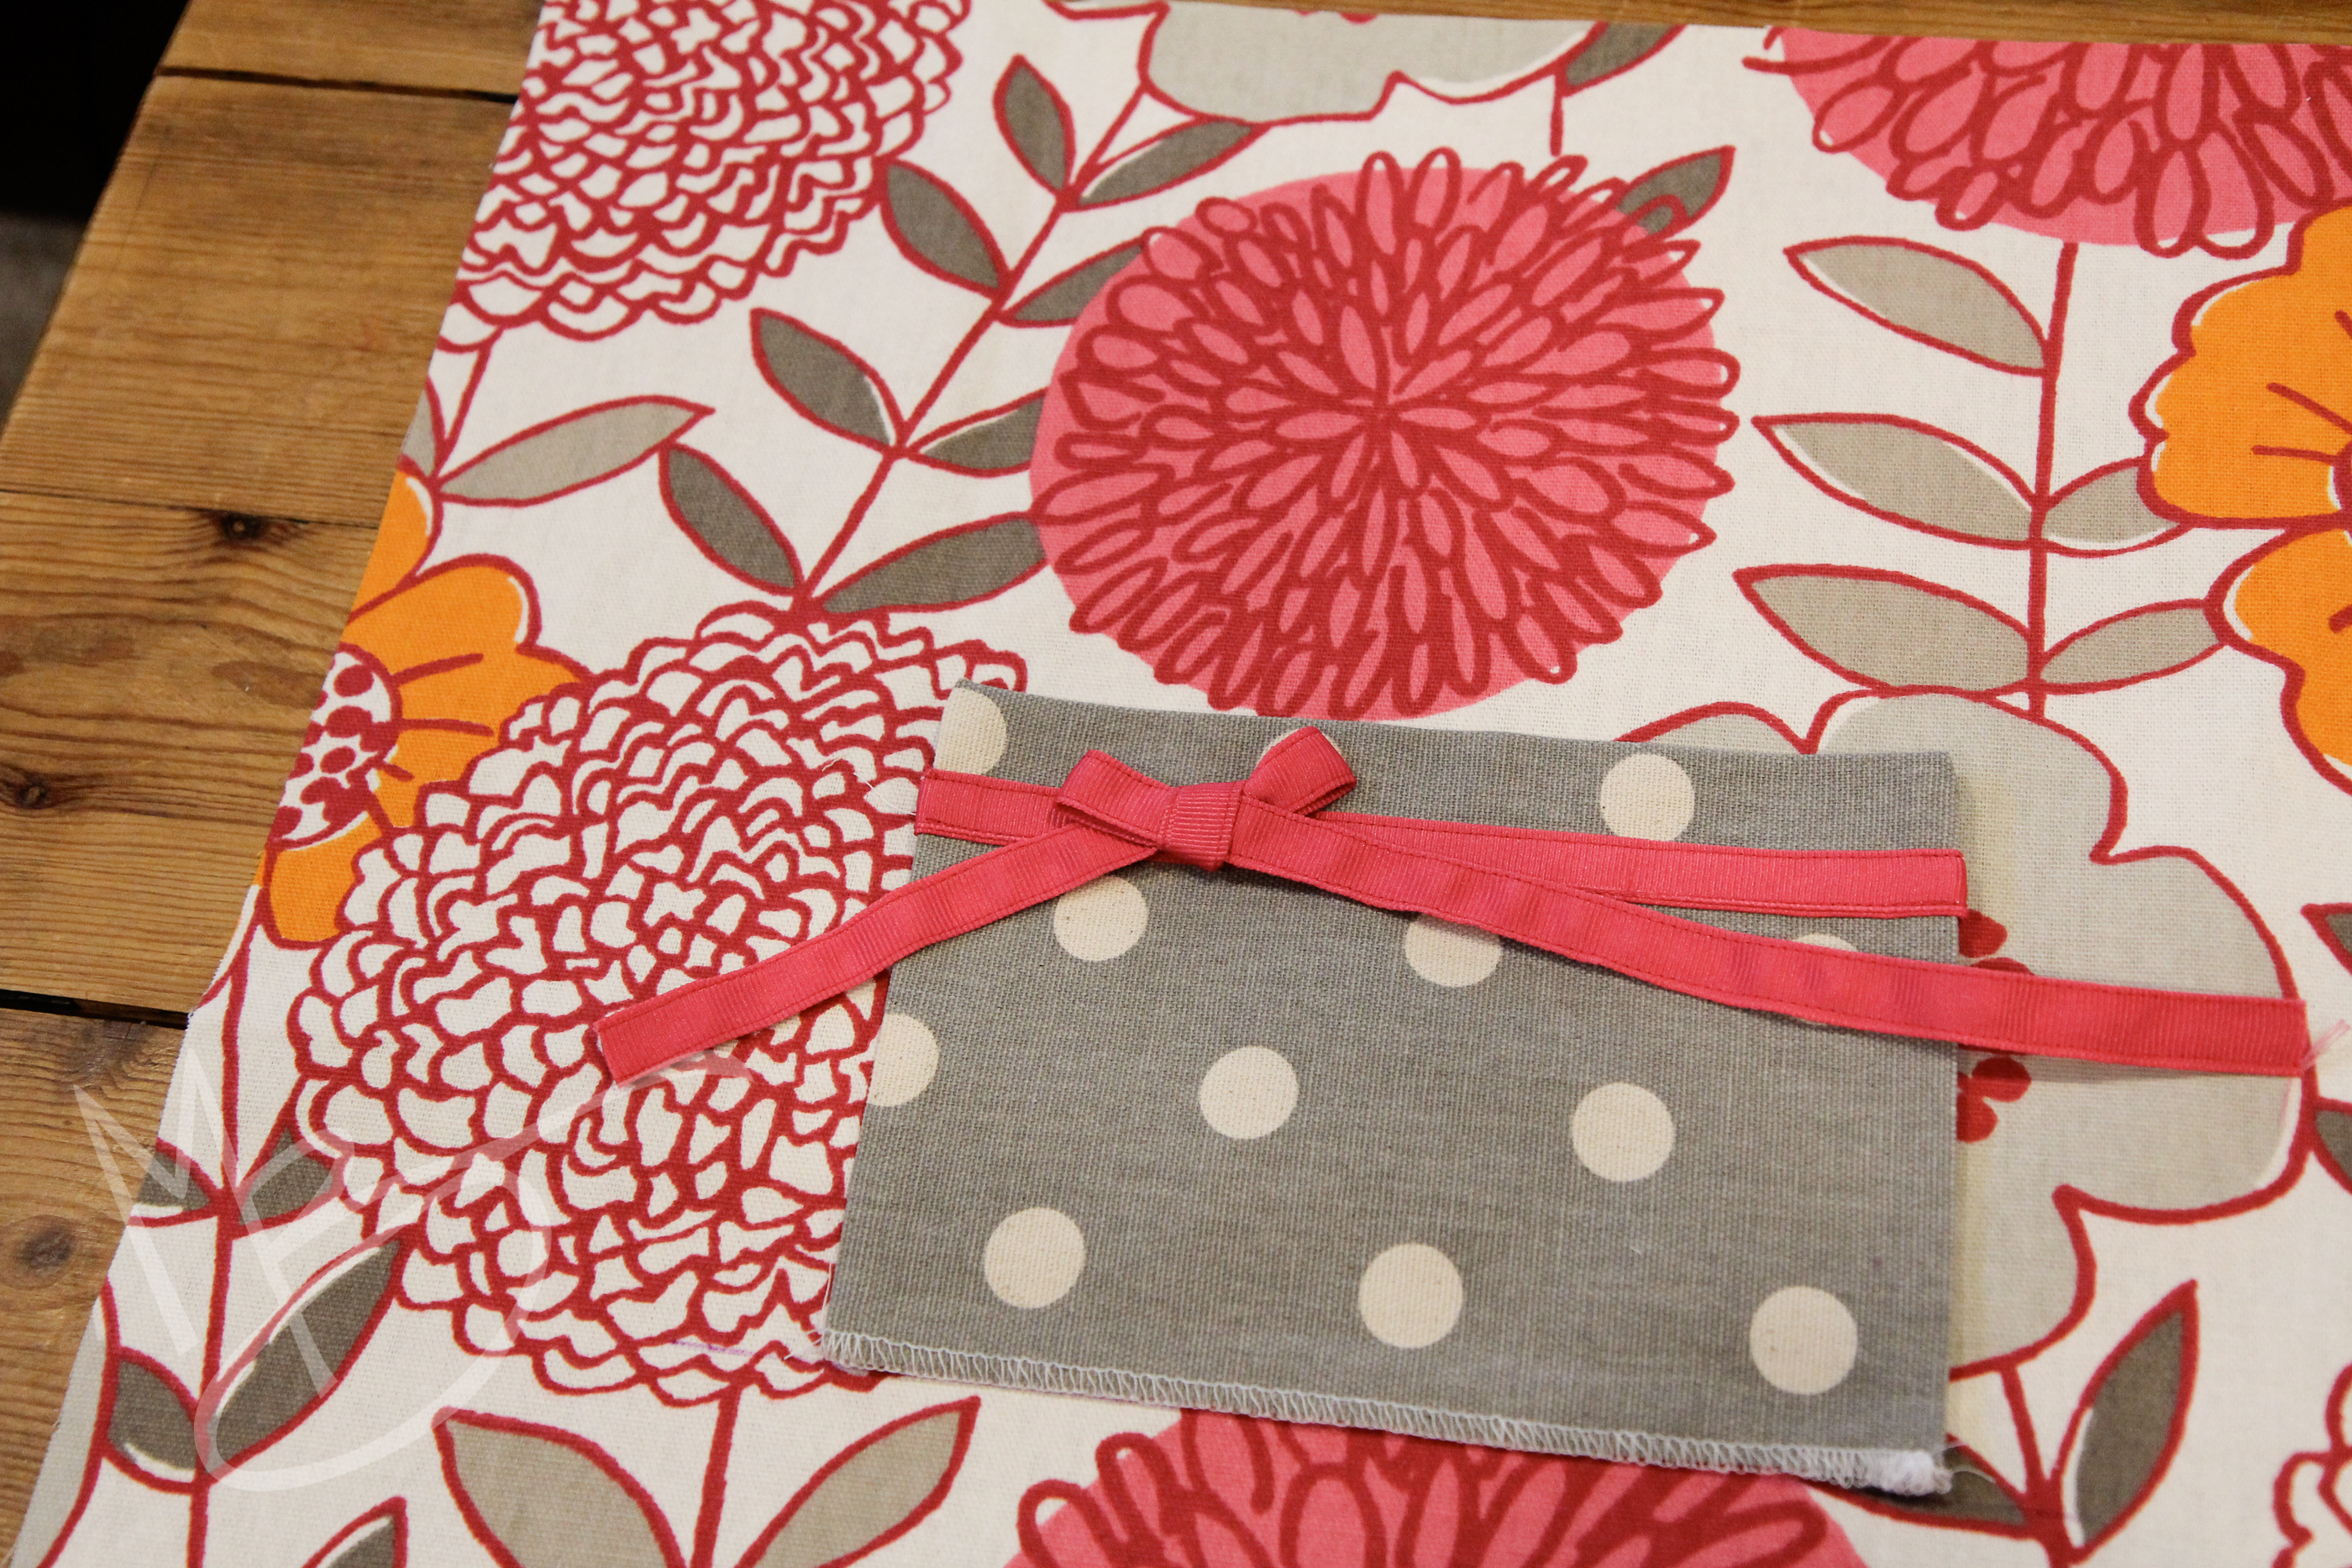
It’s easy to play around with options by laying the pocket on the fabric and then embellishments on top so you can see what it would like.  It’s much harder to sew something on and decide you don’t like it so play all you like, then stitch. 🙂

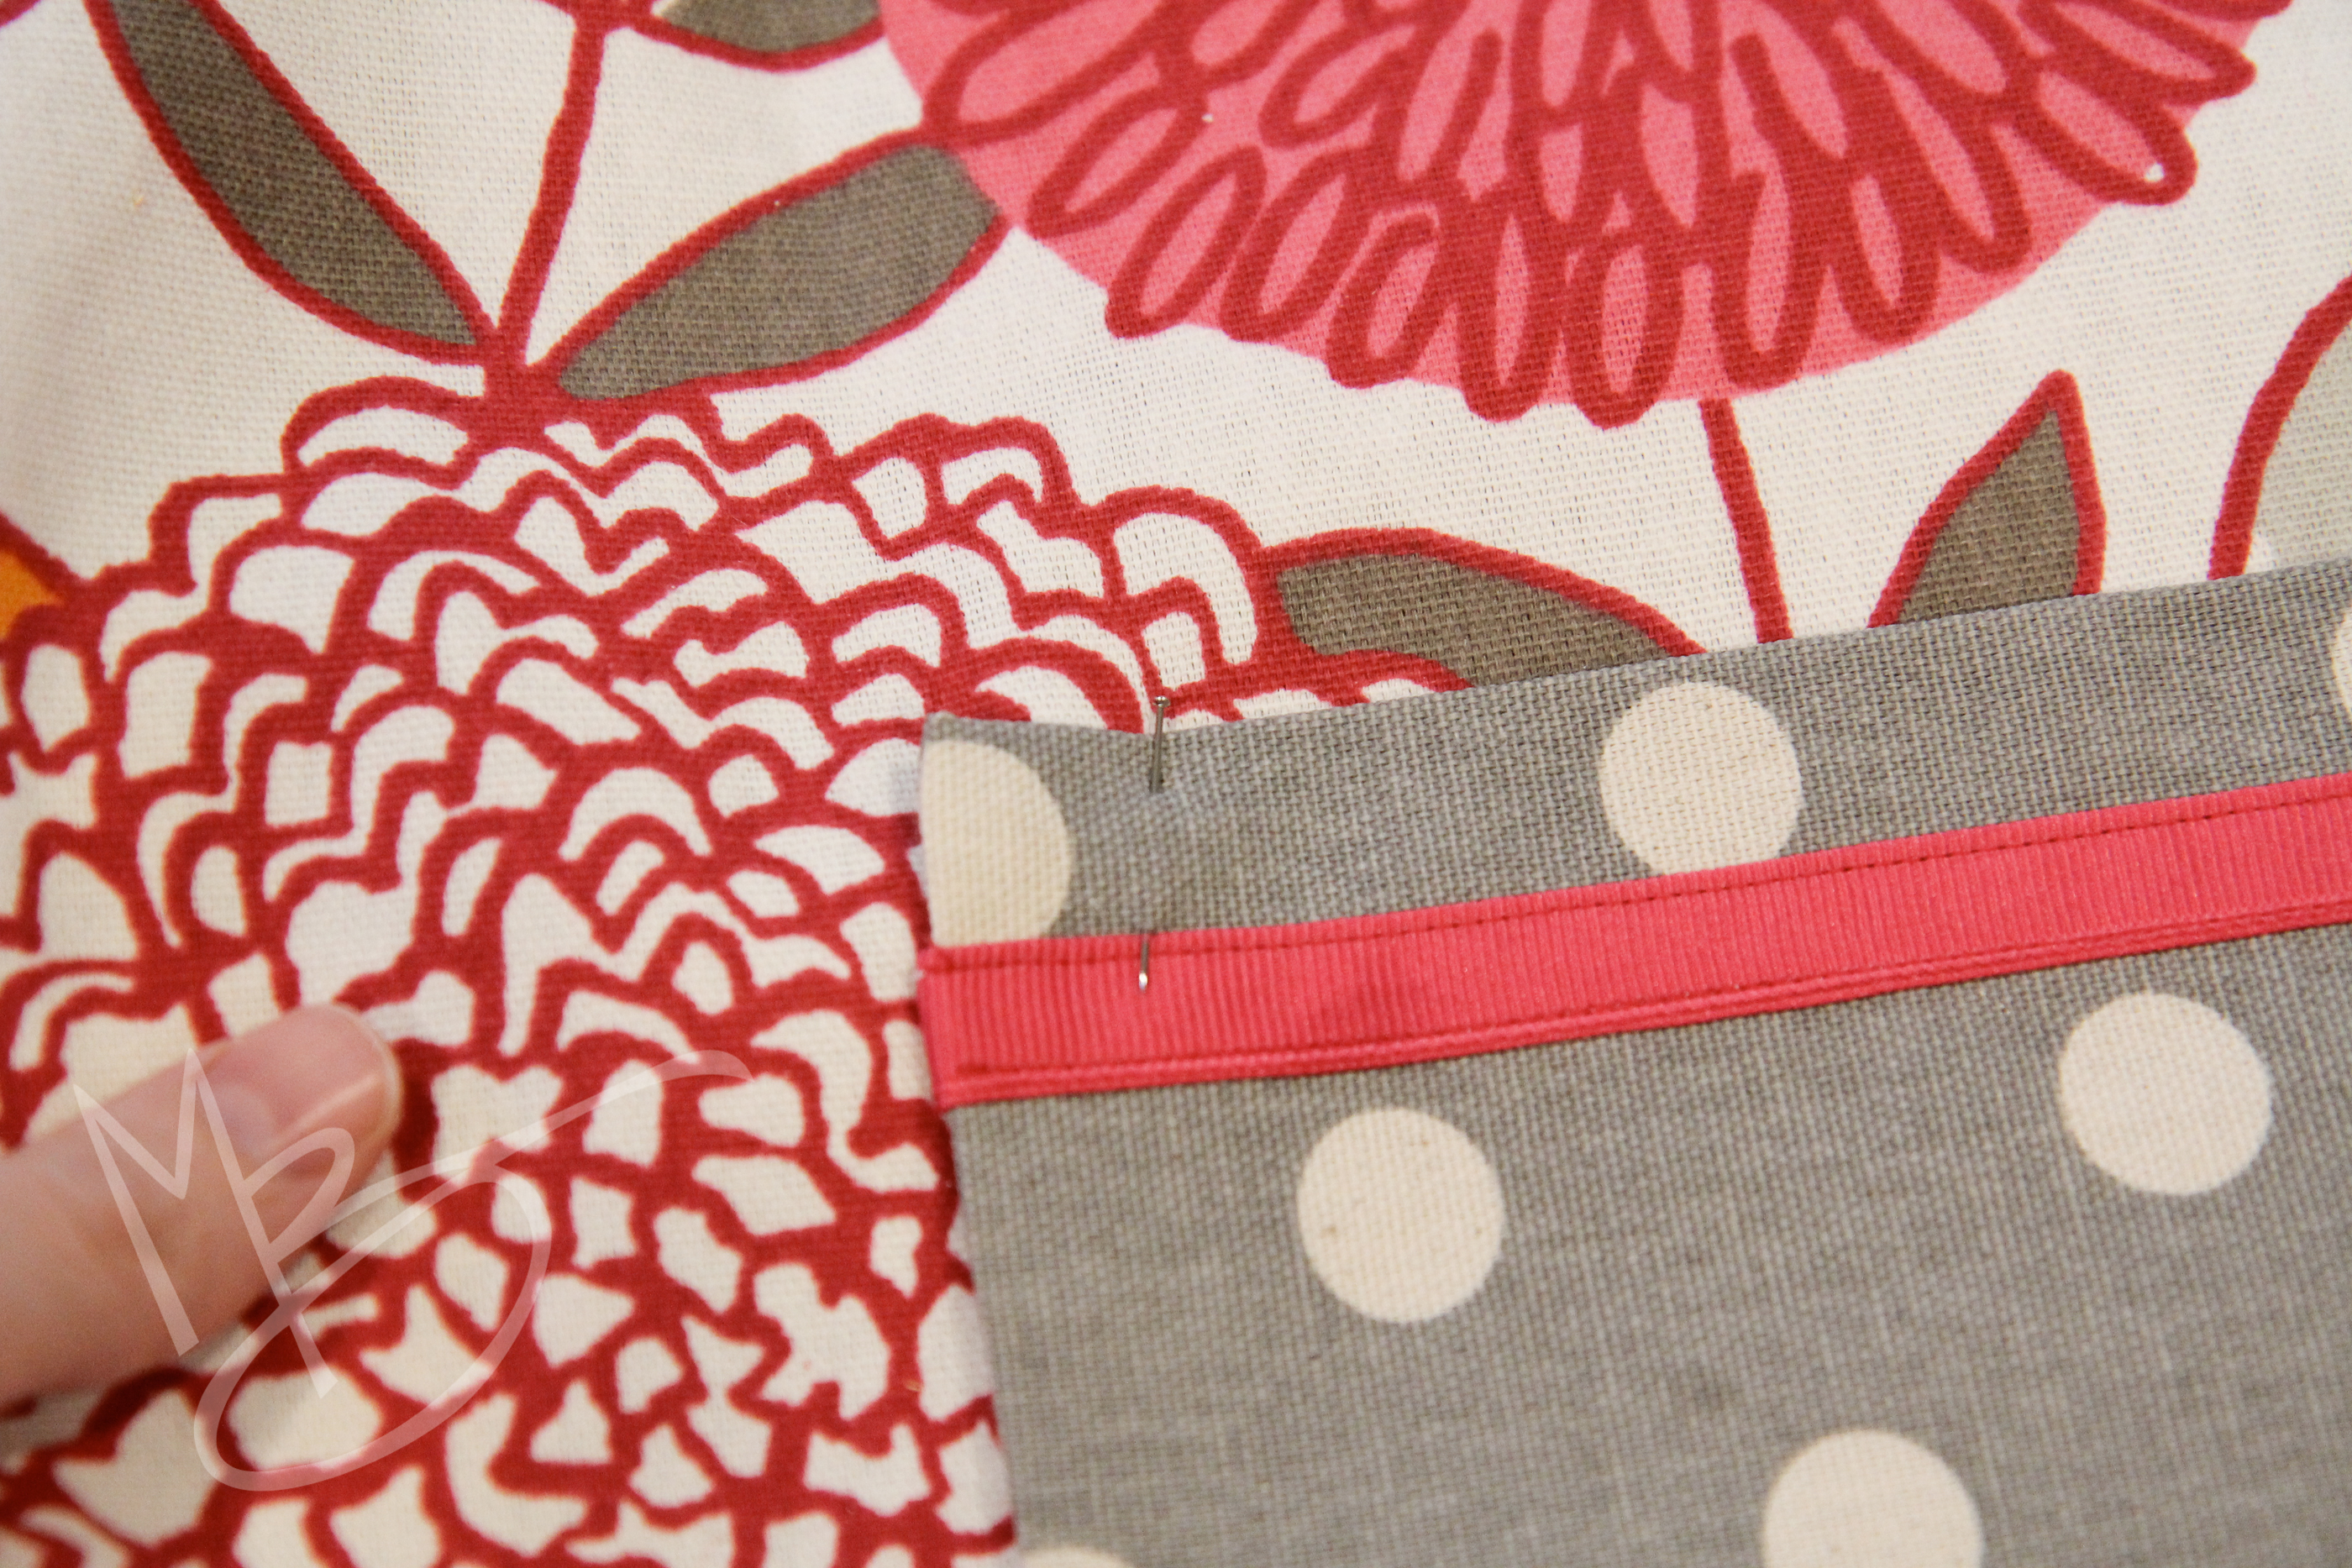
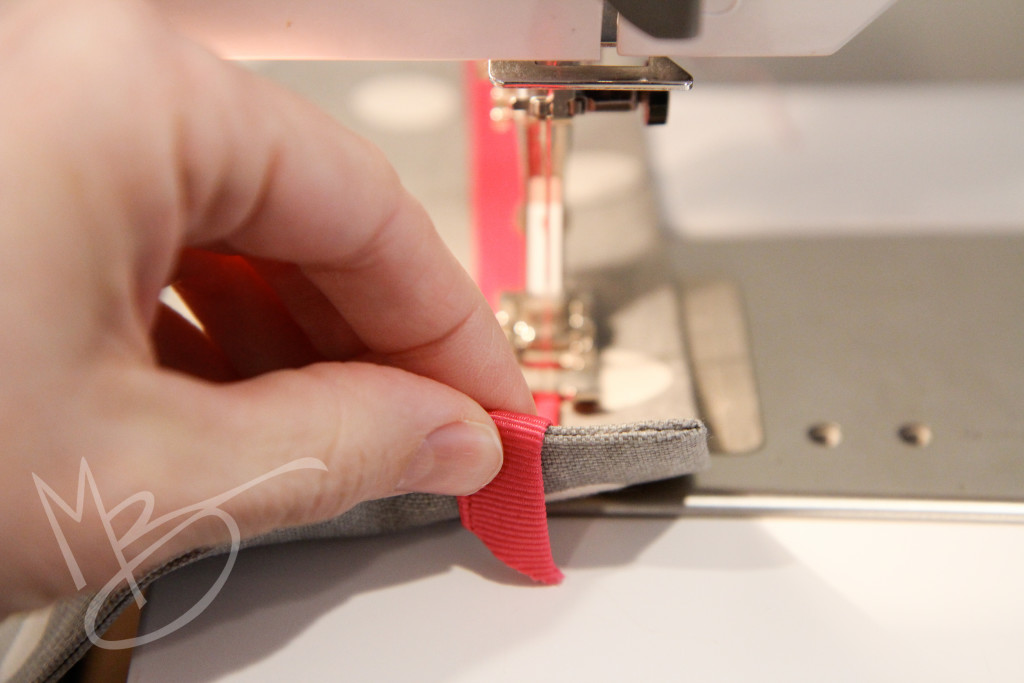
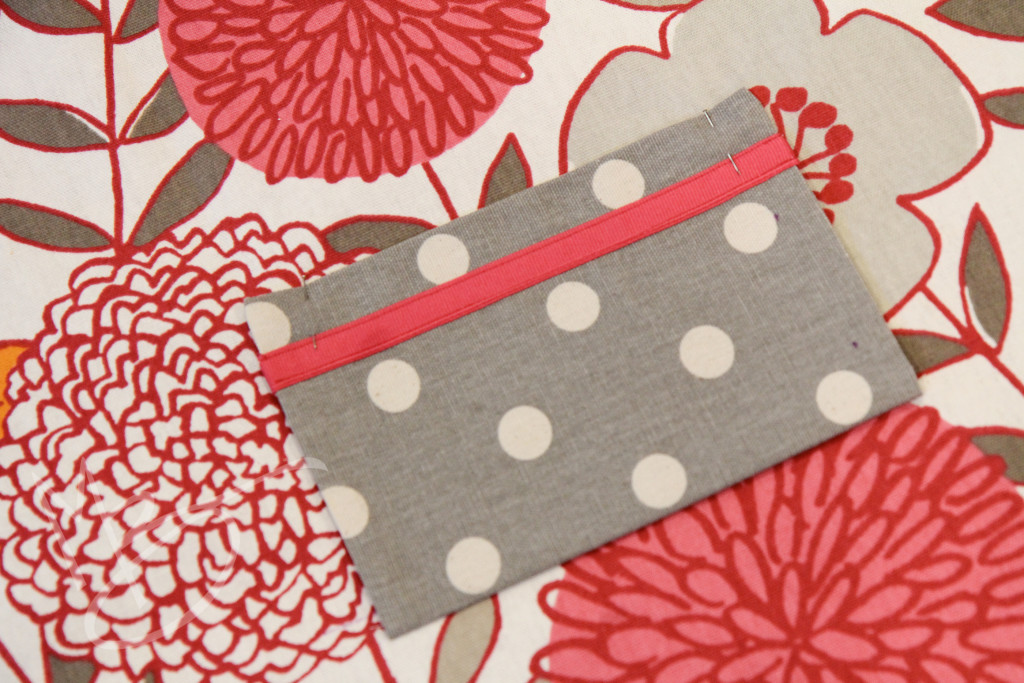
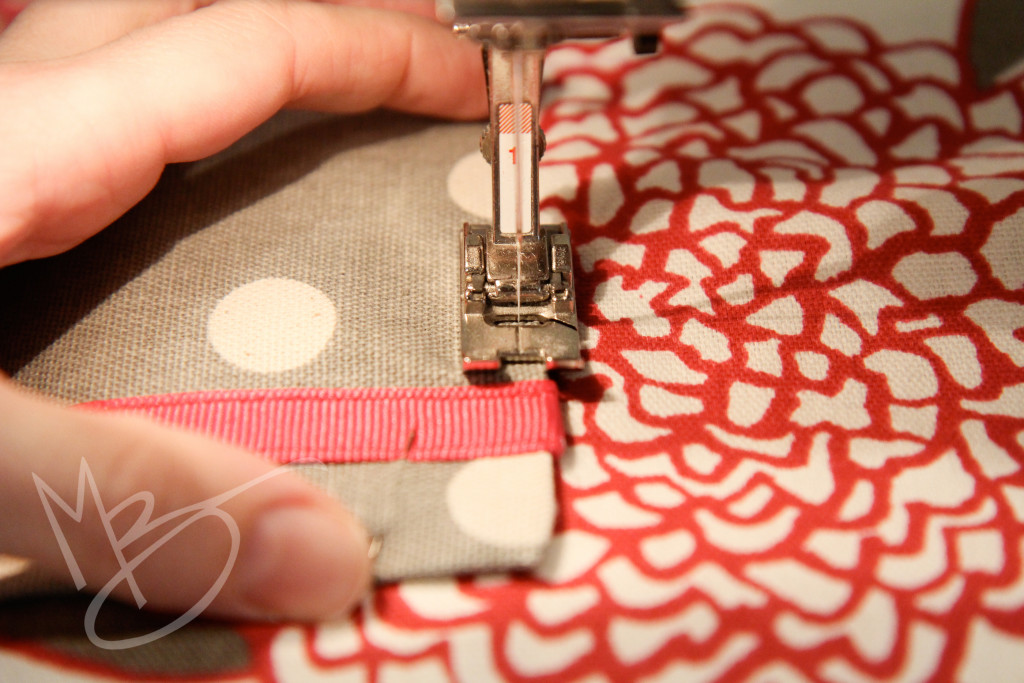
Once you decide where you want something, mark where it should go with a fabric pen.  I put mine 1/2″ down from the top of the pocket.  Line the ribbon up (this is where a particular seamstress would pin in place, but I’m a bit of a wing it girl so I just make marks and line it up with my fingers as I go) and stitch it in place along the top and bottom of the ribbon. If you’ve been using white thread, you will want to change the thread color to match the ribbon.

cinch sack tutorial (14 of 41)

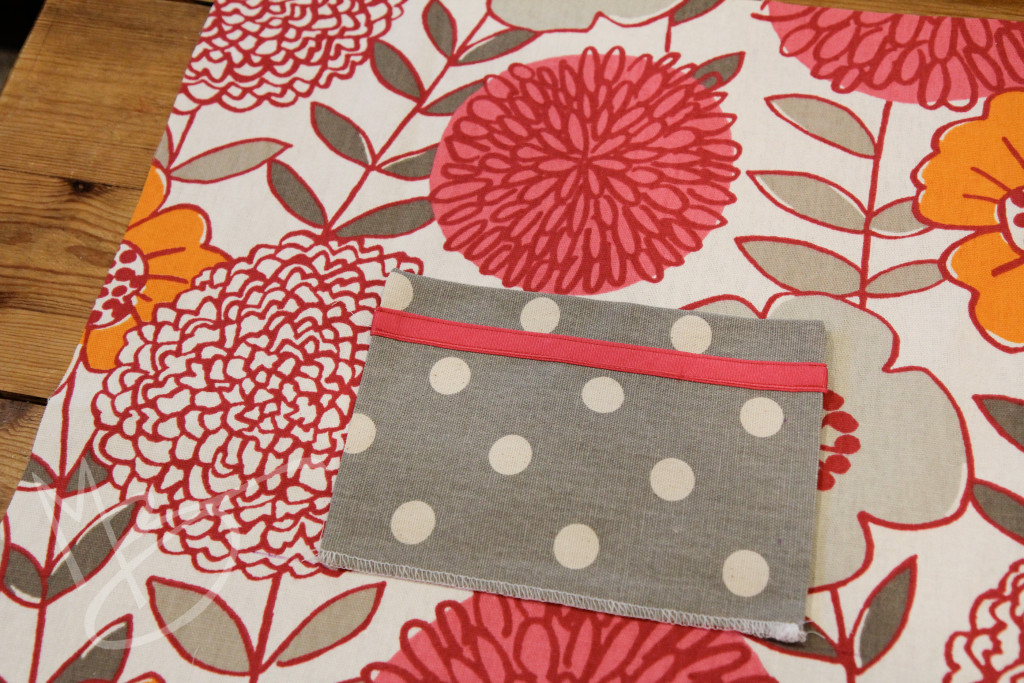
You can fold it in under the pocket so the edges are neatly finished.

cinch sack tutorial (15 of 41)

cinch sack tutorial (16 of 41)

I considered adding a ribbon bow, but decided against it. I still think a button would have been cute, but I didn’t have one on hand that worked so I skipped it.  But the sky is the limit when it comes to personalizing your own project.

cinch sack tutorial (17 of 41)

cinch sack tutorial (18 of 41)

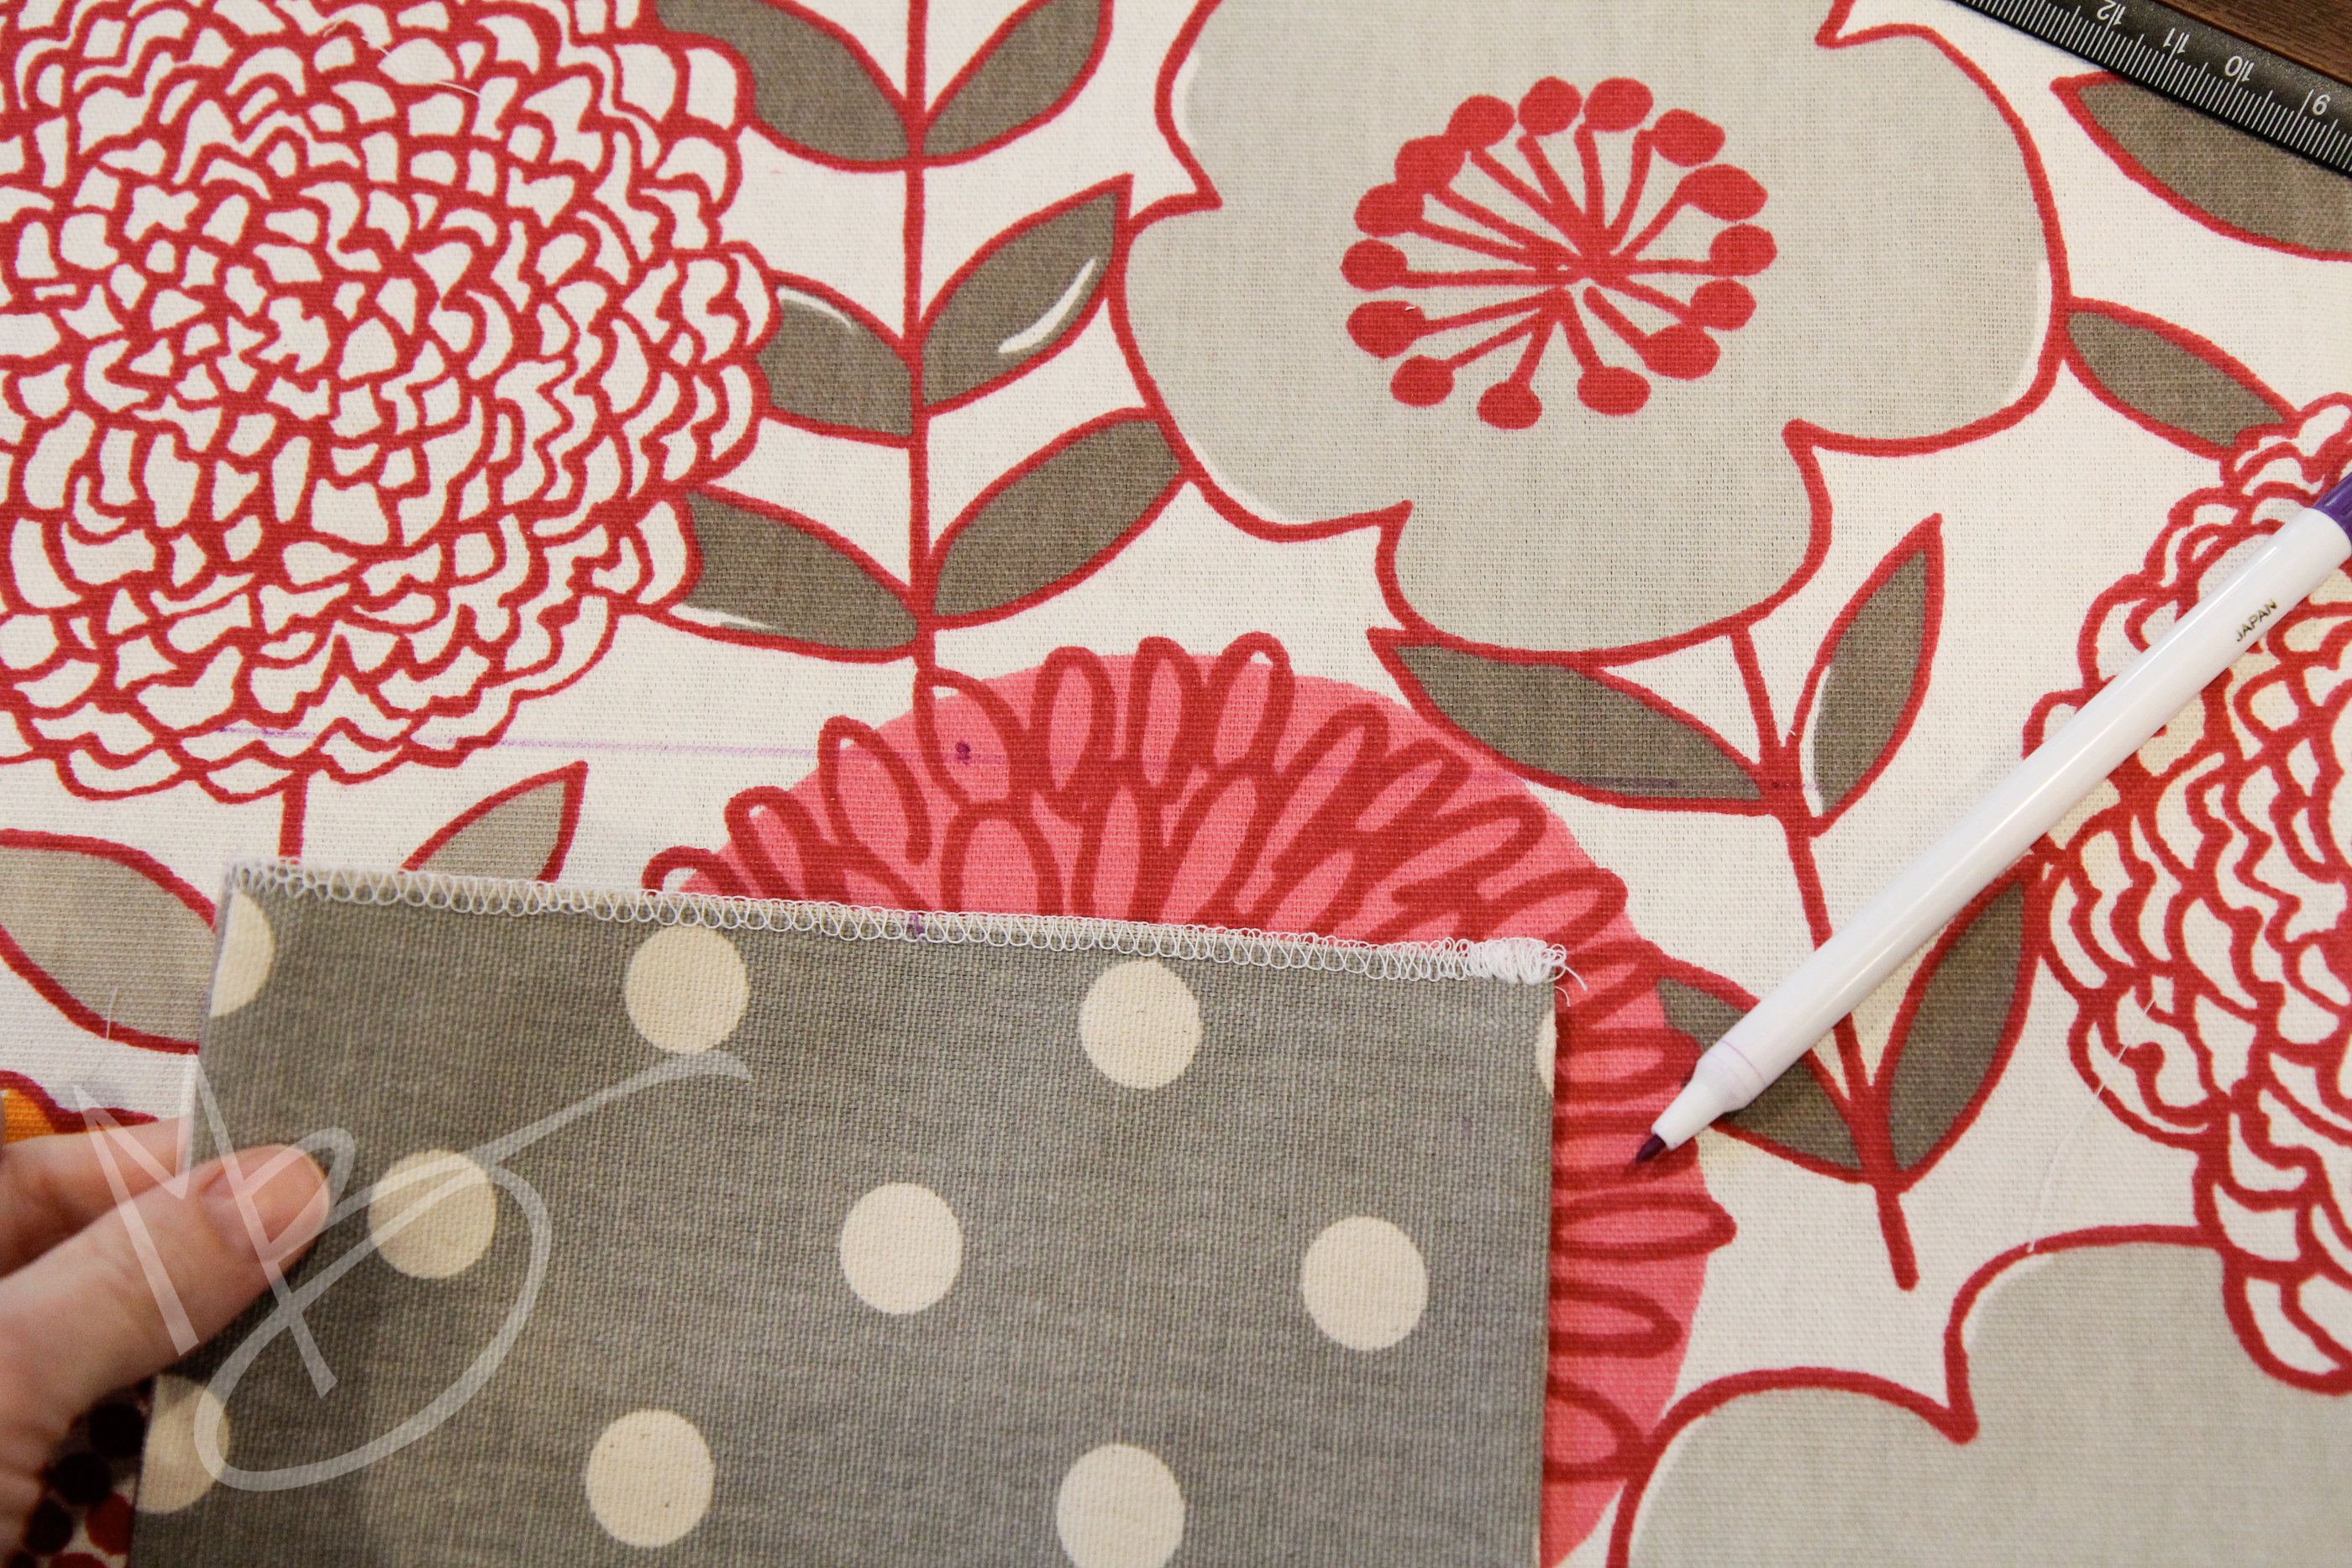
After you’re satisfied with what the pocket will look like, draw a line 6″ up from the bottom of the main piece of fabric.  Find the middle of the fabric and the middle of the pocket. Place the serged edge of the pocket along the line you just drew, matching the middle markings, and pin it in place (or wing it if you’re like me). Then sew close to the edge of the pocket.  I tried to sew just below the serger stitching.

cinch sack tutorial (19 of 41)

cinch sack tutorial (20 of 41)

Now flip the pocket up into position and press.  This time you really should pin it, even if you tend to wing it. 🙂 You don’t want the pocket to shift sideways while you’re sewing.

cinch sack tutorial (21 of 41)

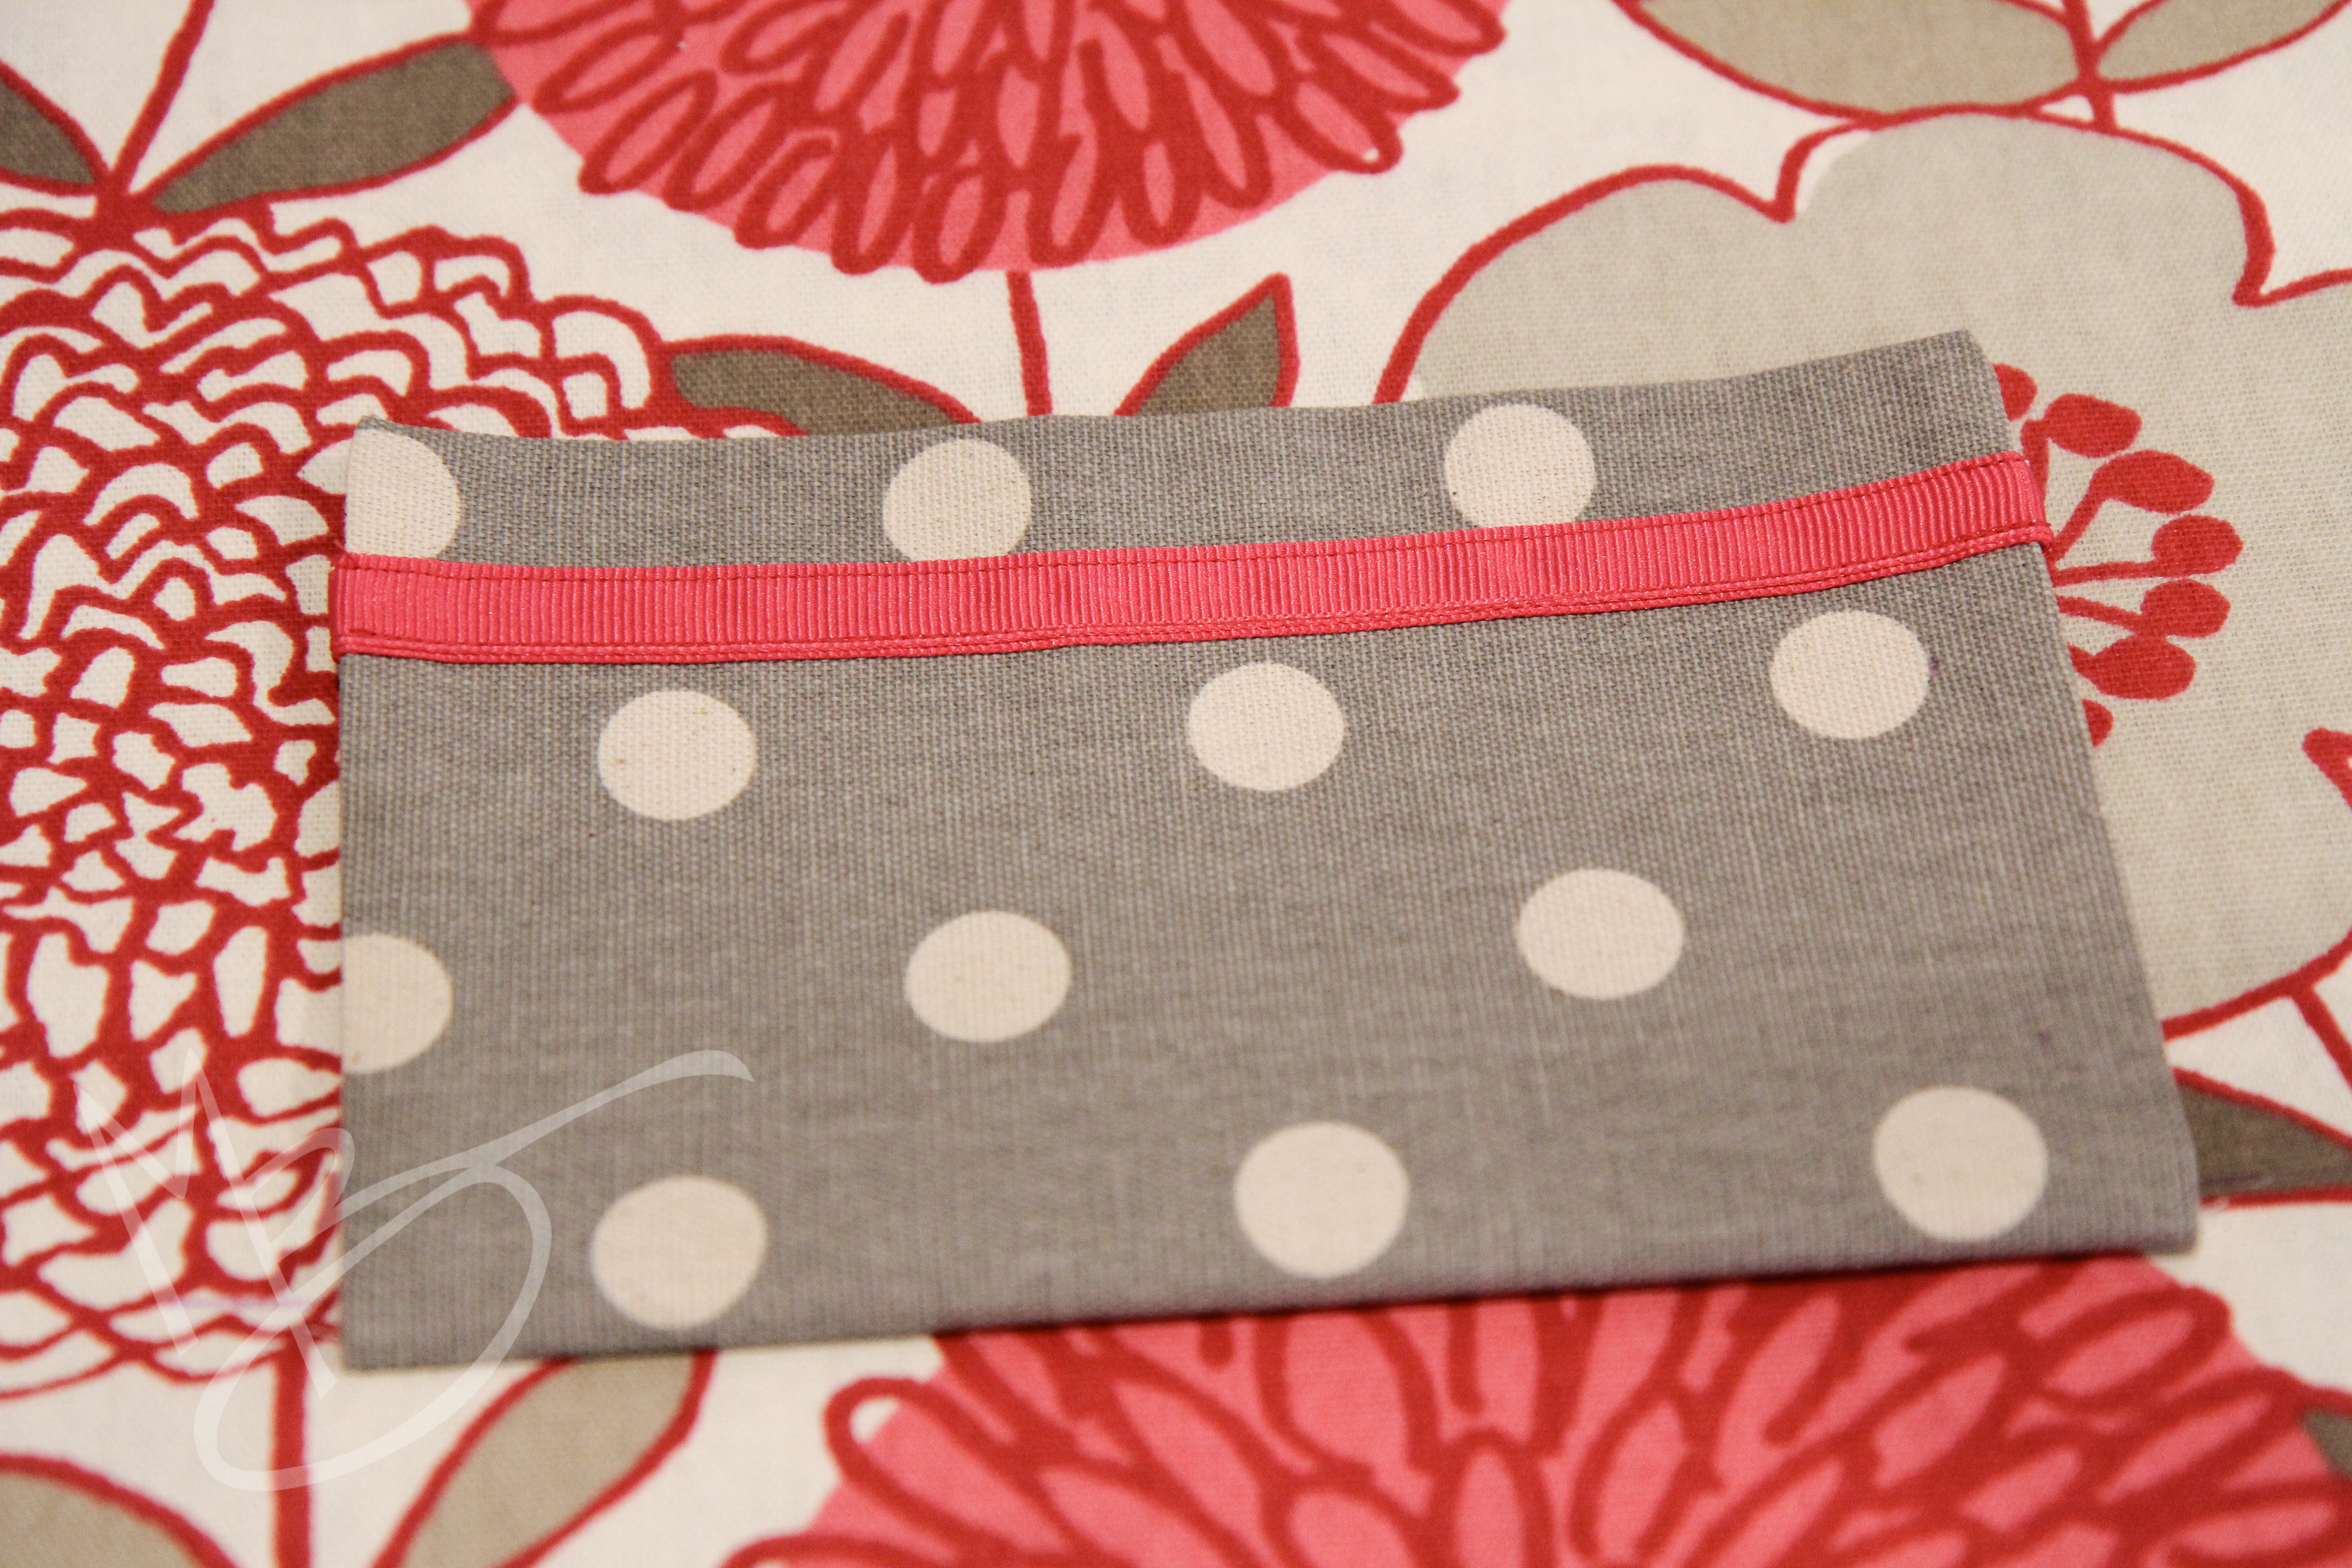
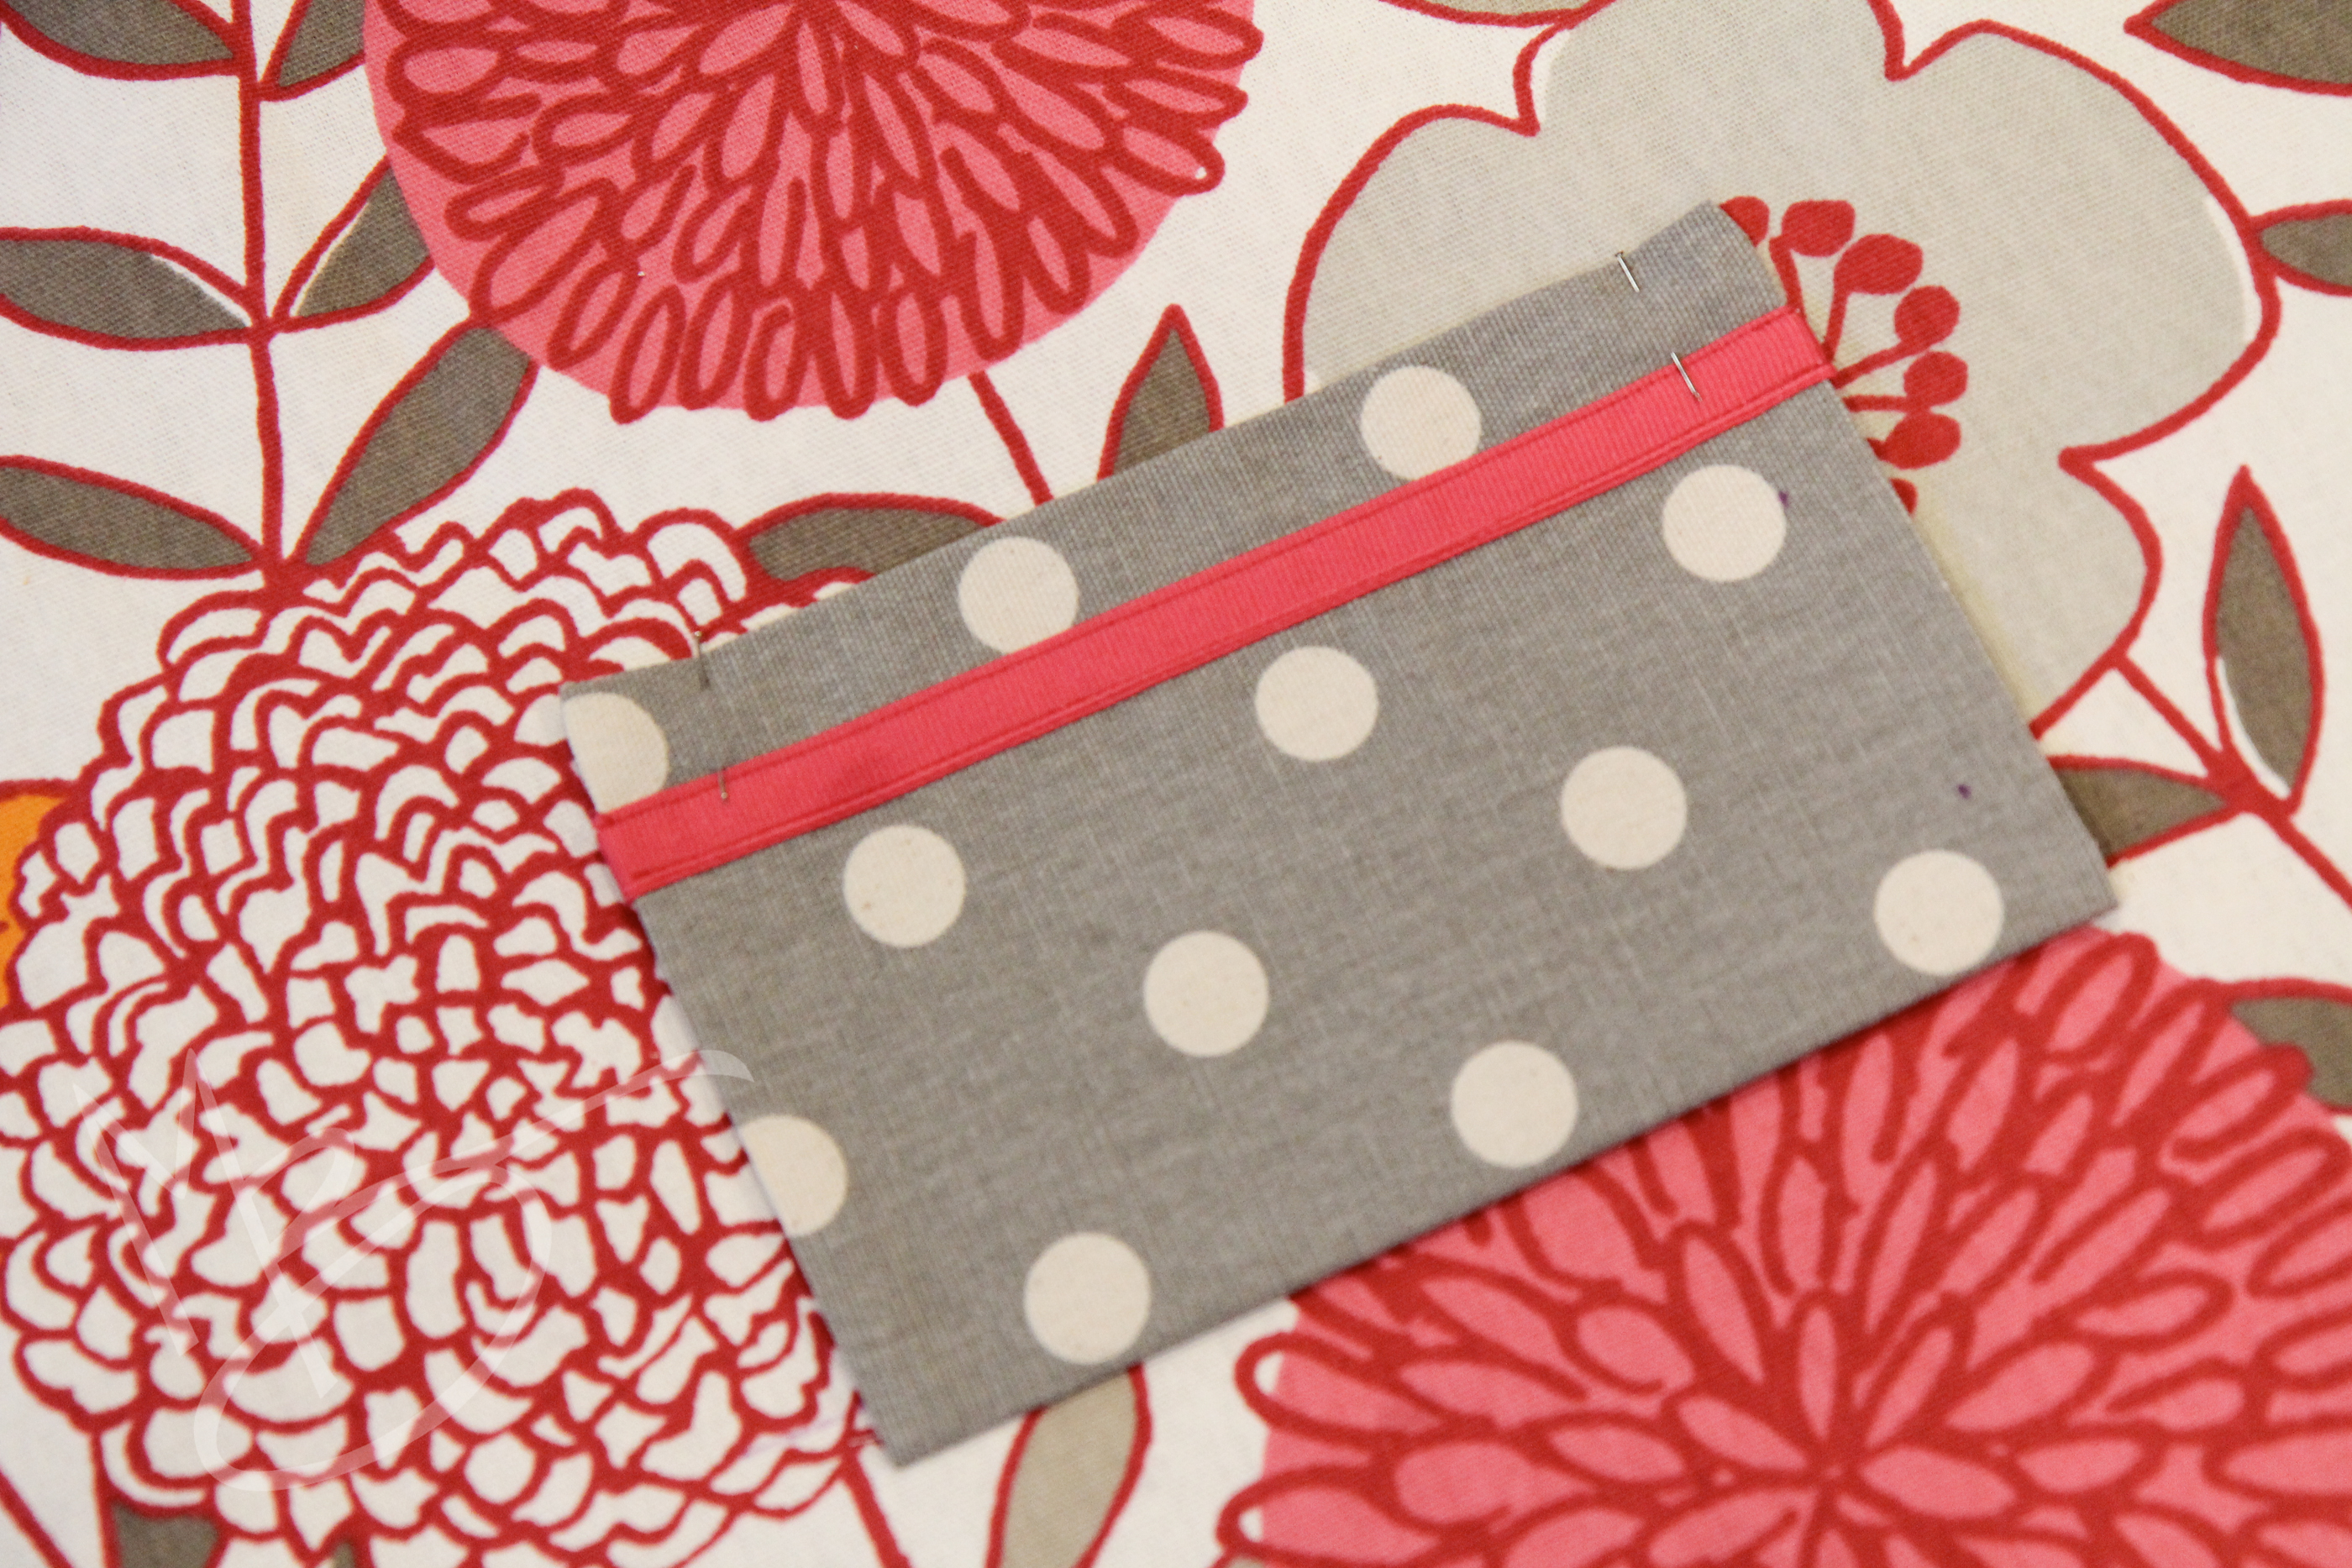
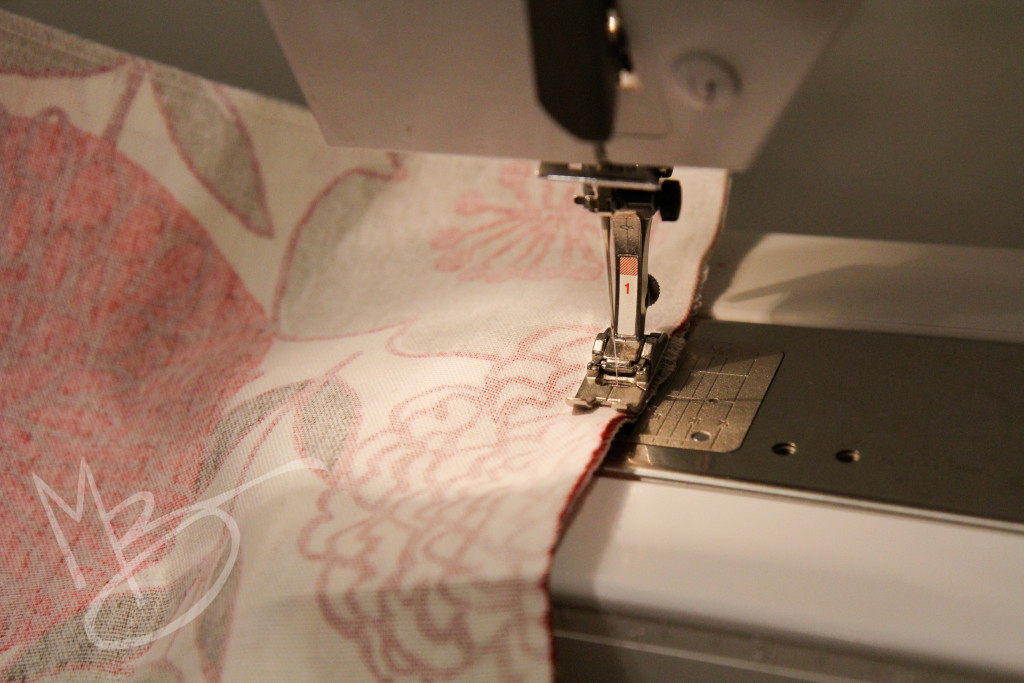
Top stitch the sides of the pocket to the fabric.  I prefer starting from the bottom of the pocket on both sides to keep the fabric from bunching as I sew.

cinch sack tutorial (22 of 41)

cinch sack tutorial (23 of 41)

cinch sack tutorial (24 of 41)

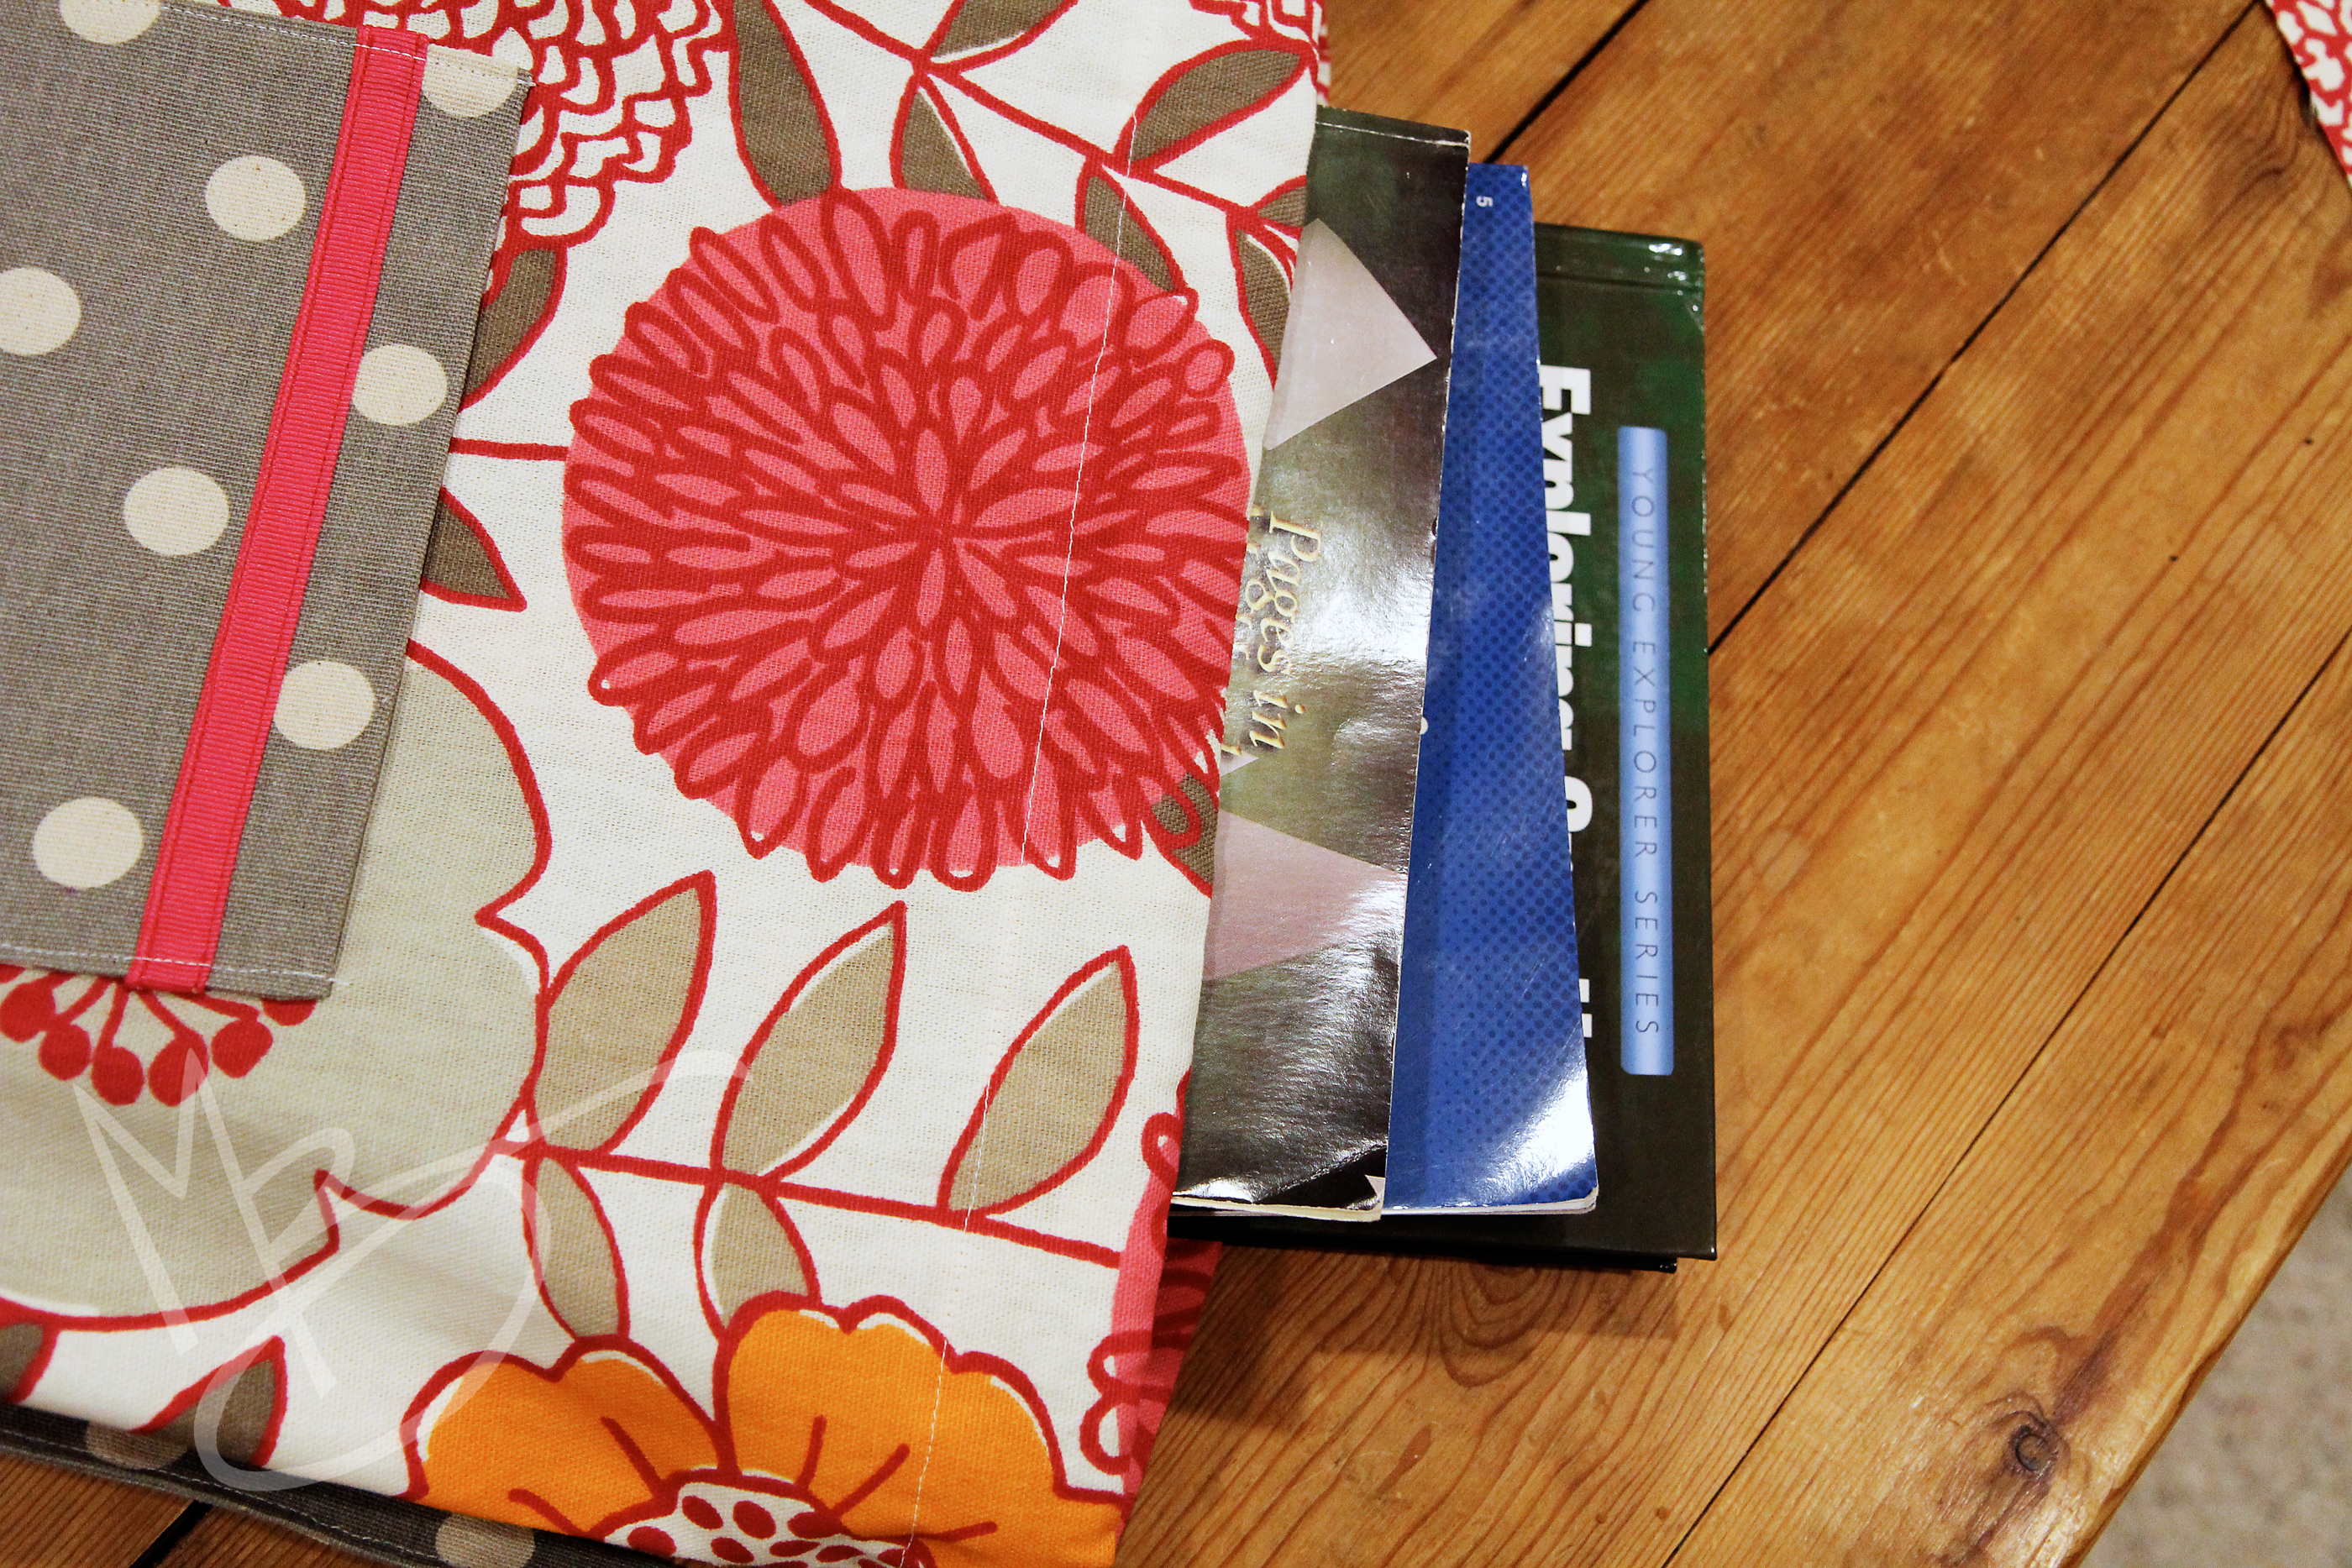
Since I was donating this bag to a fundraiser for camp, I left the pocket like this.  If I would have been making it for myself, I would have topstitched a line to divide the pocket so that one side would fit my cell phone.  I think this bag is perfect for a book, snack and water bottle for a day at the lake and I love to have my cell phone on the outside where it’s easy to get to.

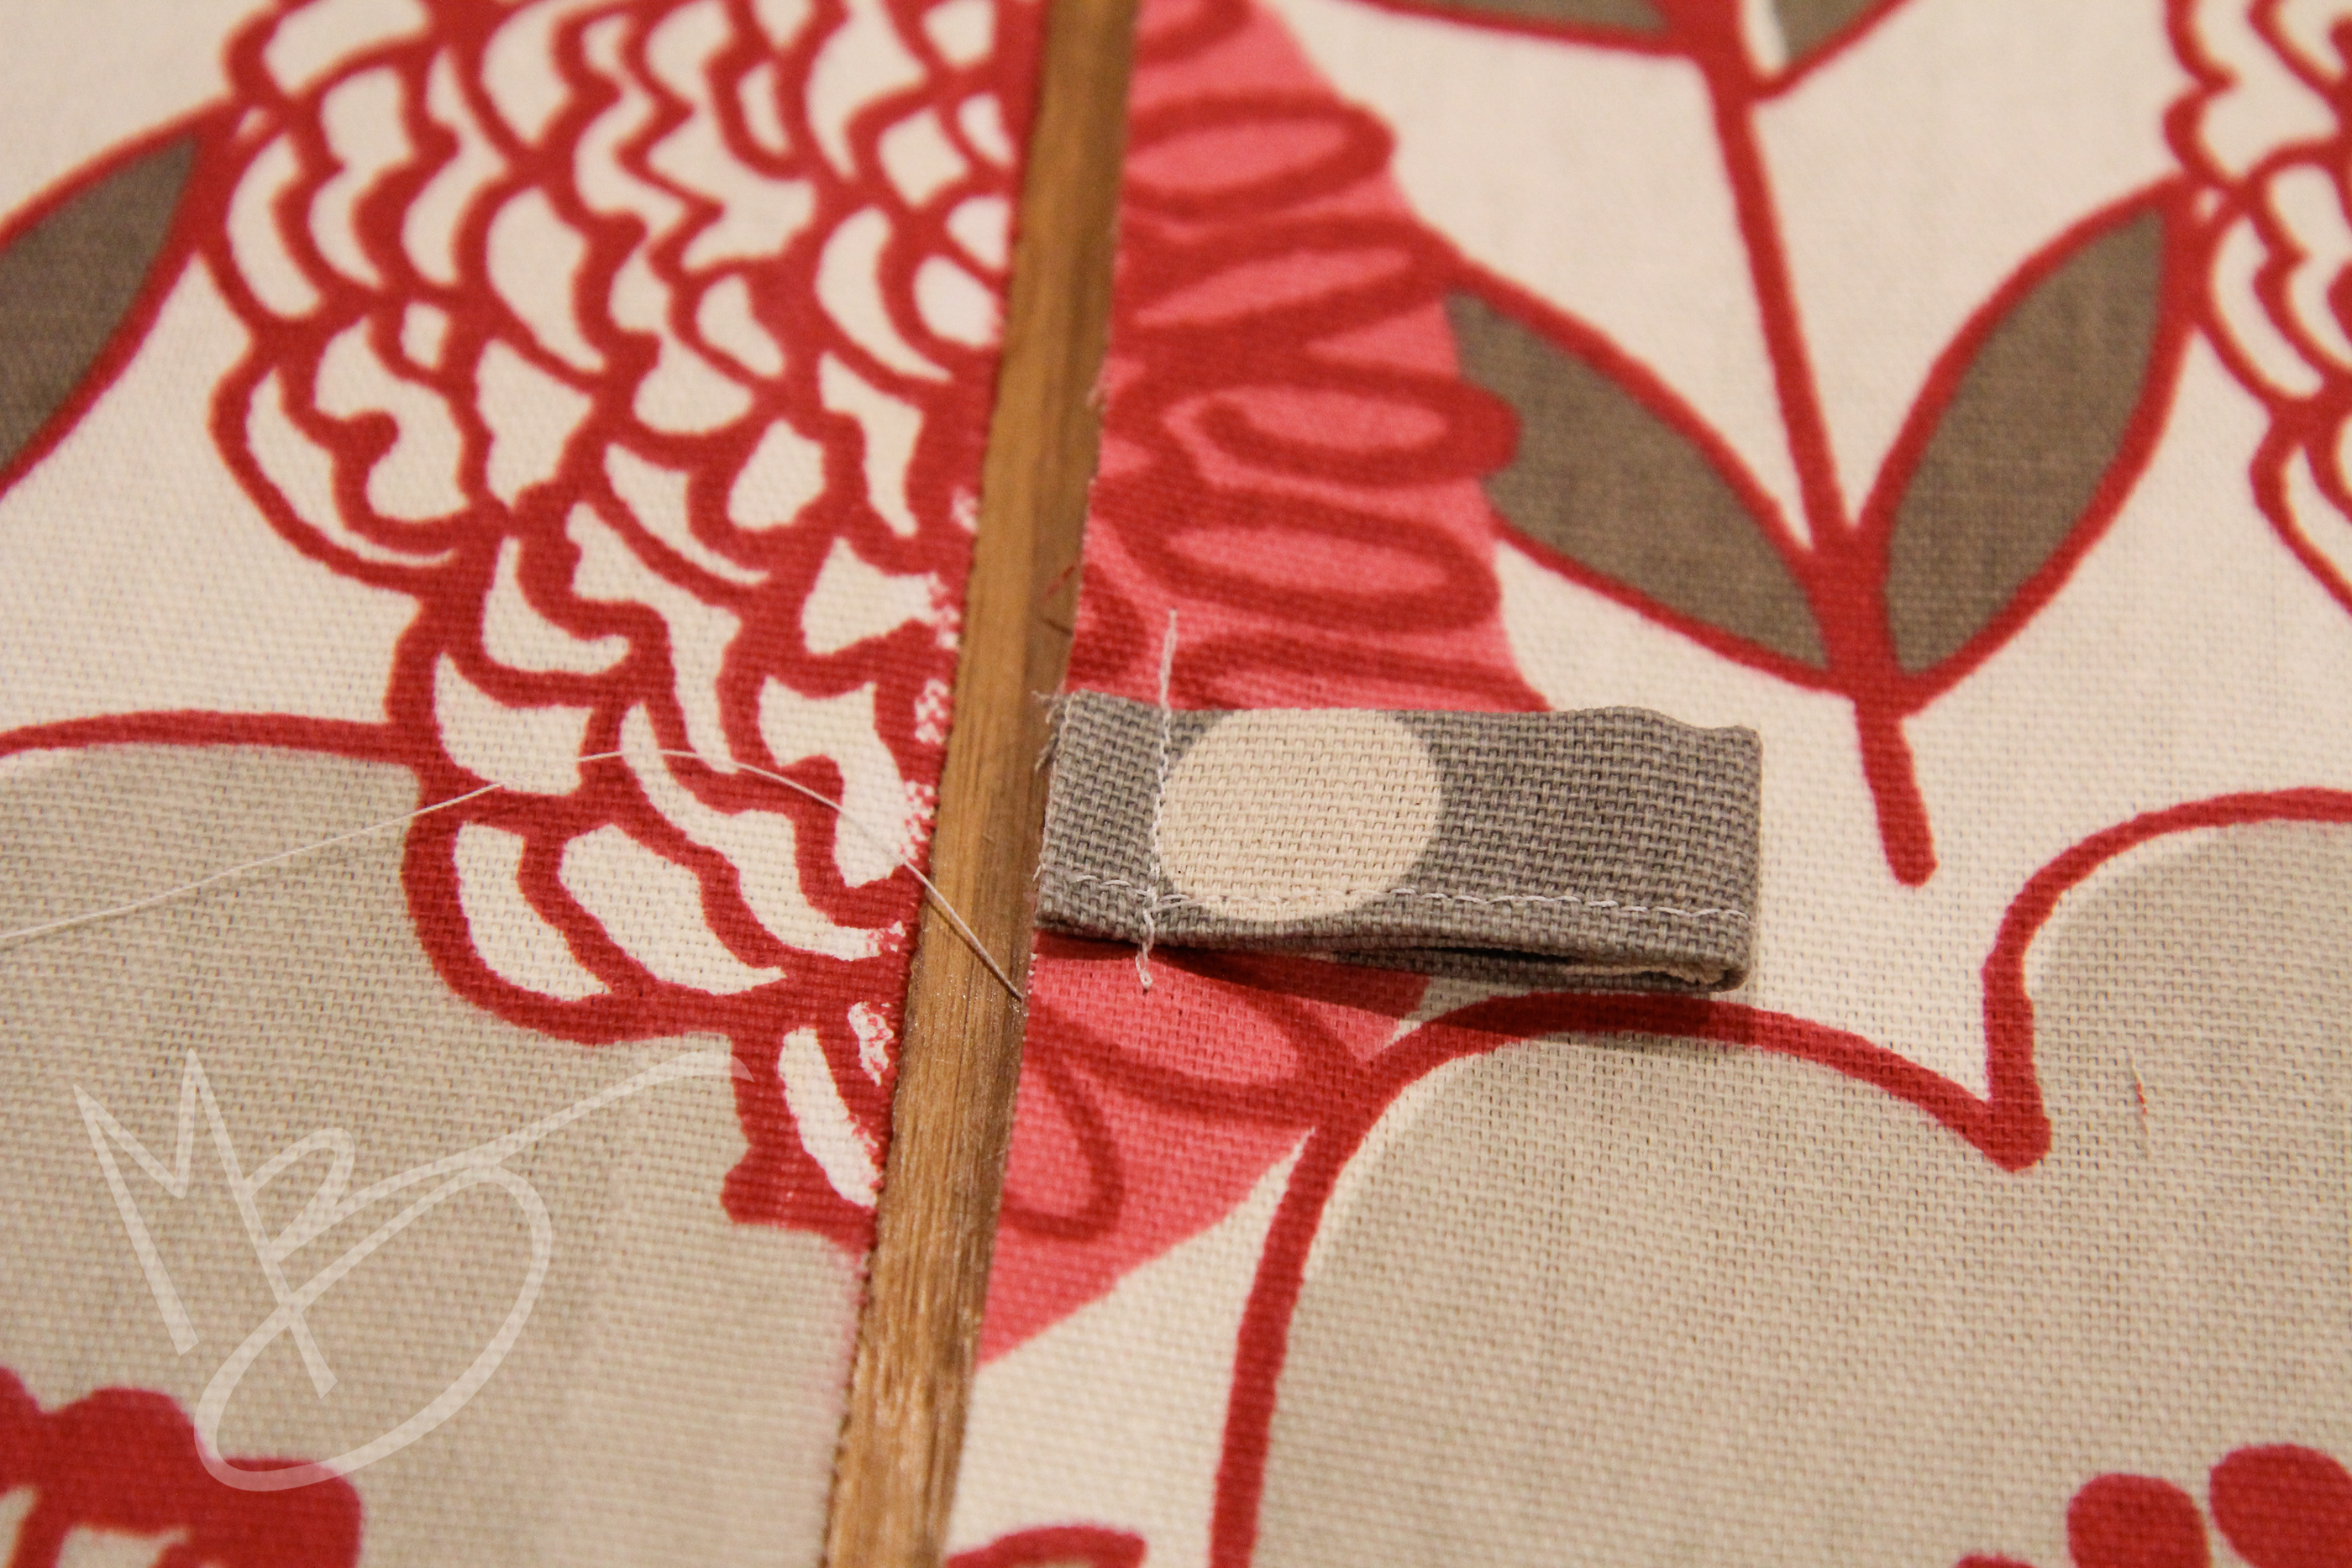
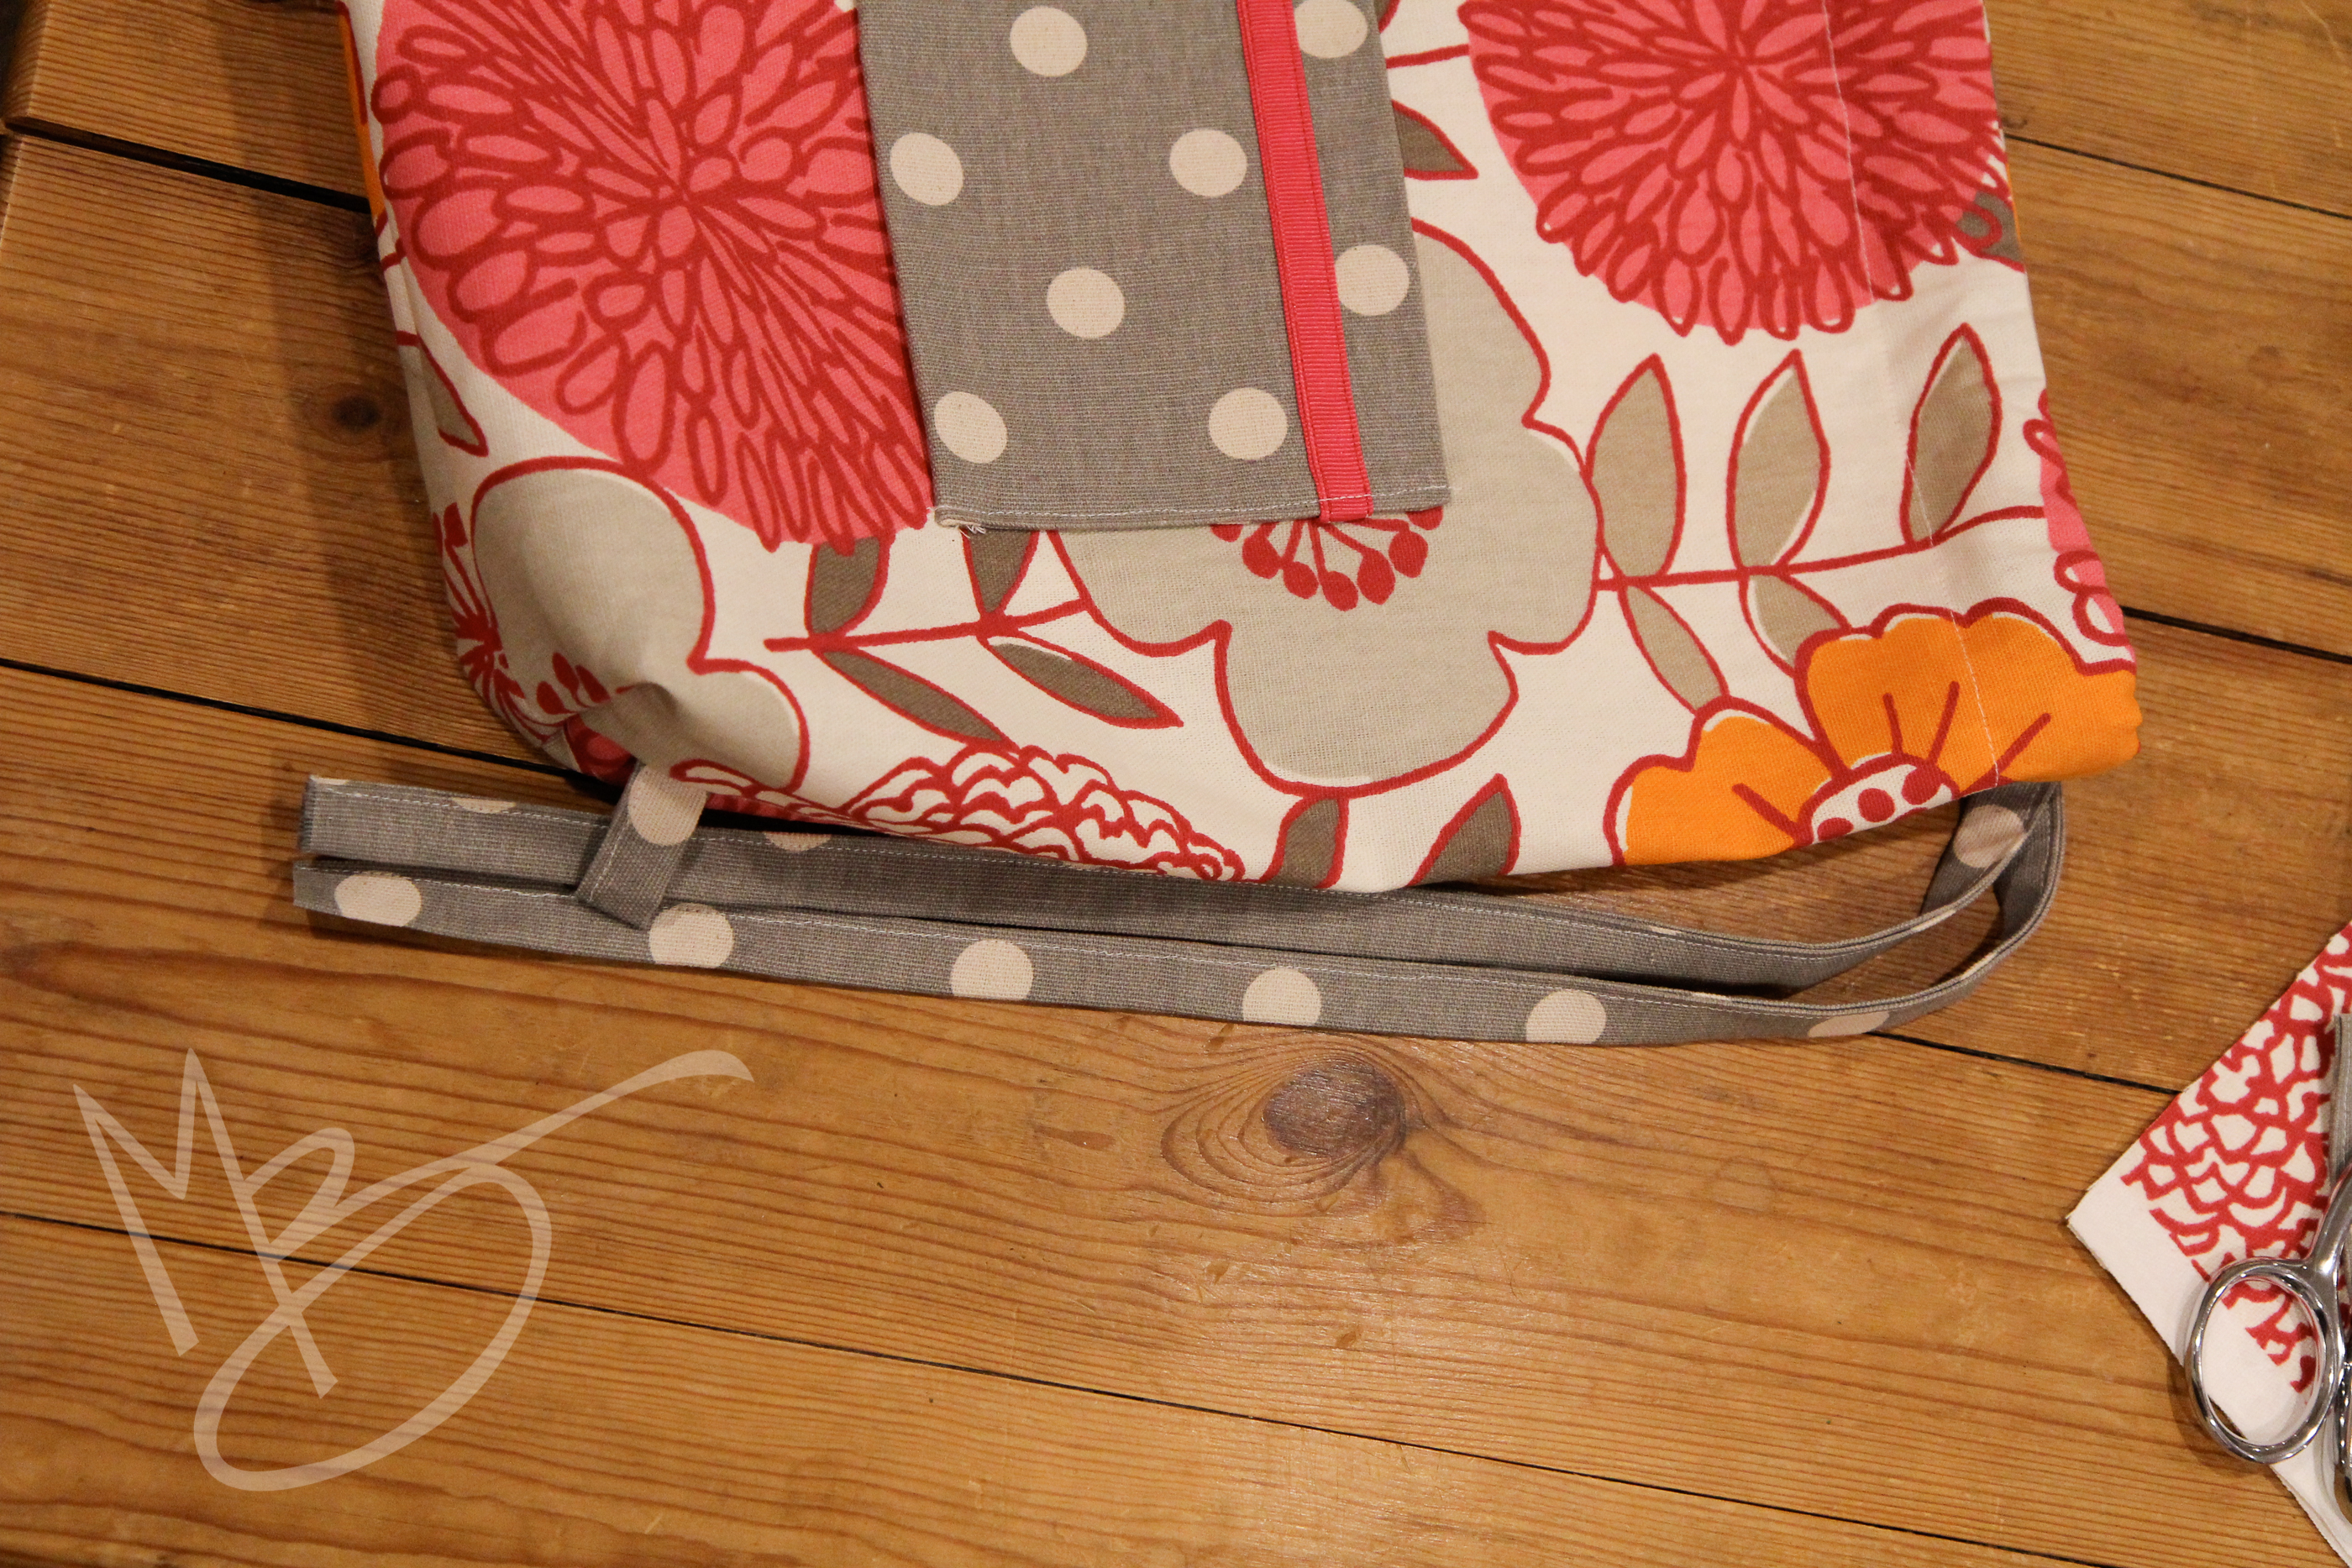
When you’re happy with the pocket, pick up the little 3 1/2″ tabs you cut from the long strips earlier, fold them in half, and sew them onto the other rectangle.  Measure up  3″ from the bottom of the fabric and stitch them to the right side of the fabric.  Just a little tip for neatness.  If the top stitched edge of your tab is toward the bottom of the bag, be sure to do the other one the same way.  It might be kind of like splicing straps and no one will notice.  But it’s such an easy thing to do and it does look more professional when it’s finished.

cinch sack tutorial (26 of 41)


cinch sack tutorial (28 of 41)

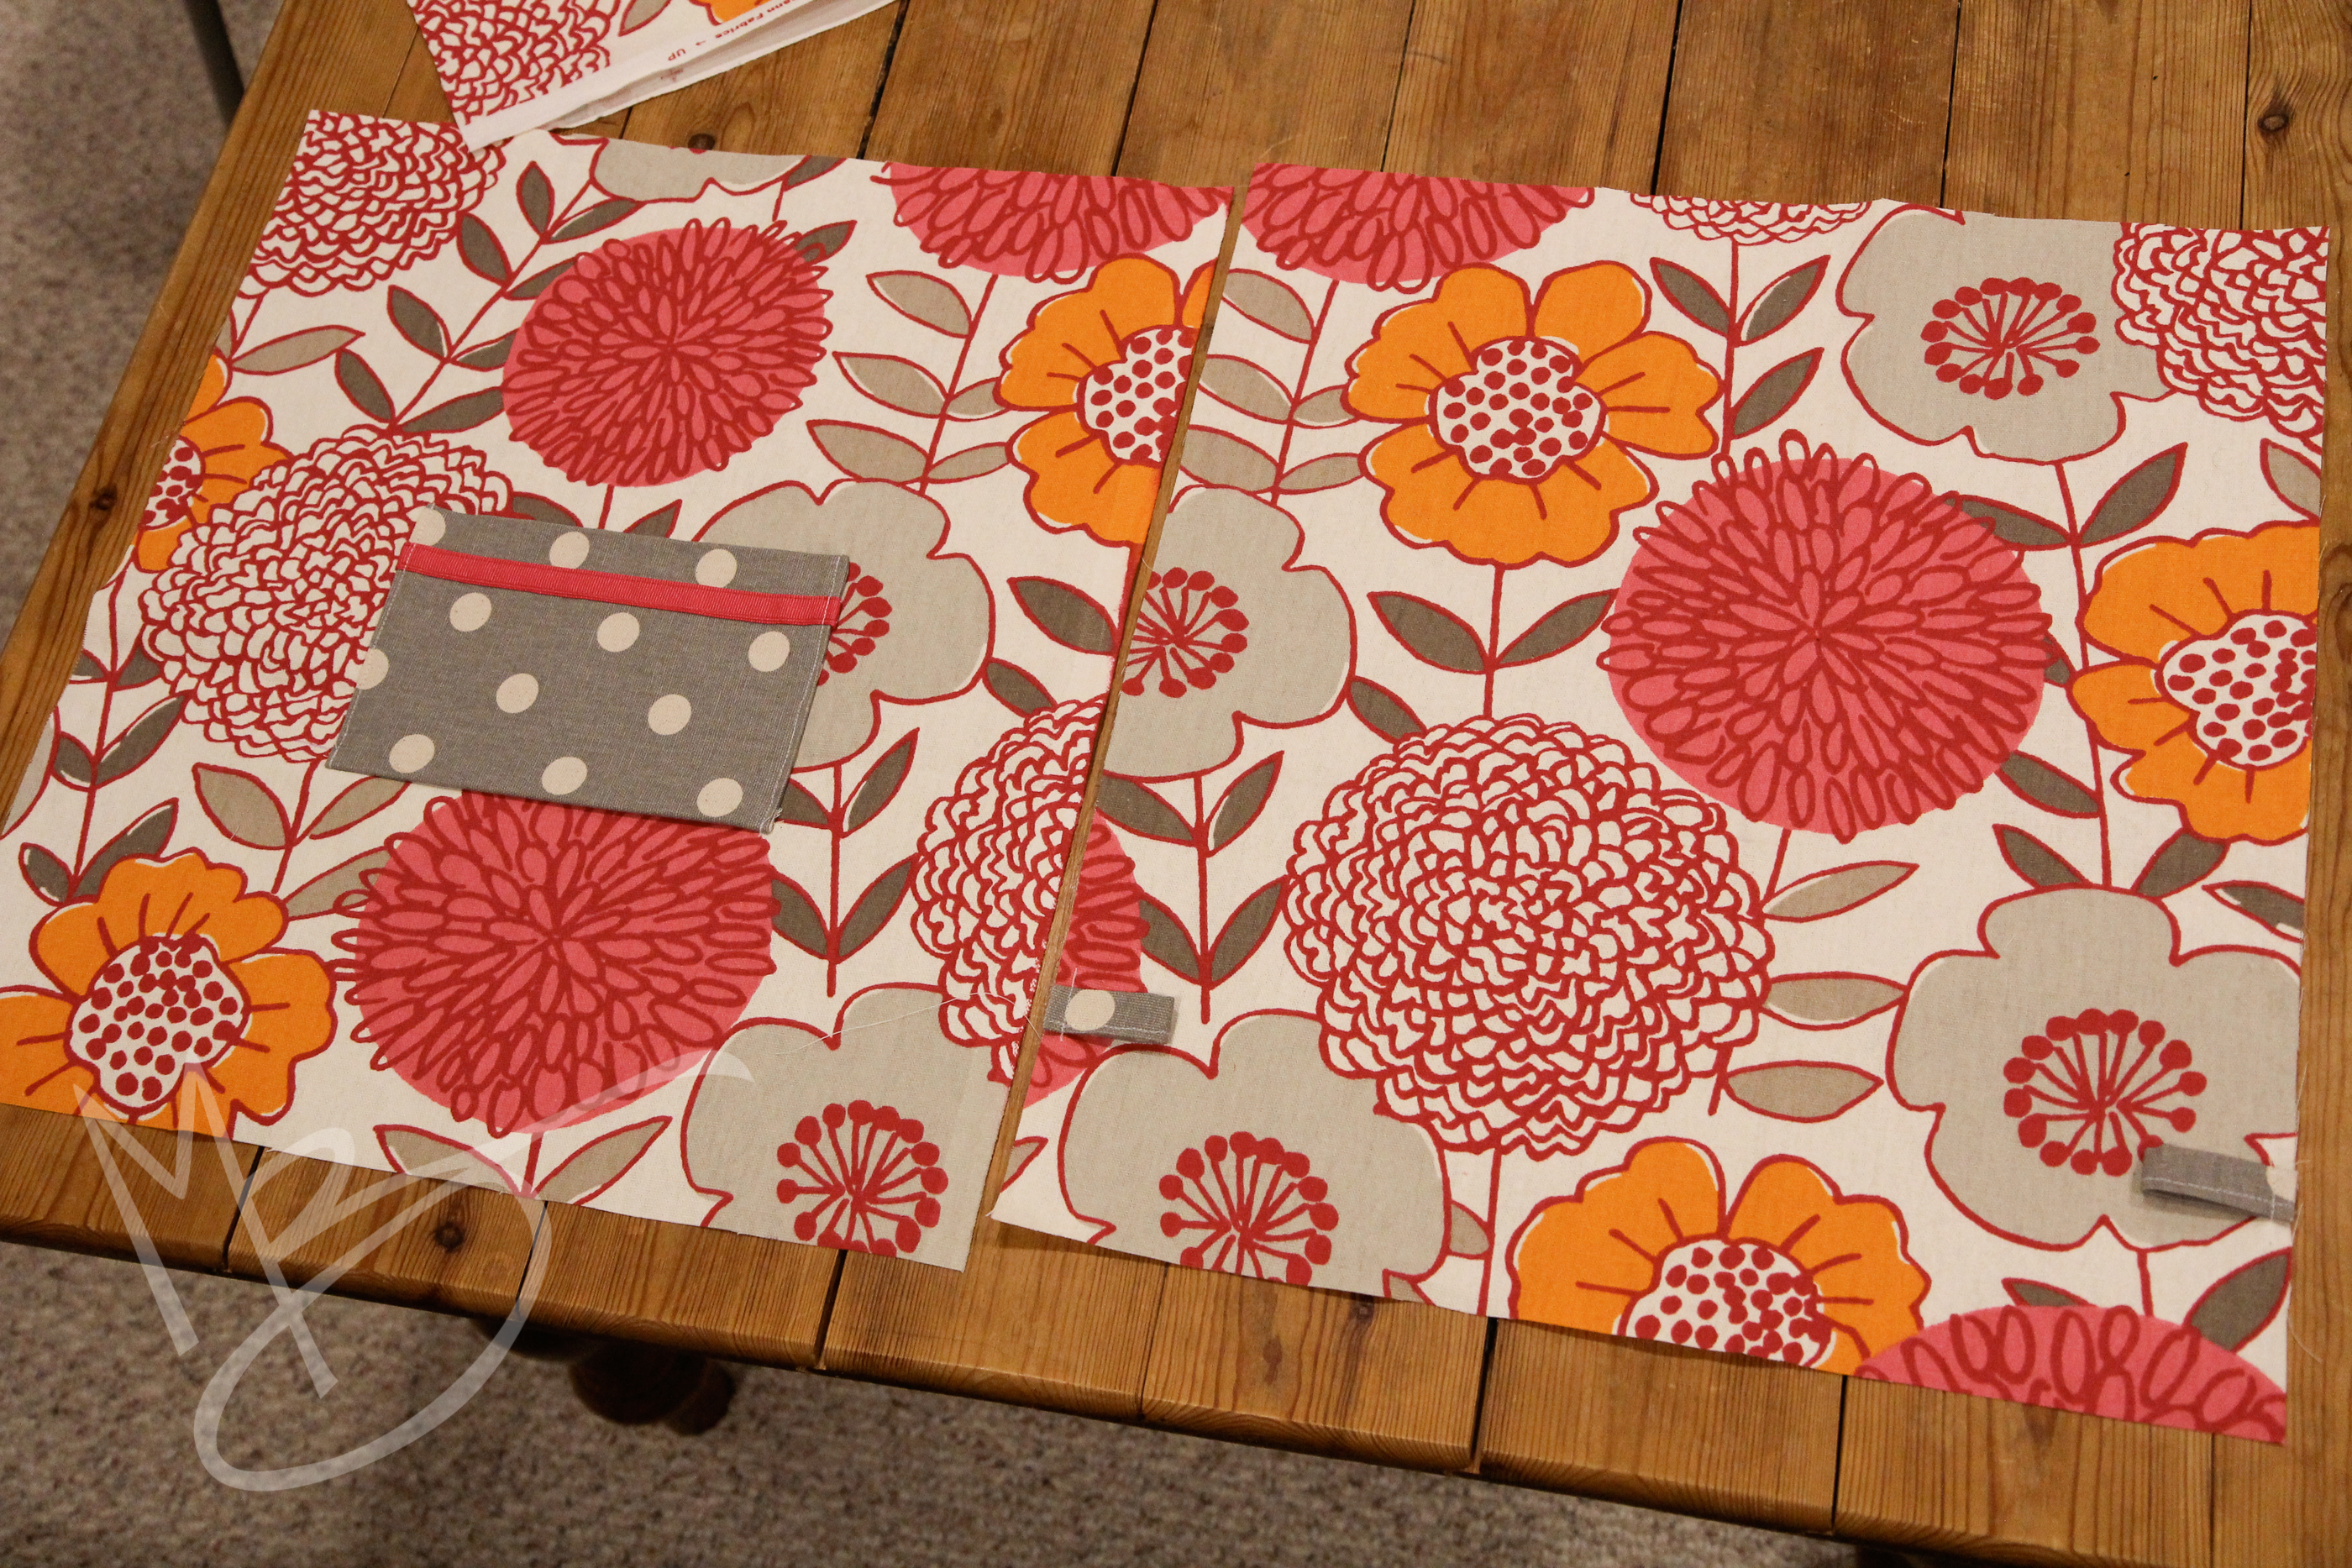
The two rectangles should now look like this. Front and back.

cinch sack tutorial (27 of 41)

Serge all around the edges of both rectangles.

Now place right sides together and PIN! See, I do pin sometimes. 🙂

Sew around the sides and the bottom of the bag, but not the top!

cinch sack tutorial (29 of 41)

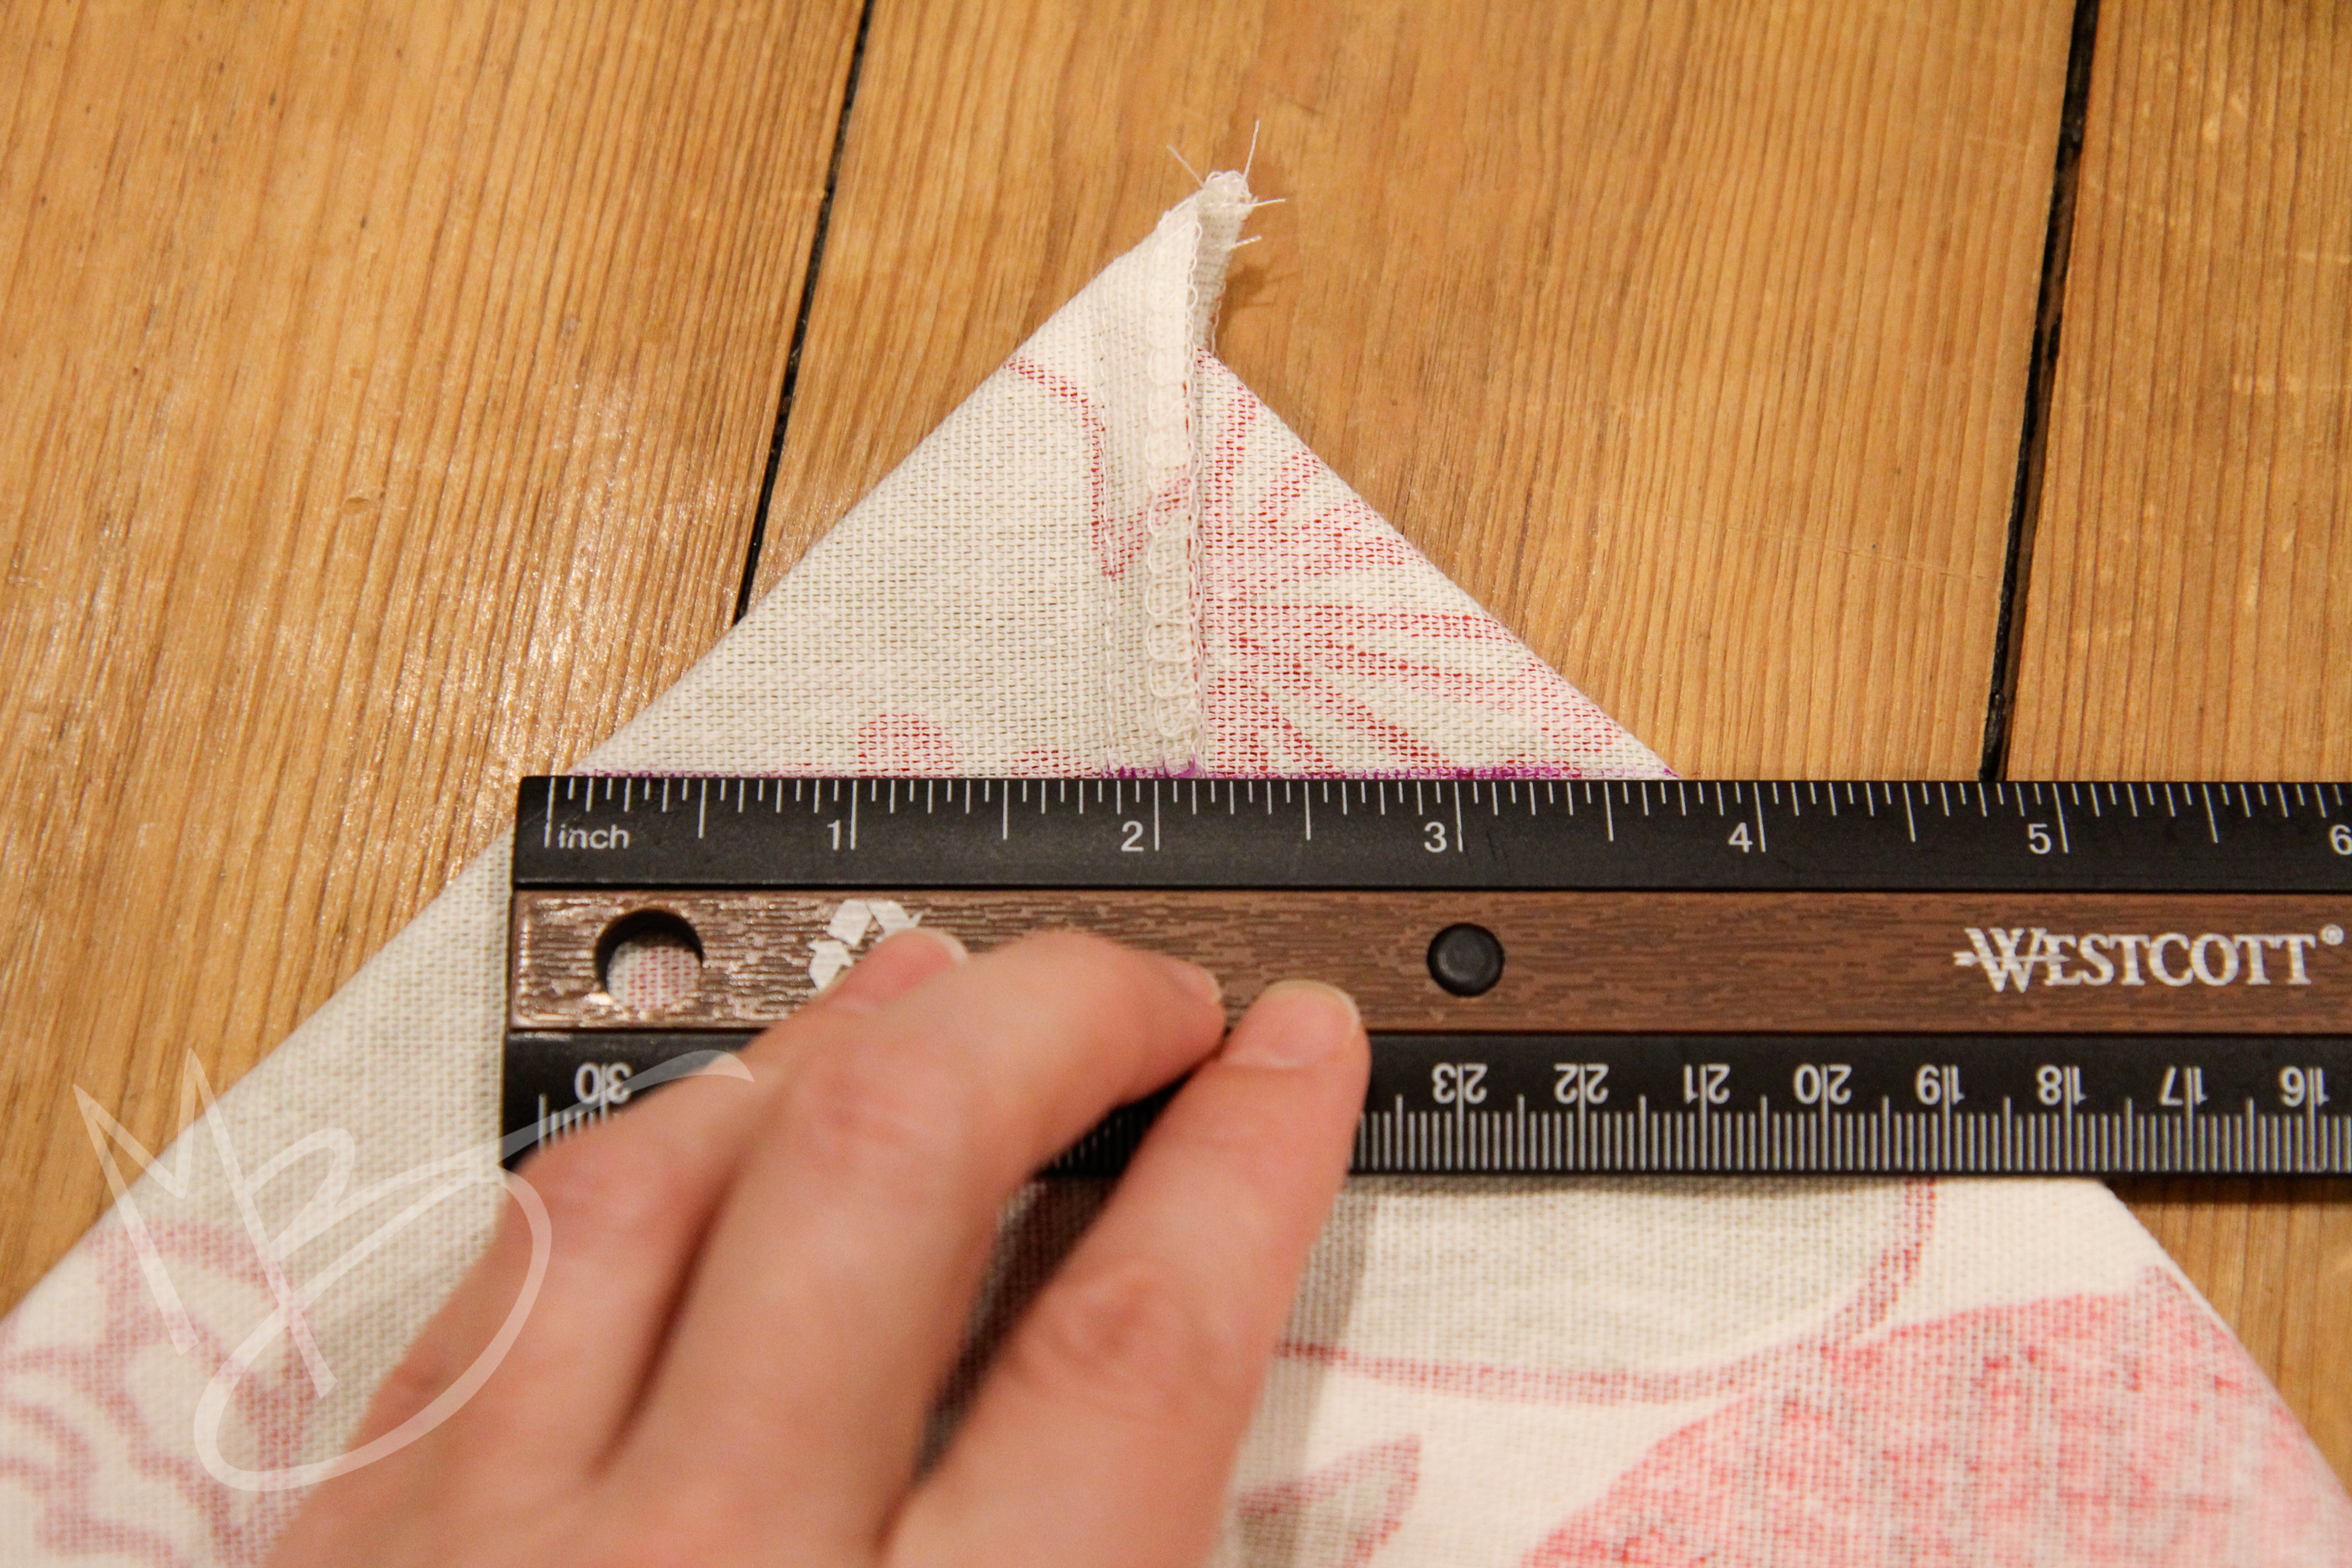
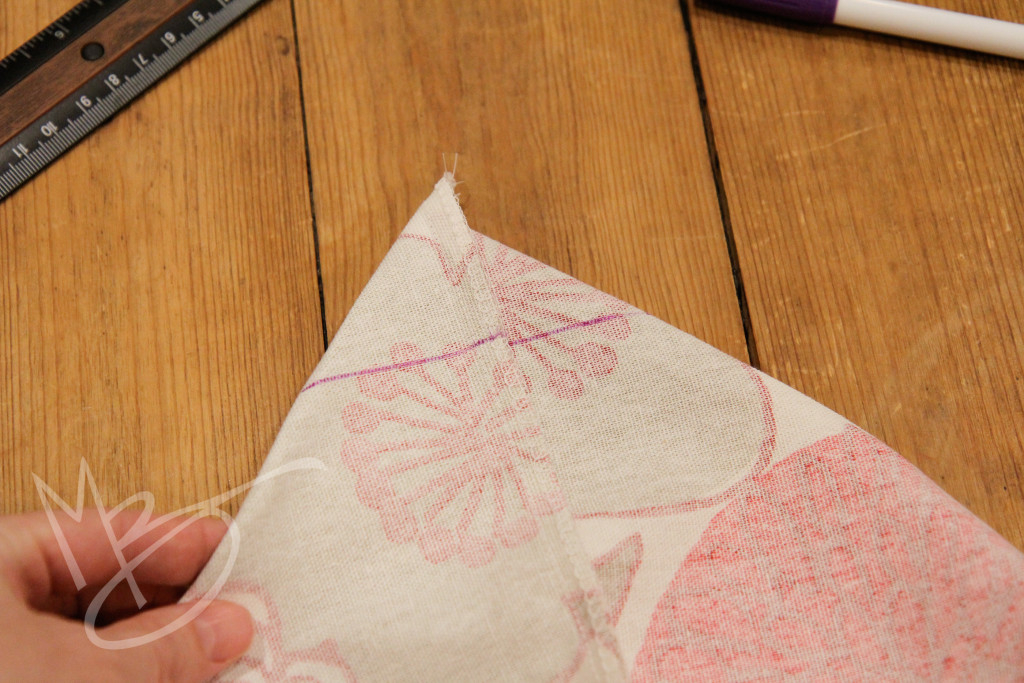
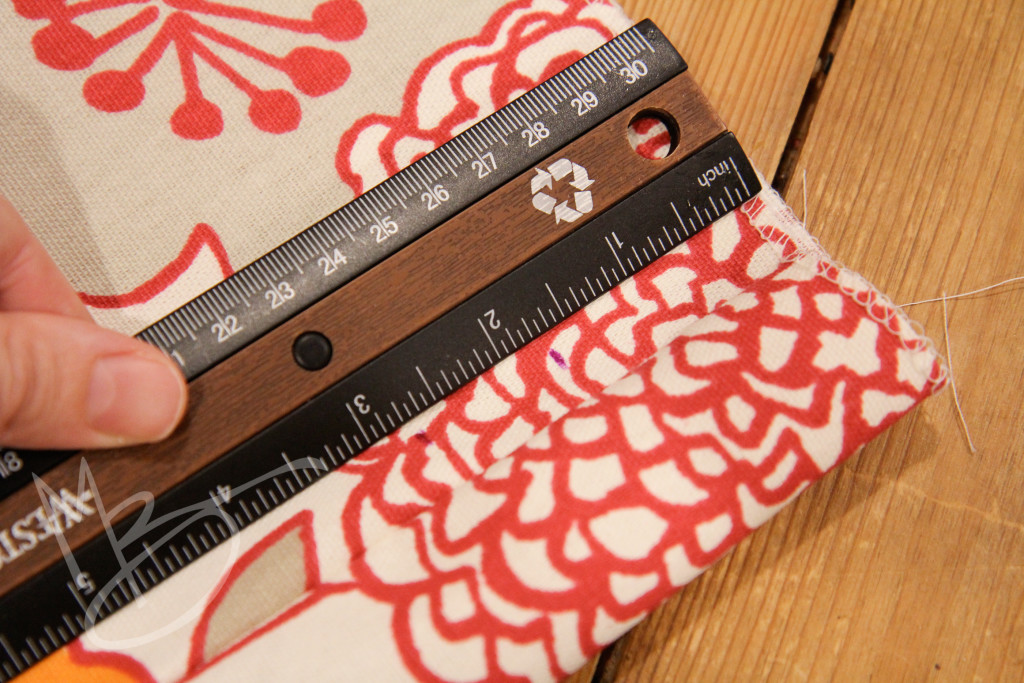
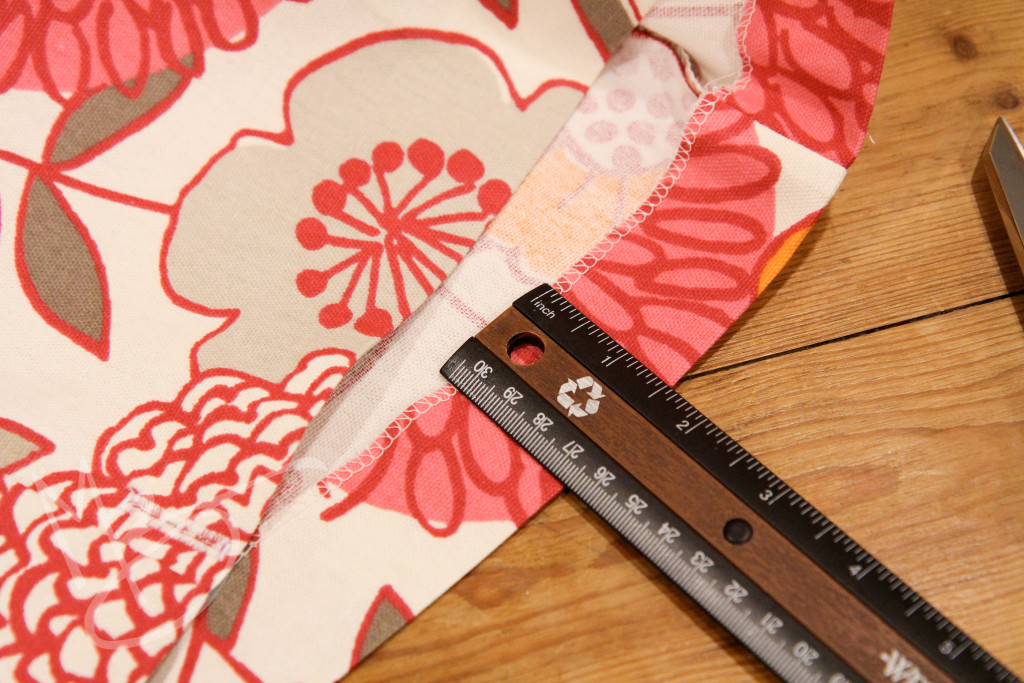
Now we’re going to give the bag a flat bottom.  Lay the bag down and separate the front and back from each other at the corner to make a triangle.  Be sure the side seam and bottom seam are matching (you can feel it through the fabric) so that you have an even triangle.  Then mark a straight line across the corner.  I made mine 3 3/4″.

cinch sack tutorial (30 of 41)

cinch sack tutorial (31 of 41)

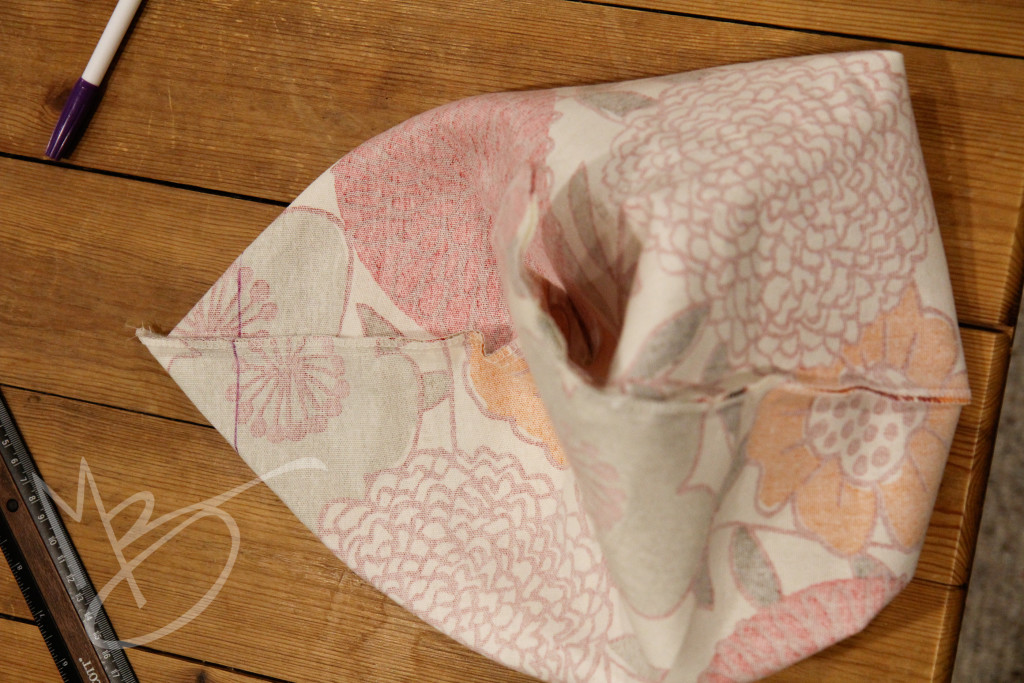
Pin it in place (or hold it very, very carefully) and sew right along that line being careful that the little tabs you sewed on earlier are not caught in the triangle.  Do this on both sides.  The bag should look like it has bunny ears. 🙂

cinch sack tutorial (32 of 41)

cinch sack tutorial (33 of 41)Cut off the extra fabric and serge the edges.

cinch sack tutorial (34 of 41)

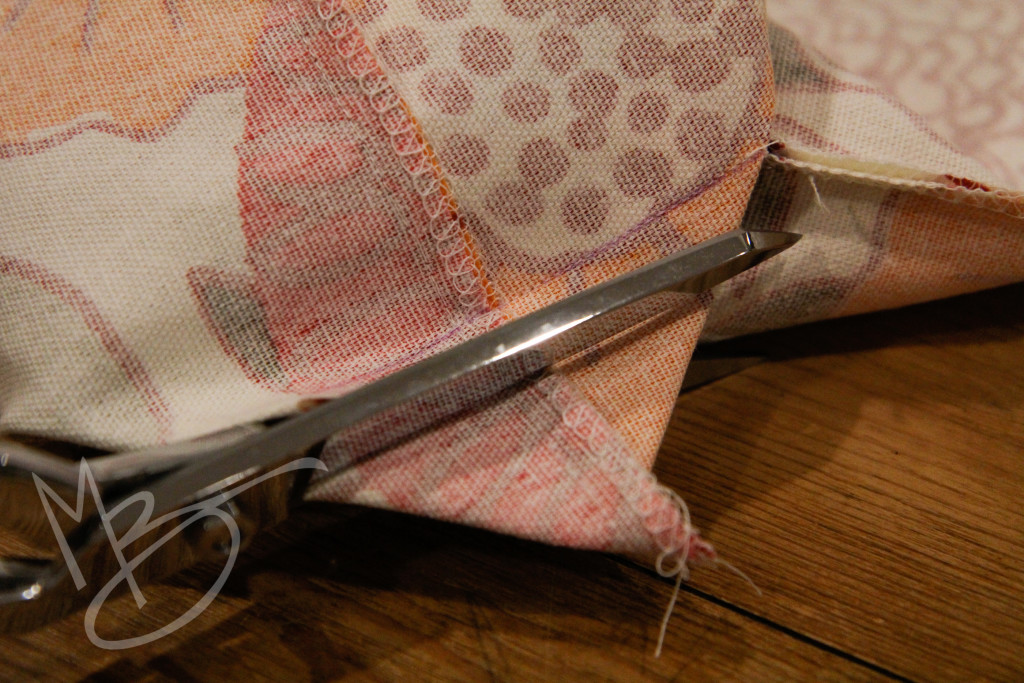
Turn the bag right side out.  Isn’t that cool? We’re almost done.

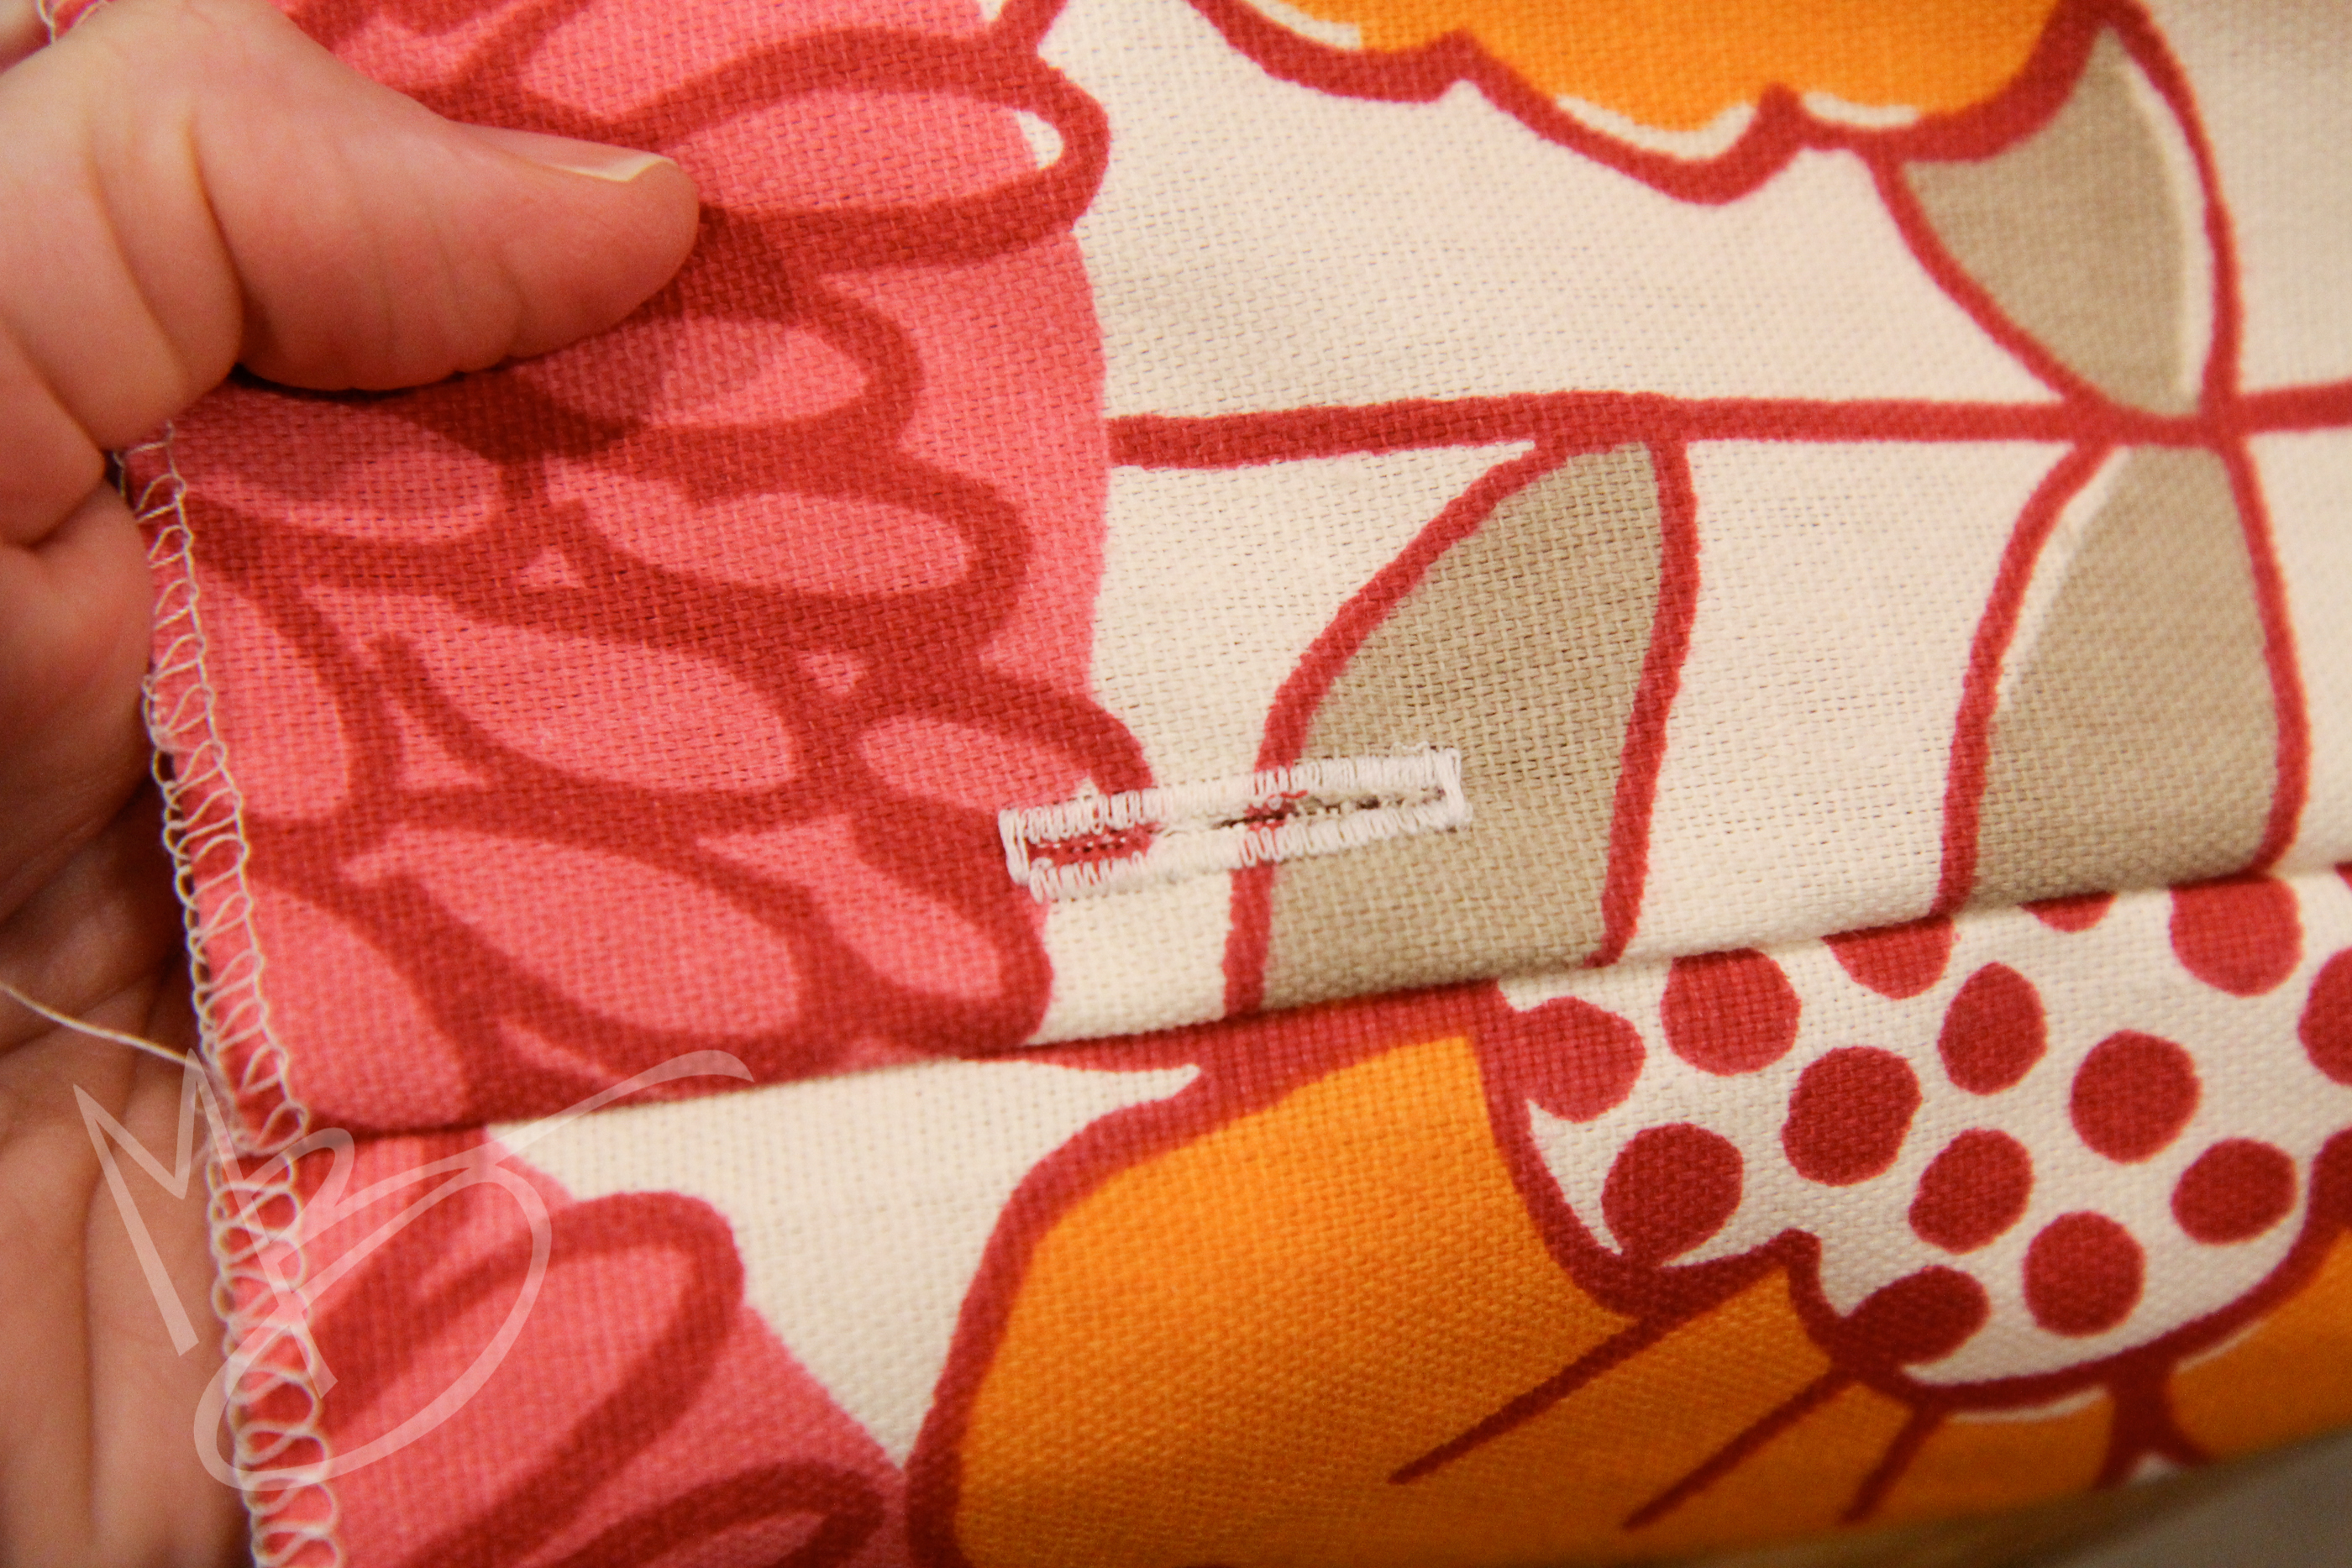
Now sew two button holes on the back piece of fabric as close to the side seam as you can reasonably do.  Make a 1″ button hole starting 1 3/4″ down from the top of the fabric. This will create the openings for the strings to go through the casing.

cinch sack tutorial (35 of 41)


cinch sack tutorial (36 of 41)

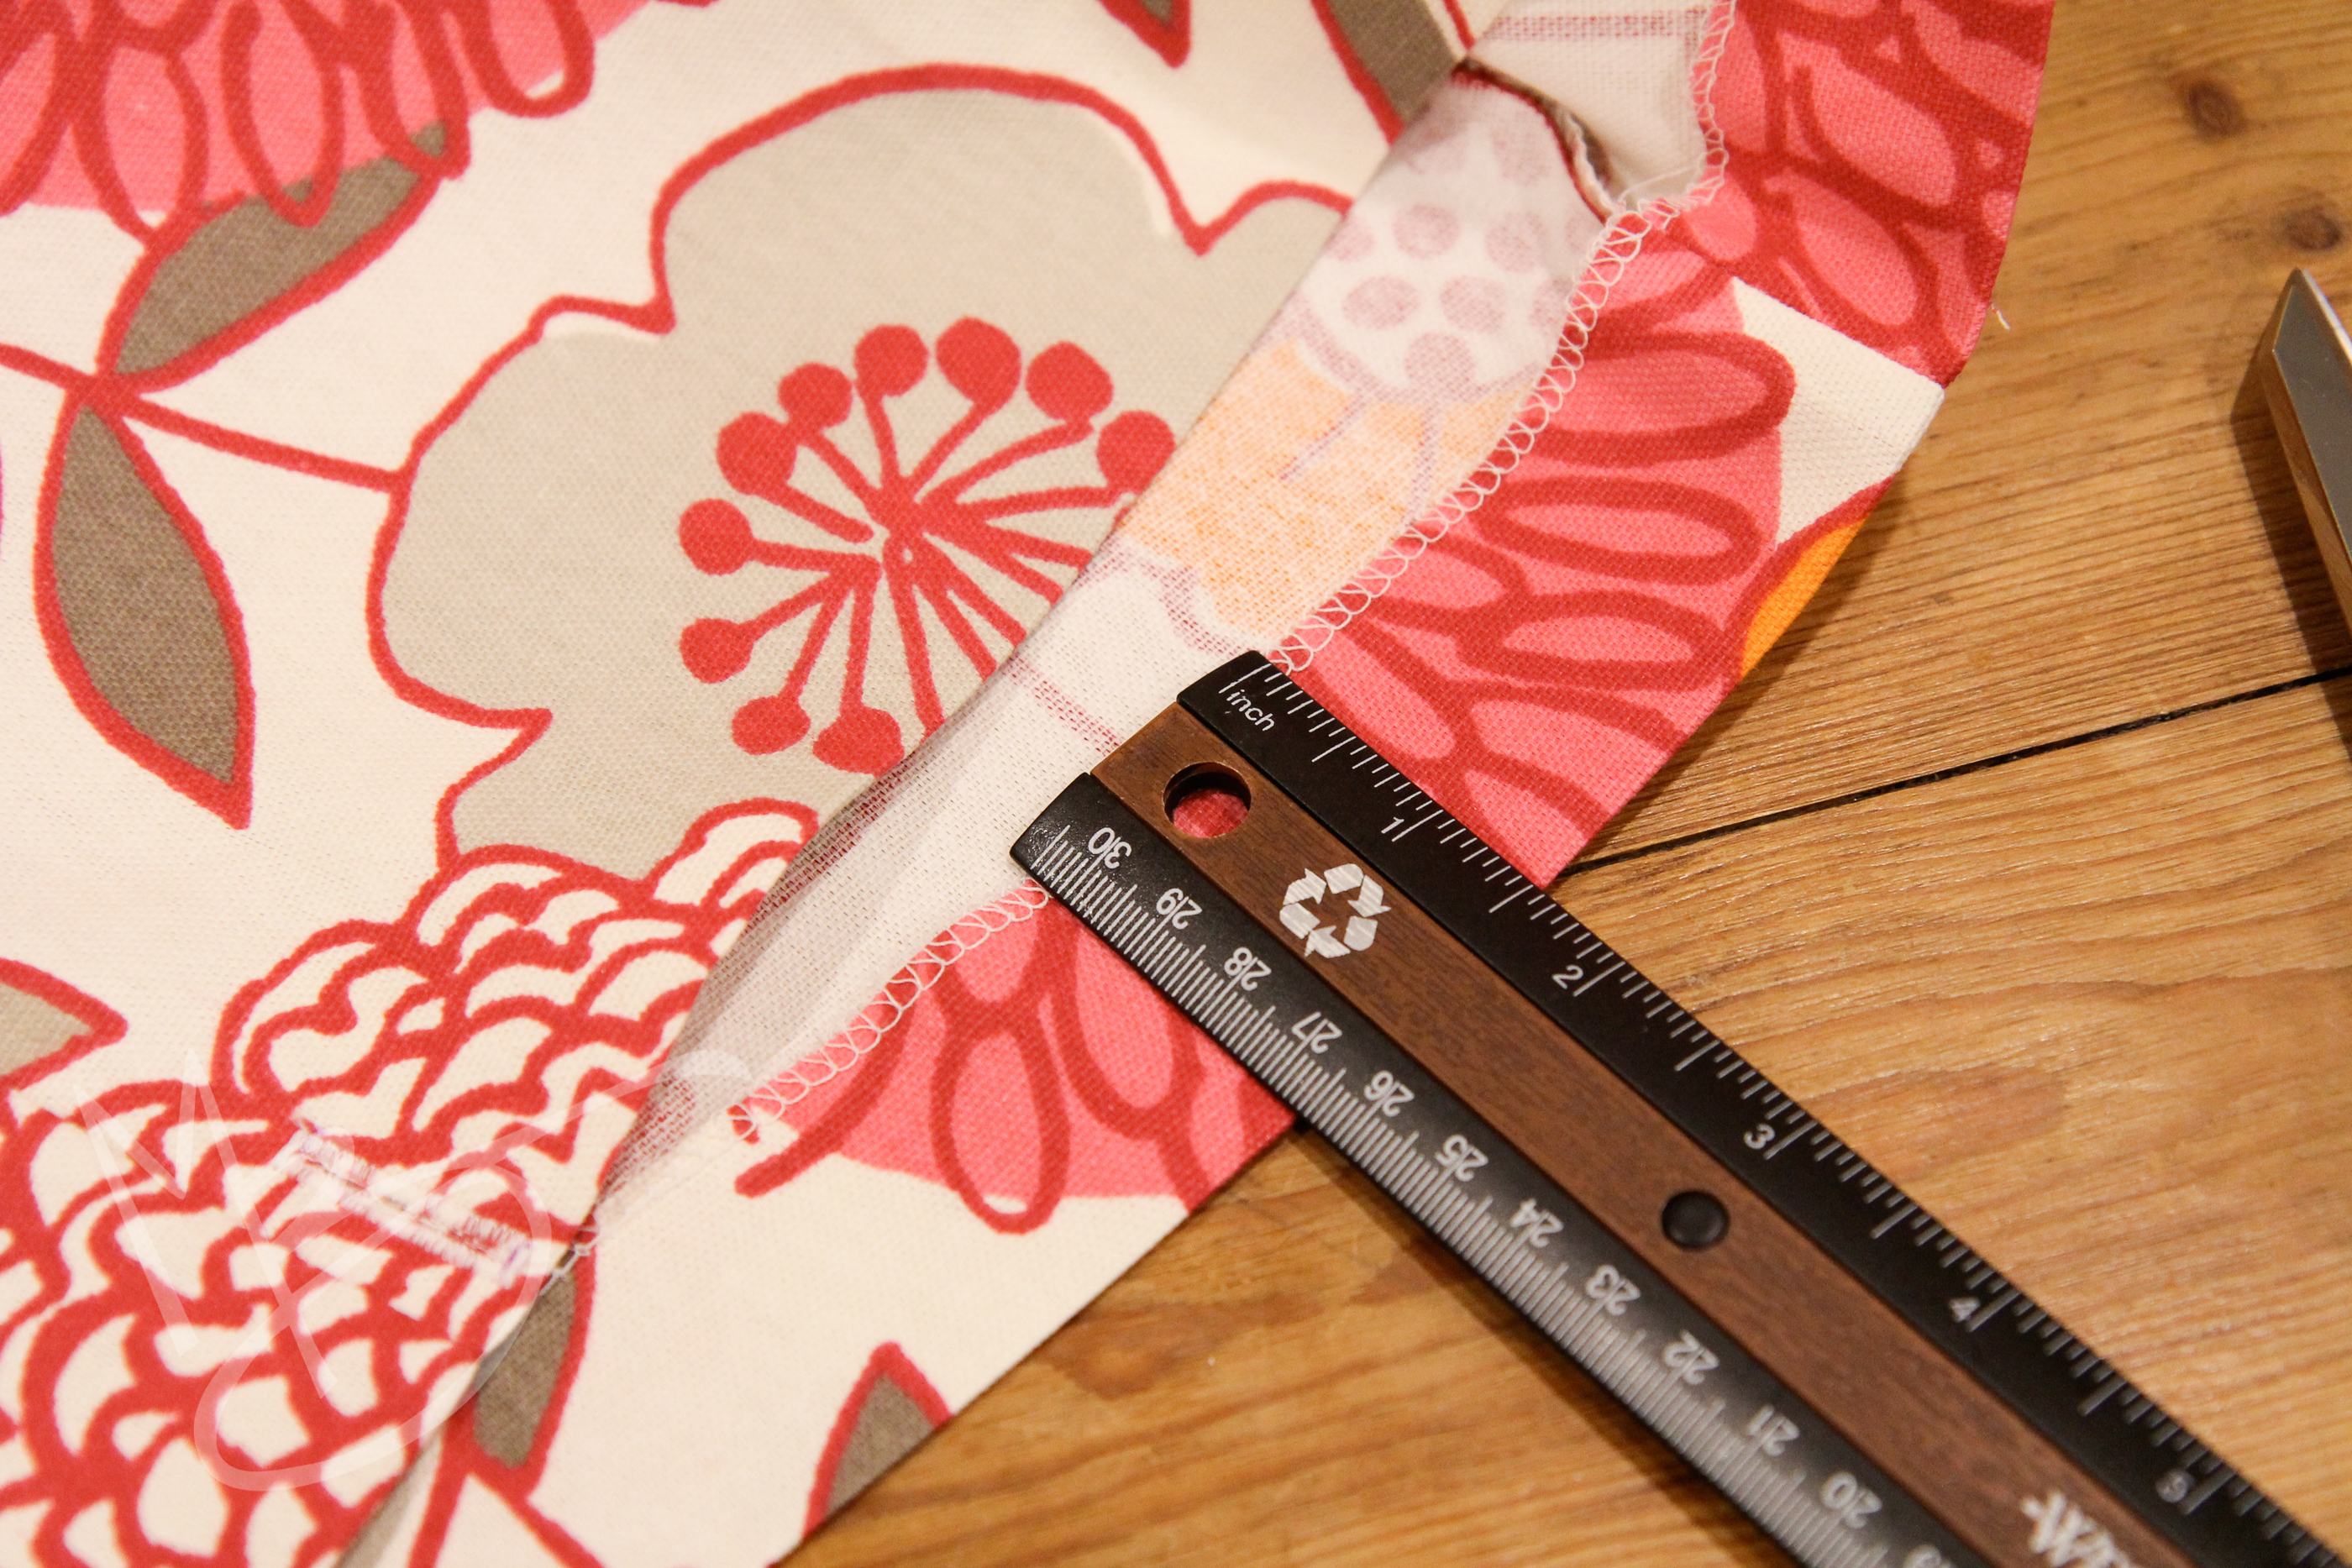
Fold the top edge of the bag down 1 1/2″ and press.  Sew along the edge all the way around the bag.

cinch sack tutorial (37 of 41)

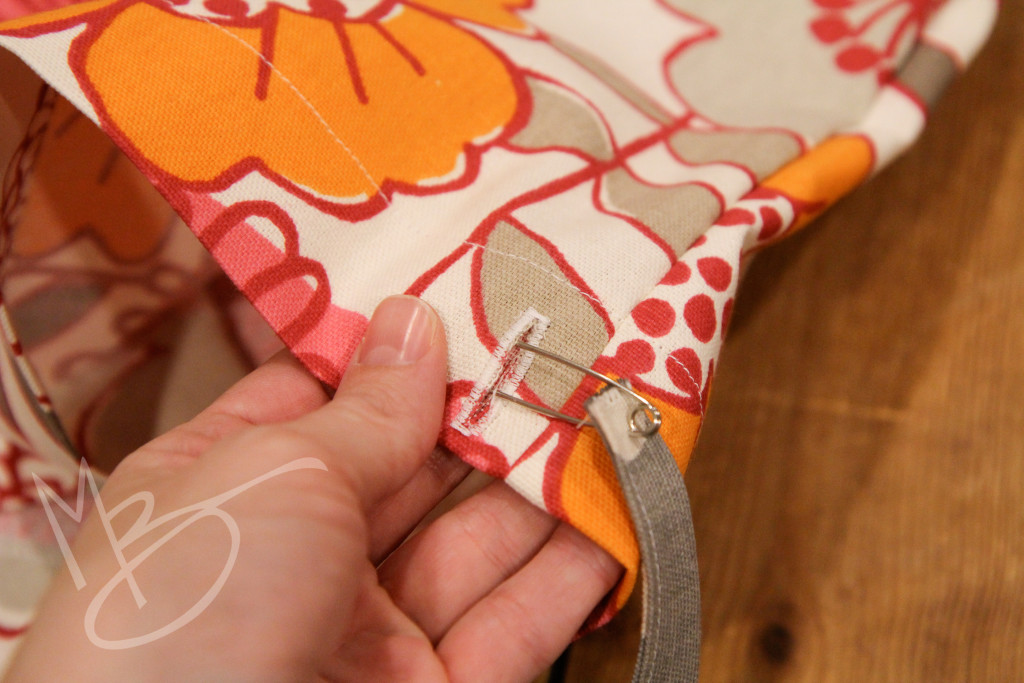
Now you’re ready to thread the strings through.  I used a safety pin, but some of you may have a better tool.  Feed the strap the entire way around the bag, bypassing the buttonhole on the other side and exiting out the button hole you entered.

cinch sack tutorial (38 of 41)

Now repeat the process with the other string using the other buttonhole.  You’ll have to push the first string to the side a bit as you wiggle past that first buttonhole with the second string.

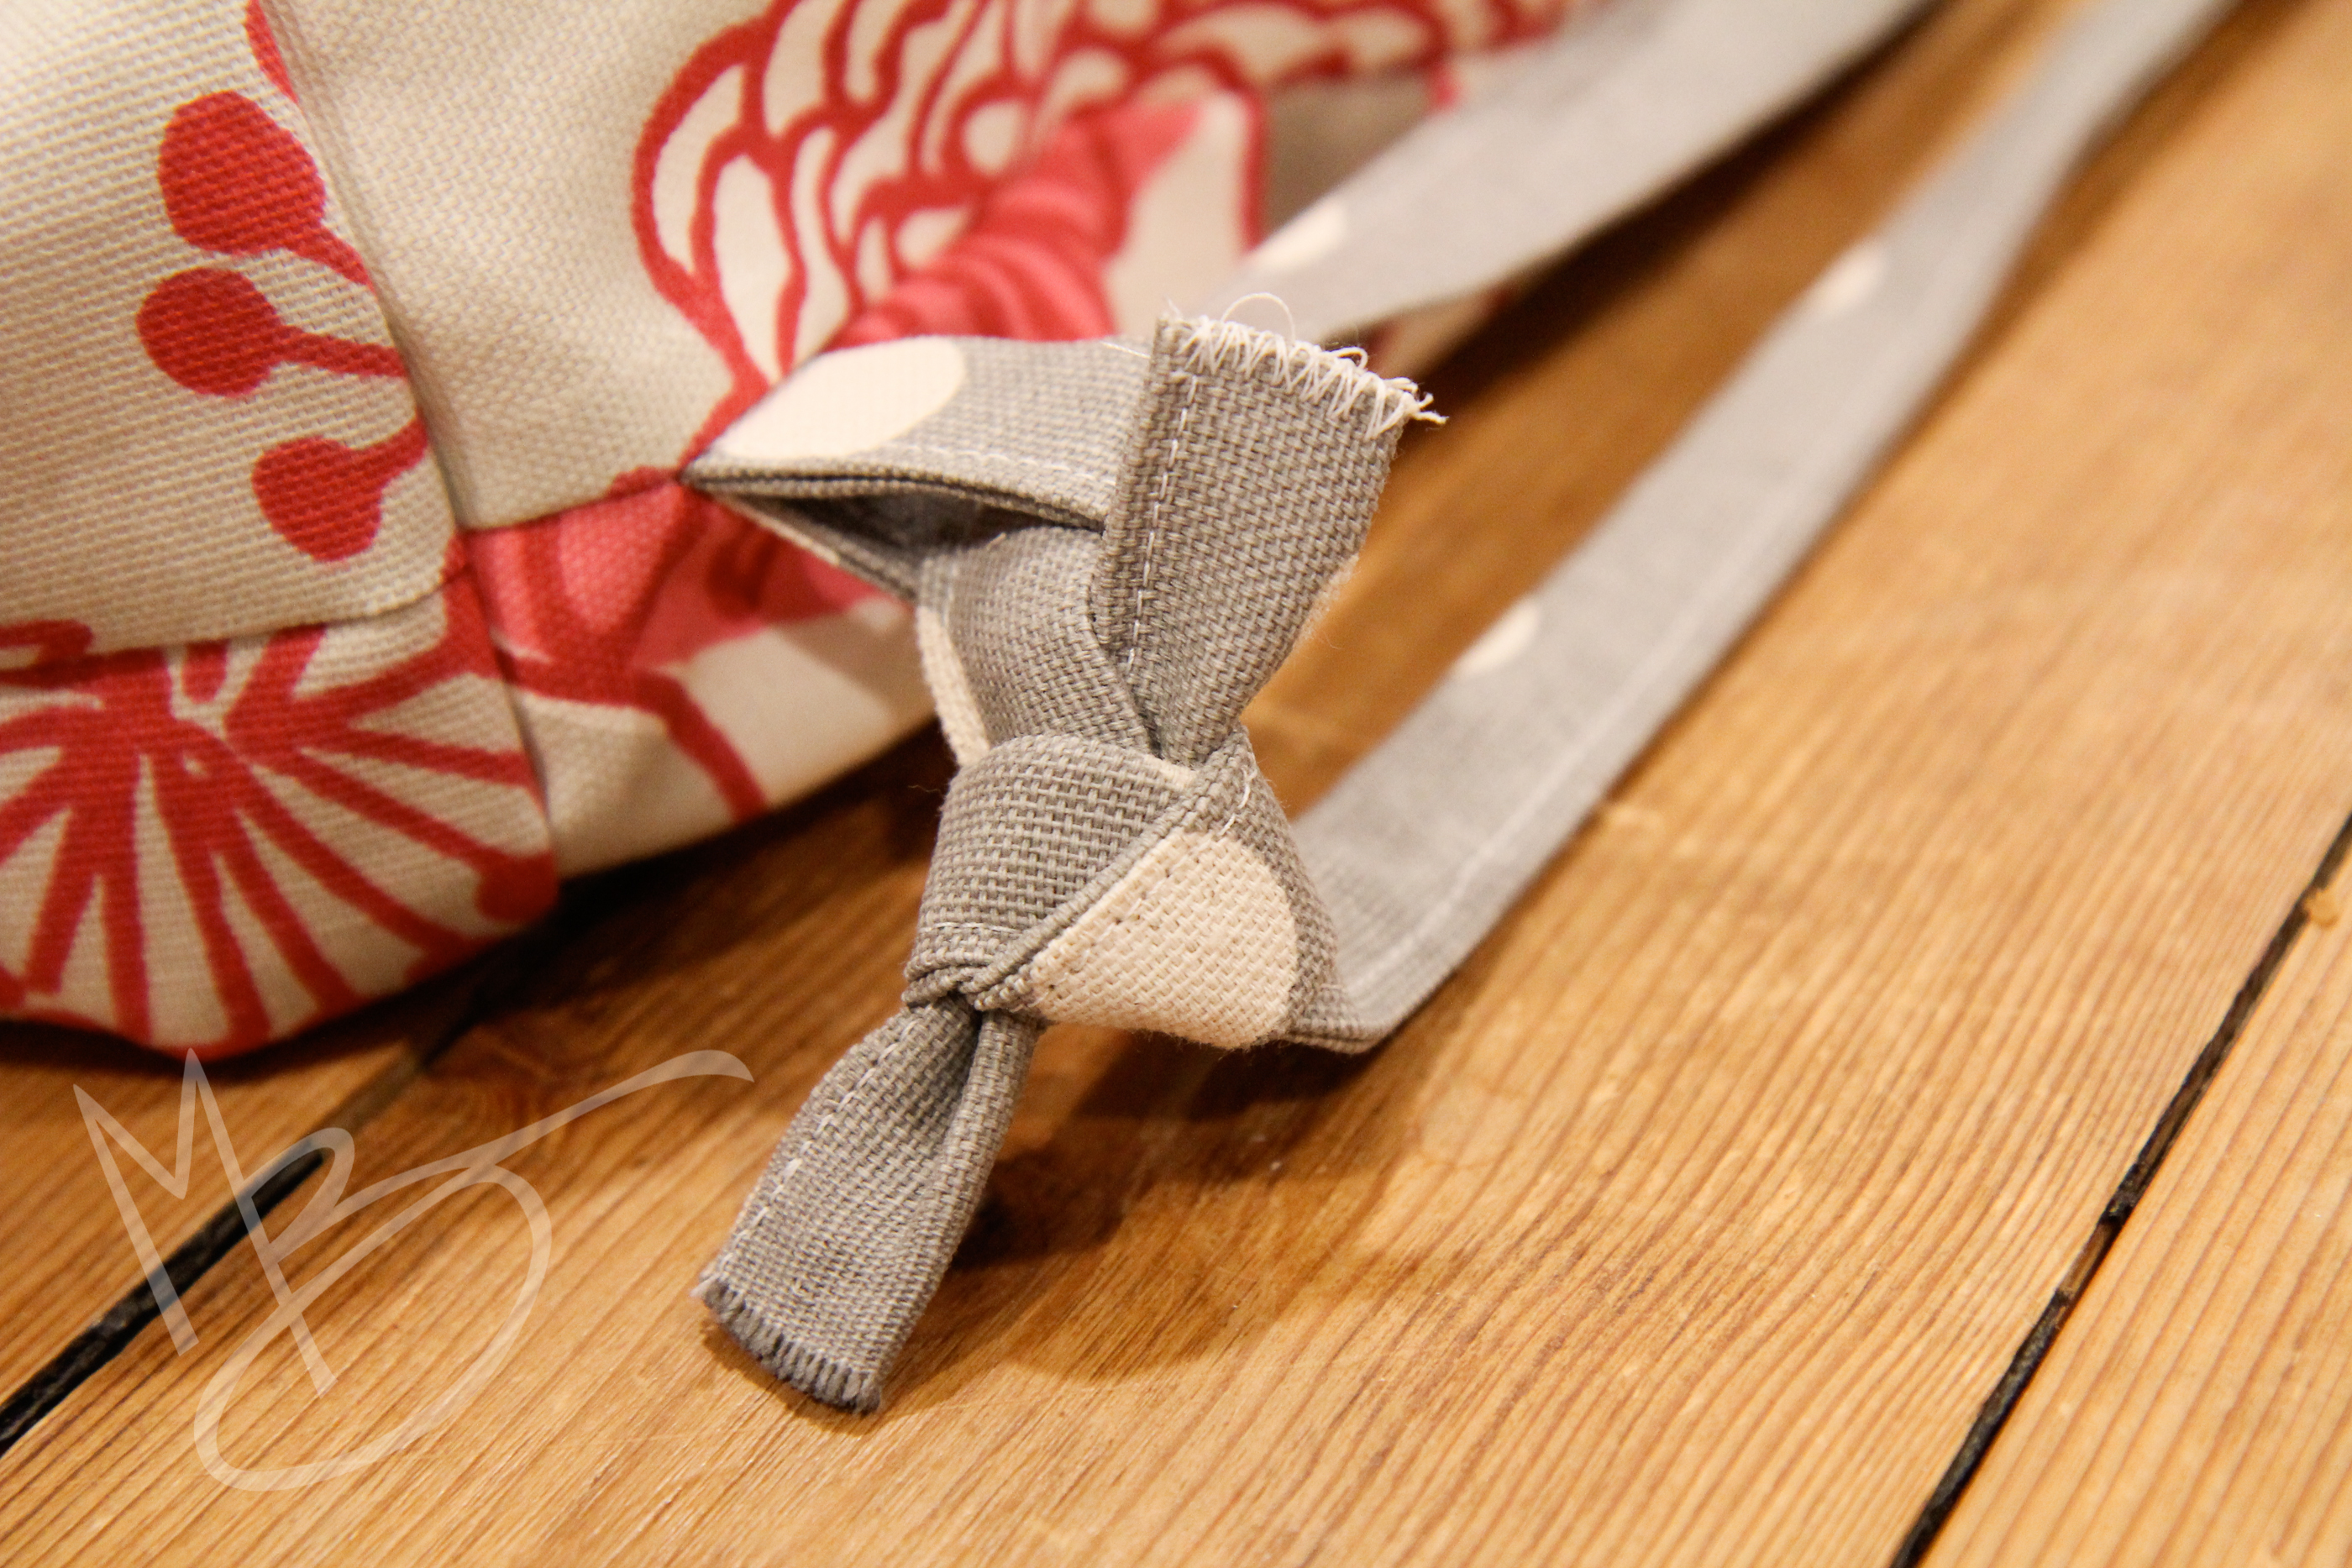
Loop one strap on each side through the tabs at the bottom of the bag and tie a knot.

cinch sack tutorial (39 of 41)

cinch sack tutorial (40 of 41)

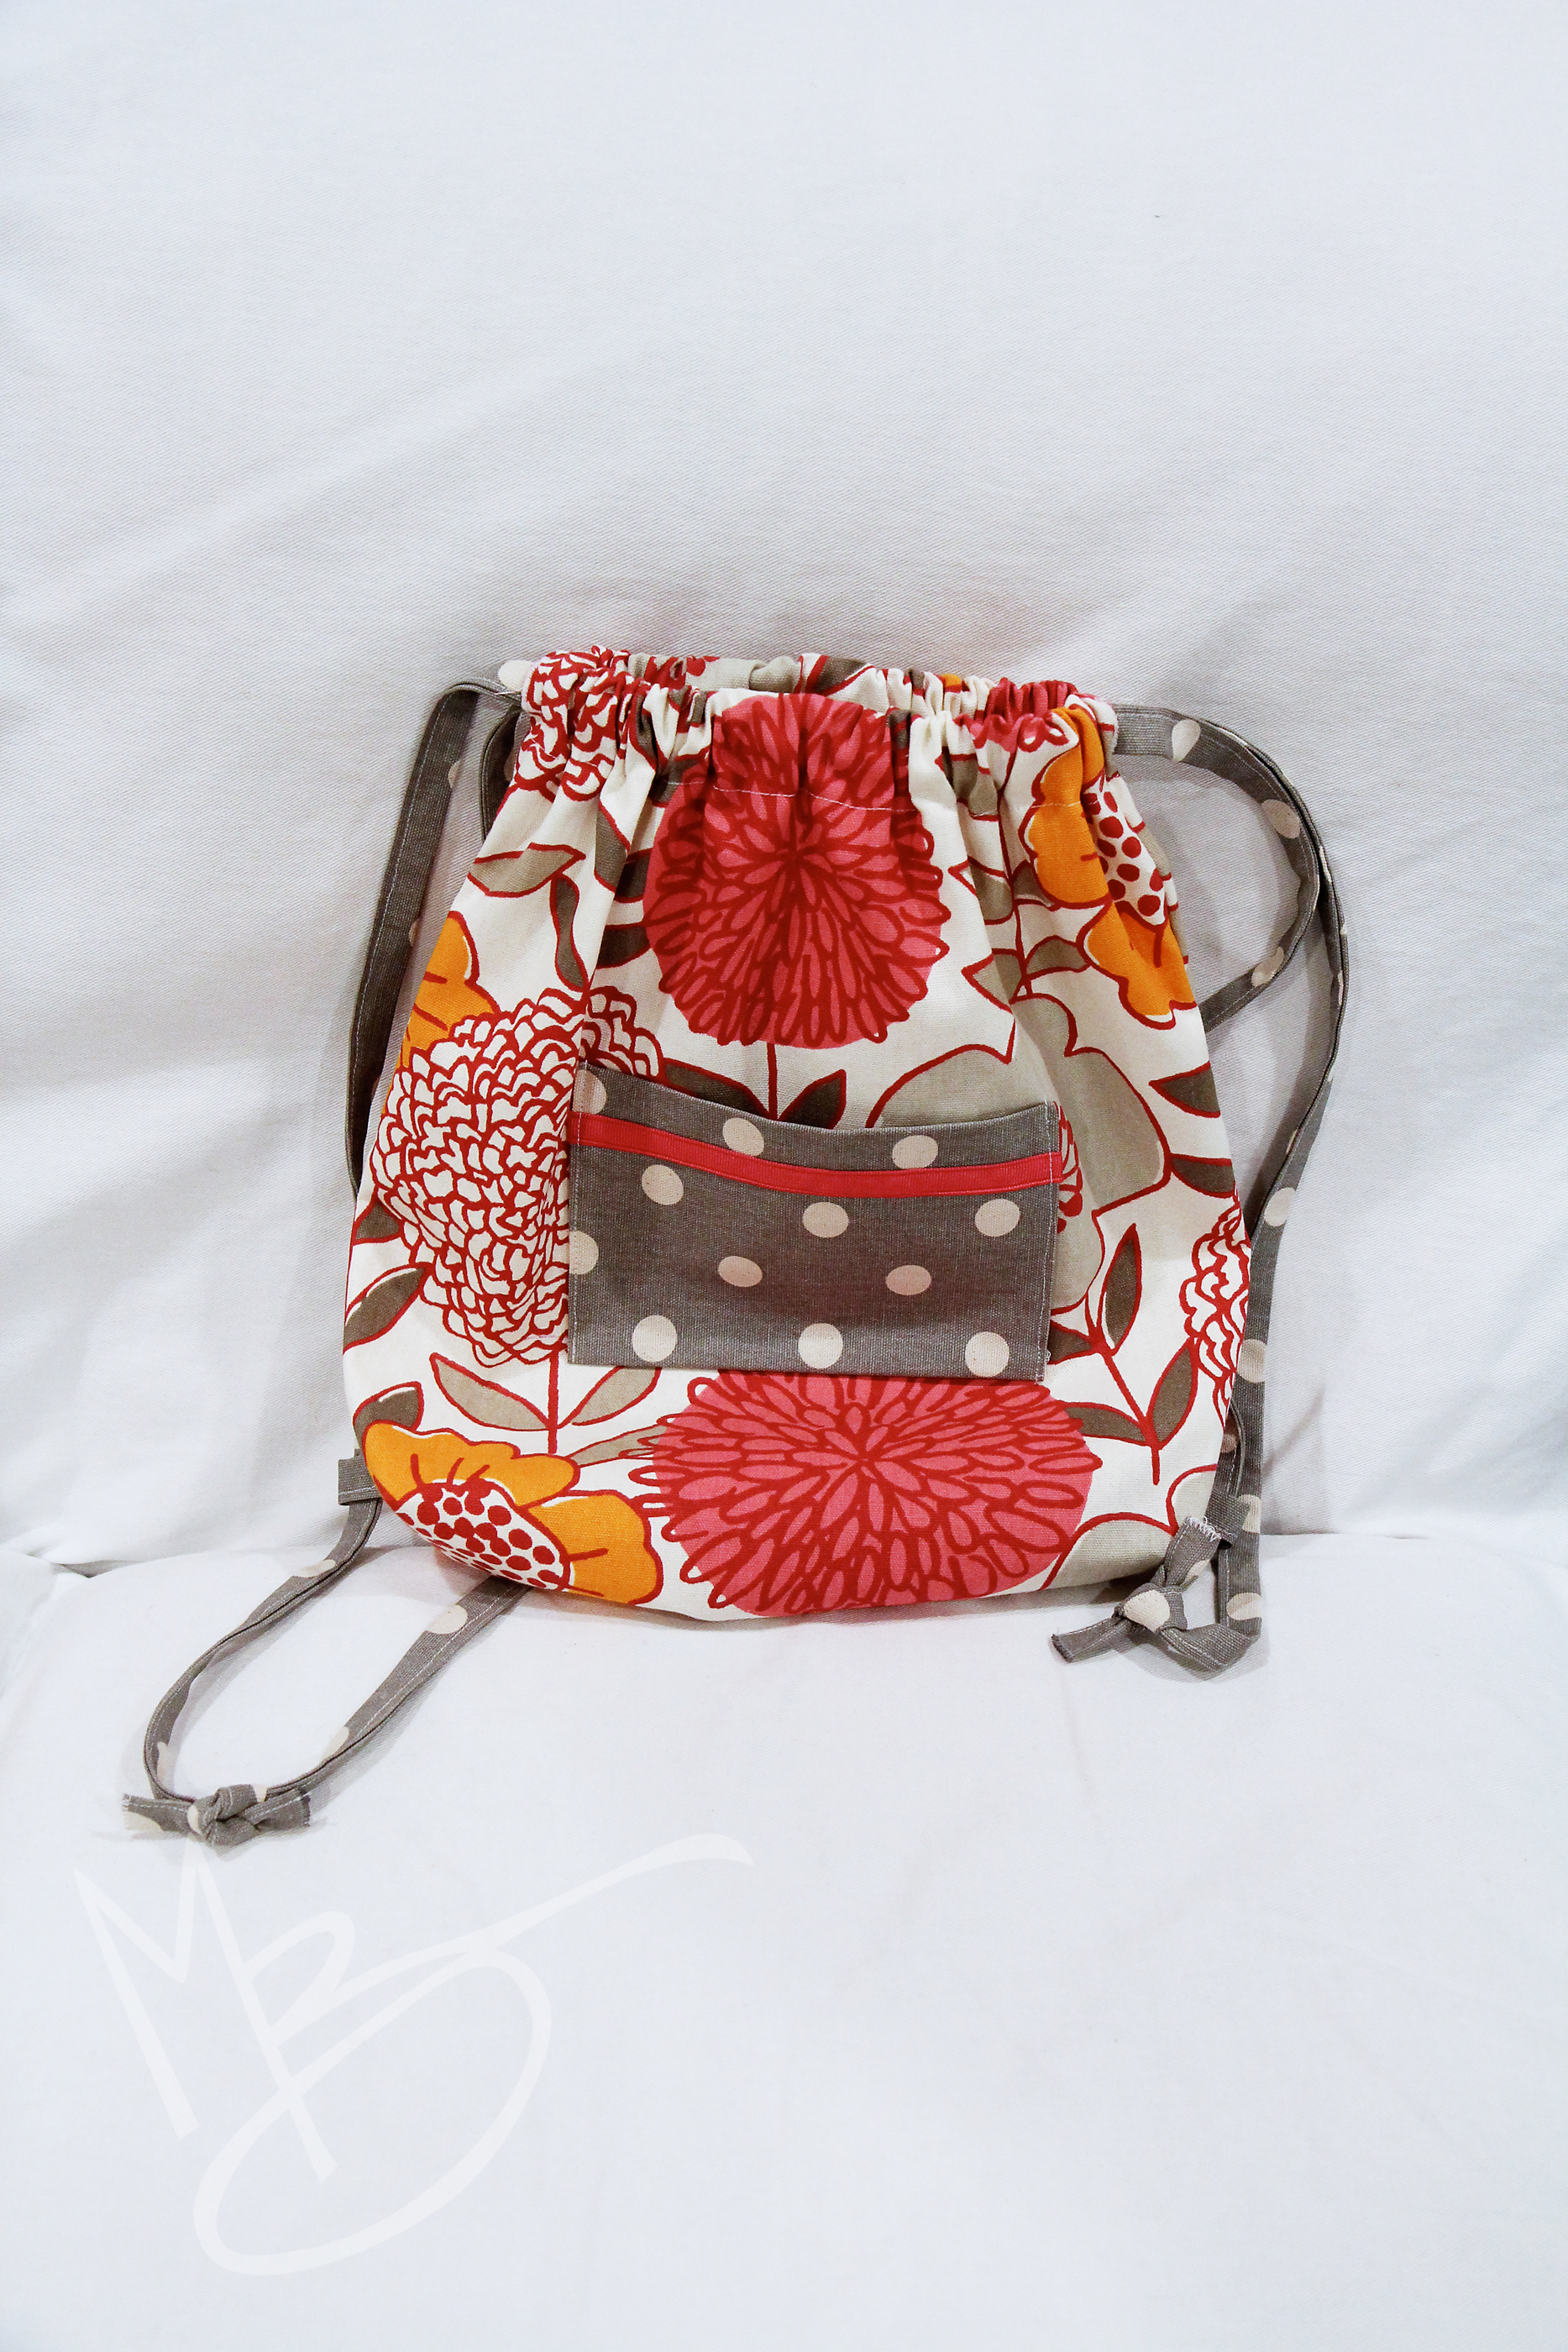
If the strings are too long, you can trim off some excess first.  Just remember that it’s much easier to cut some off than it is to splice another piece back on (how would I know?) so make sure you’re happy with the measurement when the bag is open and cinched. 🙂

And you’re finished!

cinch sack tutorial (42 of 1)

You could use it for school books or a sleepover with friends.  Or maybe you just need something to carry your Bible and journal to the coffeeshop.

cinch sack tutorial (43 of 1)

If you try it I’d love to hear how it went. Even better, you could send me a picture of your finished bag. 🙂


Boy Quotes

In early fall, I’d been hearing dire predictions that 2014-15 will be one of the most harsh winters yet.  So I know it’s often a lot of hype, but everyone seemed to be saying it this year.  According to one article, we could see snowfall as early as the end of September and winter may well last until June of next year.  “Most kids haven’t seen blizzards but by the end of this winter they’ll be very knowledgeable about them.  People shouldn’t wait until the snow starts to buy bread. They should stock up and put it in their freezers.”  Wow. Just wow.  I was telling our winter-loving boys and they were all excited.  I ended with, “In which case, Daddy will probably need to buy me a ticket to Florida at some point.”  Adam promptly said, “Oh, then you’d just be like the prodigal son. You’d get to Florida and the money would just go tick, tick, tick.”

life with boys (18 of 18)

*********************

Liam: A bunch of tomorrows have passed and a bunch of Fridays have passed but not tomorrow and not a week from tomorrow. I think I won’t be dead yet a week from tomorrow.

Me: I hope not!

Liam: I think I’ll be alive to become a grown up …. and then I’ll put away these childish things.

life with boys (1 of 1)

***********************

While working on first grade Math, Liam struggled a little with 5-3=2 and 5-2=3.  I used manipulatives and also explained that this is just like our family.  We have five in our family, so if the parents go away (2) there are three kids still at home.  Or if they would go away, there would just be two (the parents) left at home.  The next day while doing flashcards we got to 5-2.  He squinted a little then said quietly to himself, “Ok, 5 take away the parents…..”

life with boys (5 of 18)

***********************

When the hand soap ran low in the hallway bathroom Liam marched through our bedroom on his way to our bathroom to wash his hands.  “The soap in Zara’s bathroom quit giving birth,” he announced.

***********************

life with boys (7 of 18)

Liam and Adam spent two days with our friends, Keith and Jeanne, while Zara was at Johns Hopkins.  On Sunday, my parents picked them up, brought them to the hospital to see us, and then took them along home to Virginia.  The boys attended their local church school. Fortunately, Liam is doing the same curriculum they are and even though he is ahead of where they are, he was able to do some of his work.  Liam LOVED school so very much.  When he got home he was telling me about it.  Then he got a funny little grin as he talked about his teacher.  “She had a certain voice (he meant accent).”  He stopped to giggle again.  “I can’t get it right.  Taaaaaaast,” (test) he said, in a southern Virginia drawl.

*************************

life with boys (4 of 18)

Whenever we get to a bigger town it is immediately obvious that the boys have forgotten how to act outside of backwoods USA. We were in Winchester and I was constantly worrying they’d get hit because they just bounced out of the vehicle, dragged along behind or ran precariously in front of us.  They’re old enough not to have to stick close as a burr, but goodness, they’ve all but forgotten how to be aware of traffic.  At the next stop when Liam just disappeared behind the van before I was even out of it, I started the normal, “wait, where’s Liam? Tell him to come back here,” frantic kind of mumble jumble.

Adam: “Oh, just stop worrying.”

Me: “This is serious. Do you realize kids have been killed in parking lots?”

Adam quite nonchalantly: “Oh, don’t you hear his jolly voice?”

life with boys (9 of 18)

**************************

The boys have switched career dreams at least once a year during their short lifetime.  Currently, they’re both set on the wild outdoors.  Adam is planning to be a professional fisherman, preferably somewhere way far North.

Liam is having a hard time deciding.  One day he’s going to be a jockey.  The next he’s planning to be a chef and open his own restaurant.  Recently when we had guests he proudly announced, “As soon as I’m thirteen or fourteen I’m going off to college to become a cowboy!

life with boys (2 of 1)

*****************************

We were in the card aisle looking for a birthday card for Grandpa. “How old is he?” asked Liam.

“Sixty-eight.”

Liam: “Oh, so you’re older than he is?”

“Um, no.”

Liam: “oh, so you’re not in your seventies?”

*********************************

Liam loooooves to read.  He’s delving into chapter books and his lips move as he sounds out the words. I love seeing him so intent on reading that he is willing to work hard to read an interesting story.  I didn’t realize how much effort it takes though until I would ask him to do something.  He’d put his finger on his book to keep his place and ask hopefully, “Can I wait for a period?”

*******************************

Another day when I was grading a section of his book that required yes and no answers I mentioned that he had gotten one wrong. A yes that should have been a no.  “YES!” he said excitedly. “I always cheer for the no’s and now there are more of them.”

******************************

The highlight of the session at camp is a craft auction where boys and staff alike are making hand-crafted items to be sold.  Adam and Liam got in on the fun.  Liam sewed a pillow with some help from me and David helped Adam make a rather complicated wren house.  I got wind that kids might be introducing their crafts so I started coaching Adam since there will probably be well over a hundred attendees and I hoped to eliminate some stage fright in the event he did get a chance to talk.  You could say, “My dad helped me make this cool bird house …”

Adam interrupting: “Um, cool? That’s propaganda.  I’m not sure I want to use testimonial propaganda about my craft.”

Whatever.  I think he can probably come up with his own speech.


WFMW: A Gift Idea for Men

Do you love giving gifts as much as I do?

There is this strange phenomenon that happens though.  I’ll see something while I’m shopping or have the greatest idea pop into my head at random times throughout the year.  Then sometimes, when birthdays and Christmas roll around, I suddenly can.not.think.of.them.at.all.  It’s so wierd.  Anyhow, I’ve started keeping a running list for David and the boys and I should do it for more people, too.  Inspiration is the best when it happens on its own.

So, in case you need a great idea to add to your running list, here is one of my favorites!

gift idea for men (2 of 2)

A Simple Leather Belt.

These belts are hand-crafted from genuine leather.

They’re custom made so you can choose belt buckles, thickness of the leather, the shape of the end of the belt, and how many holes you’d like.  One? Talk about a belt made just for you.

Turn around time is fast and the packaging? Oh, my.  The packaging!

gift idea for men (1 of 2)

This belt is like, a belt.  Not like other belts that are pretending to be belts.  When you hold this belt, you know this is what a belt is supposed to feel like.

I had no idea belts could be so cool until I met this one.

I bet somebody in your life would like to meet one, too!


WFMW: Choosing Paint Colors

I’ve been having a blast helping a friend choose paint colors for her house and just last week had someone else message me for advice on the same subject.  I’m far from an expert, but when you do it a lot, you pick up a few helpful tips along the way. Best of all, you start to develop an eye.  A friend of David’s is a professional painter.  I listened in awe as he described one client who gets her house repainted every year before Christmas.  She can flip through the paint color stack one time and say, “this one and this one and this one” and every time it looks perfect.  I’m convinced our only connection must go all the way back to Eve. Then again, I kind of like the obsessing process.

I thought it might be a fun WFMW subject then you guys can chime in with your own advice and preferences.  After all, we all know that painting and decor has as much to do with personal style and taste as it does with anything else.  It goes without saying that everything here is opinion and biased by own experiences. 🙂

Let’s talk paint, first.  I am a huge fan of Benjamin Moore paint.  I love that it is thick, covers well, doesn’t splatter, and best of all, has very little odor.  Most paints leave me eating almost as much as I paint (food, not paint, just in case you were worried) …. I have no idea what they put in those paint fumes, but three strokes in, I’m starving.  Ben Moore? No such problem.  I usually buy the eggshell finish for walls and semi gloss for trim and have not had any trouble with washing walls even though they recommend going to a satin finish for bathrooms and kids bedrooms.  I’ll take a little wear and tear over gloss on the walls, and so far we’ve not had any issues.  The closest knock off I’ve found to Ben Moore is the Behr paint at Home Depot.  It’s thinner, has a little more smell, but it’s pretty similar.  I know lots of people like Sherwin Williams and I have no doubt it’s a good product.  But I’d have to park my painting project next to the grocery store, just saying.

And now, the fun part! I could just about get giddy in the paint chip aisle.  Seriously, if David ever wants to convince me to build another house, he’d be very wise to suggest it while we’re standing in that aisle.  I lose my head when I’m surrounded by all those possibilities and think anything would be fun.

But it can also be overwhelming, especially if you’re looking at a big project.  When we were building our house, I found it helpful to take my known (kitchen cabinets) and work around that.  You  can choose lots of colors or shades of colors, but it’s nice if they flow nicely.  You won’t be jolted walking into a room with lots of color if it relates well to the color next door.  The paint expert where we bought our paint showed me how to line the color chips up so we could see if they were all similarly warm or cool shades.  For example, a cool yellow won’t look as good next to warm tones. Don’t forget the trim color when you’re lining things up! Once I know the colors all belong together, I like to hold them so that I visualize the amounts of each color.  A teeny bit of the white, a little more of my secondary color, and the whole chip of the main color.

Here’s my lineup for the basement.  {You can see what it looks like on the walls here.  Well, kind of.  It’s pretty hard to take accurate color pictures in a basement.  The bathroom is a little richer in real life and the navy might be a little darker, but it’s pretty close.}  I loved this greige color for the main part.  I wanted something just a little bit warmer than grey since it was a basement, but I gravitate toward gray more than tan.  This color was the perfect in-between.

choosing paint colors (1 of 1)

Color names from L-R: van deucen blue HC-156, collingwood 859, white dove OC-17, ocean air 2123-50

David and I gravitate toward painted trim, but we prefer a white that is a little warmer, yet still looks crisp white.  Benjamin Moore’s white dove is perfect for us.  I always keep a chip of that so I can make sure I’m staying in the same tones.  If you prefer a crisper white, Decorator White may be what you’re looking for.

If you see a color you like, ask! It helps so much to see a color on the wall.  Even if you don’t use the same color, it can help you find a color that is similar with perhaps a tiny bit more of another tone you’re looking for.  I loved that for a long time Pottery Barn named the wall colors in their catalogs.  It was so much easier to visualize a room when you saw a picture of a room done in that color.  I think they’ve switched to Sherwin William colors …or at least they did the last time I checked.  Sadly, my catalogs have quit coming.  Probably because it’s been awhile since I made a purchase.  They were one of my favorite pieces in the mail just for the inspiration! I kind of think I could live in their stores!

Sometimes it’s worth the money to buy a sample! A wall of color can look so different from a 2 inch chip! After you do it for awhile, you’ll get better at seeing undertones.  I’m pretty sure David can spot pink undertones a half a mile away and I’m pretty sure he has an allergic reaction to lavender undertones in grays. 🙂 He likes pink.  In a girls room.  Unrecognized pink undertones that get louder on the wall in our room? Not so much. 🙂 We had a bit of a learning curve in Virginia until I figured out how to hold the color against other colors to see different tones pop out.

Don’t be afraid of color whether it’s in large amounts or small pops.  Just think about what you want ahead of time and where you want the color.  My personal rule is, “you can always paint it again.” 🙂 Things like flooring and furniture will likely hang out in your house for a long time.  But it’s not that hard to repaint a few walls (unless you’ve got a second story house with an open foyer) and you can change the look of the room after awhile if you don’t like it.  If the paint store isn’t too far away, I like to order enough paint for the first coat.  If the color only needs to be tweaked a tiny bit, you can sometimes get away with just one coat of the new color.

I still think grays are tricky.  The gray in our living room has far more blue essence on the wall than it does on the chip.  In fact, most people don’t believe me when I tell them that’s the color.  I like the color. It just surprises me.  But at least it didn’t shine lavender. 😉 Which leads me to the next tip.  Check the color in the room you’re planning to paint.  Not outside, and definitely not in the store under the fluorescent lights.  A room that has lots of light will not only look lighter, it may bring out hues you wouldn’t notice otherwise. A small room with few windows will appear darker and you might want to choose the same color in a lighter shade.  So grab those color chips and a good drink and sit in the room you’re going to paint.

You’ve probably heard all the old tips about light colors in small rooms and dark colors in big rooms.  They’re true.  But I think more importantly, you should think about how you want the rooms to feel.  Our house in Virginia had big rooms with high ceilings so I wanted warm colors. A rich gold, yellow in the kitchen that made you think of big, lazy breakfasts (even if they only happened Saturday mornings), a rich grown up blue in the living room, and a dark, red in a small bathroom that made the white towels and shower curtain look fresh and clean. It was warm and inviting.

Our house in Maryland is smaller with typical eight foot ceilings and the sun seems to hide a lot.  Plus, my mental capacity gets maxed out so much I found I craved white space. I chose a much more neutral, light color scheme and even painted some rooms a warm white, barely warmer than the trim color.  Surprisingly, it’s perfect!  I love the way I can add color pops in small accents. It’s easy to change the feel of the room with just a few things and seasonal decor really pops!  I love that it looks restful, clean, and inviting.

You can see the colors in our main floor sprinkled throughout all of our pictures.  Here’s the main floor line up. I wasn’t lying when I said I stayed very, very neutral.  The only wild child on the main floor is the front door. Zara’s room has pink in it, now, but I have no color chip because I mixed white with the pink color I bought. 🙂

image

From back to front: Ominous Cloud 5044 (this is a Clark and Kensington paint) used in the master bedroom, sea pearl OC-19 used on the kitchen walls and the bathroom walls and the base coat for Zara’s room, stonington gray HC-170 in our living room, and of course the white dove for the trim.

I think this is what is the most fun about creating a space.  Seeing the ways it evolves to hold it’s own personality.  It’s also why I love to visit other people’s homes and enjoy their tastes and beauty.  Our homes are really such a beautiful extension of ourselves and a tangible way we can share with others.

I’d love to hear what goes through your mind when you choose paint colors? Do you get your inspiration from colors you love in other places like the sparkling blues and sandy tans of the ocean or burnt rust and gold as the warm afternoon sun shines through red maple leaves? Or do you automatically think about the colors you love most in your closet?  Do you gravitate toward lots of color or neutrals? But even more, I’d love to hear if the process is fun for you or gives you a bellyache or does both. 🙂 And if you’ve never had a chance to paint, what colors do you dream of painting? Maybe your color scheme will inspire someone else!  Happy Wednesday!


Basement Living

Remember that finishing out the basement project I moaned and squealed about by turns, oh, about a year ago? Well, I’ve been realizing I never posted any finished pictures.  By now you’ve probably seen snippets through the snapshots of our life, but I thought it would be fun to post a few room shots.  Especially for my sister in law who helped paint, but never got to see the finished product.

basement remodel (16 of 11)

I love, love, love this space.  It’s one of those places that you kind of visualize in your mind and then when you’re finished it’s even better than you thought it would be.  I especially love that for a basement, it is so open to the outside.  I love the storage (Can a house ever have too many closets? I thought not.). I love that I don’t have to run nearly so far and not through a freezing cold basement to do laundry.  I love that we can create a separate space for guests.  I love that we have a separate space to do school.

basement remodel (12 of 11)

So, here it is.  The basement was roughly framed already when we moved in.  Well, really, there was just a bedroom / closet framed.  Thanks to a suggestion from Chief Brian, David re-worked the existing openings so that you could enter the bedroom immediately when you go down the steps instead of circling the entire basement.  Best improvement of the plan by a long shot.  David also added a second doorway which cuts into the wall space a lot, but makes for direct access to the bathroom.  And he added a bathroom, a storage room with lots of finished shelves, a closet in the hallway, and a laundry closet right by the table where we do school.

basement remodel (9 of 11)

basement remodel (3 of 18)

basement remodel (5 of 18)

basement remodel (4 of 18)

The owner of the house preferred drop ceiling for easy access to ductwork and pipes, so David did drop ceiling everywhere it covered lines and drywalled the rest.  I love that it gives us higher ceilings than the typical drop ceiling everywhere and also that it defines the main room as two separate areas.

basement remodel (15 of 11)

basement remodel (13 of 11)

basement remodel (11 of 11)

The boys love their room more than they’ve ever loved any of their bedrooms.  I’d been dreaming of creating this canvas canopy for them ever since I saw it in a Pottery Barn magazine as a prop about three years ago.  I brainstormed about ways to do it with PVC pipe and David, of course, came up with a far more brilliant idea.  He created what we called a hood because it looked so much like a stove hood.  Then I begged my friend, Nola, to come help me.  She’s a genius with a  sewing machine.  I knew I could do it alone, but I also knew I’d probably do a lot of picking and figuring out.  Nola whipped out her tape measure and a pencil, cut out some pieces and told me exactly which piece to sew next so that it would all go together seamlessly.  She’s a genius I tell you.  When she left it was close to supper time and I had the top together and was just starting to do the windows.  I wasn’t about to stop when I was on a roll and by eleven o’clock that night I emailed her a picture of the canopy hanging from the top of my frig.  I still think of her every time I see it.  I wonder if she even owns a seam ripper.

basement remodel (7 of 18)

basement remodel (8 of 18)

basement remodel (10 of 18)

basement remodel (11 of 18)

basement remodel (9 of 18)

The boys absolutely loved the canopy.  When they moved into their room, they spent the entire first hour just sitting on their bed reading books! It’s so cozy in there.  Odd thing to say about a basement, but it’s true!  I love the navy color of their room, too.  I was afraid to use so much color in a smallish room, especially without a lot of window light.  But when my sisters-in -law came to paint we hemmed and hawed about which wall to paint navy and finally concluded it could handle lots. The boys love it! They wish all four walls were dark, but I think one wall of greige helps to bring a little light to a room that is still darker than main level living. I wish it were possible to take an accurate color picture in a basement, because it really is a pretty navy.

basement remodel (13 of 18)

basement remodel (12 of 18)

Because the room doesn’t have much wall space, David built in shelving in the boys’ closet.  Now there is plenty of space to organize their clothes and all their fun boy gear.  Ski gear. Snorkeling gear. Hunting gear. Backpacks. Binoculars.  And all the other fun boy stuff that happens.

basement remodel (15 of 18)

basement remodel (14 of 18)

basement remodel (16 of 18)

The entire basement is still mostly minus art; but I think about it most in the bathroom. Probably because I know what I want to do in that room most definitively.  It was basement, baby, kitchen remodel, school so art can wait. But next summer, I’m hoping to have some fun adding the fun artsy part to these rooms and Zara’s nursery.  For now, I think it’s pretty cool that Adam can display some of his own oil paintings.

basement remodel (14 of 11)

basement remodel (17 of 11)

The basement is still a basement.  It’s chilly around the edges during the winter.  When we were finishing it, I kept visualizing how pretty the space would be with hardwood floors.  It’s winter here for half the year pretty much though, so carpet has been such a good decision.  One especially cold week when Zara was sick I opted to do school in the dining room so that she’d stay warmer. I realized then how much we don’t see because of being in the basement.  Upstairs we are constantly entertained by dozens of birds at the feeder and sometimes a a pileated woodpecker at the edge of the yard.  We get a much bigger view of snowflakes falling, and we have easy access to the kitchen for hot tea making.  But, for a basement, we think this place is pretty sweet!  The pros way outweigh the cons.

It’s a wonderful place for kids to run off energy and to get fewer decibel lowering directives.  It’s a great place for a sewing project that takes more than twenty minutes, which is pretty much all of them. 🙂

I also love that David put lots of can lights in the main area instead of the typical fluorescents that get installed in basements.  We can turn all the lights on during the day and have it actually feel like an energizing daytime. But he also put a dimmer switch on them so in the evening we can turn the lights on low and have soft, even lighting that makes the basement feel cozy.

basement remodel (19 of 11)

It’s not a perfect space, but it’s pretty much perfect for us.


WFMW: Cold Remedies

Zara is absolutely miserable with a bad cold.  Actually I suspect she has the flu.  She wasn’t a very happy baby Friday and Saturday when we were in Virginia which I easily attributed to being away from home.  Saturday during the night she spiked a fever.  Don’t you just love that ultimate version of Mom guilt? Hi, we came to visit you and now we have the flu so hopefully we’re only leaving good memories and not germs.  Gah.

At any rate, her fever left yesterday, but she’s left with a cough and a nose that erupts like Old Faithful only I’m pretty sure the timeframe is less than every twenty minutes.

I’ve learned a few things about colds in kids in the last ten years and, not surprisingly, I’m still learning.  Babies really should come with an instructional manual. About the time Adam was born, they pulled most cold remedies off the shelf.  At the time I thought it was pretty unfair. What? They’re just supposed to deal with the symptoms? The past few years I’ve gravitated toward a slightly more holistic approach so I’m not sure exactly where I fit in right now.  I mostly know that I scream prevention and still fail to do all of the things I preach.  Like the fact that my favorite flu prevention is Vit D consumption and we’ve yet to swallow one dose this year.

So did you know that a cold lasts a very long time (10 days to 2 weeks) and that the peak day is day 5? I didn’t either until Zara was a month old and so sick with a cold that I absolutely could not wake her.  We landed in the pediatricians office where she, of course, woke up and appeared more well than she had at home.  He said, “Let’s see, this is day 5. That’s usually when we see babies because they keep getting worse and by day 5 parents are nearly panicked.” To be honest, I think I panicked more when she did not have one wet diaper for a period of almost twelve hours and finally put out a few reddish crystals instead of urine on day six.  Her pediatrician still wasn’t worried and I finally eeked enough milk into her with a syringe to help her revive enough for a semi-normal feeding and suddenly we saw her eyes again.

So there you have it.  Baby is worrisomely sick and it’s day three? You probably need help before she crumps.  Day five and it’s bad but respirations are still normal? Hopefully this is as bad as it’s going to get.

But the best thing I learned last winter is that eucalyptus oil does a beautiful job of helping with coughs.  Unkers and Vicks have been good friends of ours for years.  We slather the kids chests and their feet, then put socks on them when we tuck them in at night.  Adam can handle straight Vicks, but Liam’s skin is sensitive so I either use Baby Vicks or put a very thin layer of Vaseline on his chest and then a layer of Vicks.  I just about can’t bring myself to put even baby Vicks on a teeny tiny baby’s chest, but I would put it on the soles of their feet.  Interestingly, Vicks contains eucalyptus and lavender oil.  After reading an article about oils for colds, I decided to try it.  The next time Zara got sick, I added 6 drops of eucalyptus oil to our regular warm air humidifier and set it next to her crib.  Amazingly, she coughed less when first getting up than she had before she went to bed.  Quite unlike the normal wake up and cough and cough and cough types of scenarios that happen normally.  I loved it because I wasn’t putting anything strong directly on her skin and I wasn’t using any petroleum products. (Told you I’ve been edging toward the other side.) 😉 One of these days I’m going to find a carrier oil we can all use and make my own cough rub. 🙂

UPDATE: Soon after posting this, a friend — thanks, Carmen! — with far more experience in essential oils messaged me about eucalyptus oil and said it’s dangerous in babies with epilepsy. Zara is up and gu-rouchy so I need to do more research but two quick links confirm these concerns.  In fact, after reading [this article], I wouldn’t even recommend putting Vicks on a baby’s feet.  It appears to be more dangerous topically, but is definitely one of those risk way outweighs any potential benefits kind of scenarios and it should not be used in kids under ten. Which makes me very curious why they sell baby Vicks??  So now I’m really serious. What DO you do with your babies?  I find it interesting that Zara has more spasms whenever she has a cold whether or not I use oils.  For example, I didn’t use anything until last night (not even tylenol) and yet, all day yesterday she showed a significant increase in events.  Today is about the same as yesterday, perhaps a little less, but we haven’t hit evening yet either. I’d really like to know causation on colds and spasms for her.  But anyhow, this is one more reason why you don’t follow everything you read online. Also, if you’re like me and just learning about EO, here’s where I’m going to begin my education.

natural cold remedies (1 of 1)

The other thing we try to do when colds happen is to cut back on dairy consumption.  Because milk based products can thicken phlegm, it stands to reason that they can accelerate the cold to ear infection progression.  So we push fluids, just not milk.  We haven’t dealt with an ear infection in years.  Causation or correlation or just blessed? It’s hard to tell, but I’m grateful.

Aside from an occasional steroid inhaler when Adam younger, we’ve been blessed with garden variety cold symptoms.  I know that some of you have tangled with nebulizers and hospitals and far more complicated respiratory issues than we have.  I’d love to hear your tips for staying well #washyourhands #washyourhands #washyourhands and what you do to make your kids more comfortable when they develop respiratory infections.


WFMW: My Cleaning Fairies

You would think I’d write about cleaning all the time instead of posting recipes since I actually like doing it.  I still think cleaning is sort of like therapy and being in the kitchen is something to be avoided whenever possible.

Today, I’m going to tell you about a few of my favorite cleaners.

1. Mox

Mox

This is hands down my favorite cleaner for tough jobs.  It is super concentrated so I dilute it for normal cleaning, but when I need the big guns, I dump it straight onto my rag.  It cleans black mildew off patio furniture and the outside of window sills like nobody’s business.  It cuts that grease ring in the tub like it didn’t even need scrubbing.  It can be used for a stain remover in the laundry (I pull it out for really, really tough jobs) and supposedly has even taken wet paint off of clothes completely.  Thankfully, I haven’t had to put it to the test. Seriously though, I rarely reach for bleach anymore and Greased Lightning is a thing of the past (did anyone else hate the smell of Greased Lightning?)

2. Legacy of Clean

household cleaners (2 of 3)

This is what I turn to for the kids bathrooms or if they are helping me clean.  Again, it’s super concentrated so I mix it in a spray bottle and Adam’s all set to clean their bathroom.  I also use it when I clean Zara’s bath because it is so mild I feel confident it won’t provoke skin issues in our eczema prone kiddos.  So far so good.  I love how it smells … clean and fresh, but not overpowering.

3. Kleens All

household cleaners (3 of 3)

Unfortunately, I can’t tell you where to get this one.  It is an incredibly mild, organic cleaner. So mild you can even use it on vegetables.  I use it when I wipe down the cabinetry and mop the hardwood floors and I love it.  It leaves no residue and is so gentle on the finish.  Unfortunately, it came with my cabinets (I purchased extra when we built our house in Virginia) and I can’t find a link to purchase just this product.  Perhaps a little digging would find it.

Now, I’d looooove to hear what your favorite cleaning products are! I’d especially like to hear from Norwex users.  I’m still a windex and paper towels girl when it comes to glass.  I’d love to hear if Norwex rags are the cat’s meow from someone who has actually used them for awhile.  Actually, to be honest, my windows are usually so dirty on the outside I have to first wash them with a drop of dish soap in warm water, but you know, no one really needs to know that.  Some parts of cleaning are anything but therapy.  Like windows.  And cleaning out the frig.

Are you a cleaner or a cook or a baker? Who are your cleaning fairies?


Zara’s Visit with Neurology

Today it’s been two weeks since Zara had her follow up appointment with the neurologist as Johns Hopkins.

baby play (2 of 2)

It is difficult to put into words just how relieved we feel since that visit. In reality, nothing changed.  But sometimes we don’t really know how much we need to hear words from someone with knowledge and experience until we receive them.

It is easy to recap the visit in words.  Zara saw the same neurology fellow, but a different attending.  I loved that he was very, very direct.  There were no minced words, no vague drawn out “wellllll …” phrases, and no questions hedged around.  They both checked her reflexes extensively and found them equal bilaterally so no sign of neurologic damage there.  They listened to her development and were pleased.  They watched the videos we’ve taken of posturing she’s done since her hospital stay.

In his words, “This is NOT infantile spasms.  We can tell that from the first thirty seconds of the EEG and from her normal development today.  At this point, we can watch and wait.  Some babies have the physical output of seizures without significant EEG changes and sometimes they grow out of them and everything stays benign. (Of course we are hoping this is the category Zara belongs.) If anything changes … the intensity or frequency of the spasms, a delay in her development, or even that the spasms concentrate to one side (currently they flip flop and don’t look the same), then you need to call us right away.”

“How long will it be until we get in?” David asked thinking of the several month wait time we’d been told initially.

“She’s on our high acuity watch list.  She’ll be in right away.” (Obviously she’s not high acuity, just being watched that carefully.)

I felt such an enormous relief to know that we could actually watch something on the outside (her development) and have a accurate clue about what was going on inside.

In his very frank, decisive manner he continued.  “These movements that you are concerned about and that we are concerned about are not normal baby movements.”

Until that moment I had no idea how much I needed to hear him say that.  You know how it is, in our well-meaning way, moms try to comfort each other by saying things like, “Oh, all babies make wierd movements,” or “I think that’s just kind of her,” or “I didn’t see anything.” I wasn’t at all offended, just beginning to feel a little muddled.  After three babies, did we still not recognize normal and abnormal?

I think if there was one thing I’d like to tell new moms it would be this.  Trust your intuition.  God made you a Mother and He gave it to you for a reason.  You might not have it right away.  For some, it comes more readily than others.  But you will develop it in time.  It doesn’t mean you’ll never be wrong.  Goodness knows I took Adam to the pediatrician countless times for, “I think it’s just a virus,” visits. 🙂  Hey, who knew viruses shed themselves in the strangest rashes ever? It doesn’t mean you’ll never need input from others because sometimes we lose our perspective because we are too close to the situation.  But when you get that feeling deep inside, don’t be afraid to act on it.  My nursing instructors used to say, “There is no such thing as a dumb question.”  Well, I’m pretty sure there is no such thing as a dumb pediatrician visit.

For us, the clue is in the way Zara’s motions repeat spastically.  Bigger than that is the way it interrupts what she is doing.  When her arm jerks to the side and she goes on playing with the other, I watch to see what will happen, but I don’t feel anxious.  It’s when she jerks, or her torso spasms, interrupting what she was doing, that I watch and hold my breath, hoping this is not the time benign gets shattered.

ten months (1 of 2)

Meanwhile, Early Childhood Development has still not been here.  First her referral got lost in the paperwork, then she finally got re-found when I called and they made an appointment over a month out.  Thirty minutes before they were supposed to show up they called to say the teacher slipped on the ice and had to go to physical therapy so they’d call me back the next day to set up another appointment.  Meanwhile, I’d asked Neuro if she really needed to see them since she was learning so many new, age-appropriate things.  They still said yes.  Apparently, having another set of hands and eyes evaluating her to make sure we’re not missing any muscle issues would be a good thing.  It’s been a week since the teacher slipped on the ice and they finally called, with another appointment several weeks away.  I’m thinking by the time they get here, Zara may just walk to the door and say hello to welcome them in. 🙂


WFMW: Staying Motivated

Motivation has been one of our toughest hurdles since we’ve started homeschooling.  One student flies through his work so fast he hardly takes time to think.  The other can spend so much time thinking he forgets to do his work.  The problem is, the thinking isn’t even always about his school work.  Putting punctuation into a sentence about Henry Ford sparks an instant need to dialogue about Henry Ford and the fact that he didn’t actually invent the automobile.  He just improved it so much that it became readily affordable and dependable.

There was the garden variety messing around and the kind that looks for all the world like you’re concentrating on a problem when you’re actually not even thinking about school at all.  This might be harder to identify if the person overseeing hadn’t been notoriously adept at every trick of the trade when it came to messing around in middle school.  But by far the biggest problem was the need to talk about the subject referred to in a book or something a sentence reminded him of that now needed to be discussed immediately.  For some Mom’s with a different style of homeschooling, this could actually be a good thing instead of a problem.  It all depends on your educational style and what goals you are trying to reach.  At our house, we have very little trouble with discussions and conversations.  We are trying to improve on the ability to be assigned a task and do it quickly and efficiently.  Also, because we may choose to re-enroll the boys in school if we move back to Virginia, we try to keep school similar to the structure of school, just a bit less rigid.  We also try to parent in a way that makes sense for the rest of their life, i.e. , what kind of work ethic are they developing and is this going to be a detrimental or helpful pattern of behavior in a job?

homeschool tips (1 of 5)

I tried many things.  I set timers.  I gave frequent reminders pleasantly and in an I-mean-business voice. I asked many homeschool moms and school moms alike for advice.  I tried many more things.  There were rewards and consequences. But nothing worked for more than a few days.  The truth is, it was still me who was doing the motivating.  This was really nothing more than a very bad habit.  They say if you can build a new habit for two weeks, you’ll own it.

I’m not sure we’re completely owning it, but we’re a lot closer than we were.

homeschool tips (3 of 5)

One fabulous day in September I was talking to a former teacher and explained my dilemma.  She smiled immediately and then offered the wisest suggestion I’ve heard so far.

When she had a classroom of kids who couldn’t stop talking and constantly thought of interesting things in the middle of a lesson, she gave them a piece of paper and told them to write down what they wanted to talk about and save it for later.

It worked perfectly.  For one thing, the act of needing to write it down made him think about whether it was actually something worth talking about.  Most of the time, writing was more of a chore than the joy of talking about something inconsequential.  I wasn’t feeling like I was constantly shutting him down.  He could converse about things that interested him, just at a different time.  And finally, he was working at self-motivating.  Usually, all it took was one question with the first random conversation at the beginning of the day.  “Is that something you want to write on your paper?”

And that was it.  He is motivated not to talk, because he is motivated not to write a long list of conversation pieces mostly contrived to avoid the task at hand.

Our days are much more peaceful with plenty of time for the interesting conversations that are relevant.

If only it wouldn’t have taken us years to find such a simple solution.  But kids are all different.  Sometimes you’re lucky and the first thing you try works. Other times, you have to try nearly every conceivable thing until you find the right method.  Maybe that process is teaching them just as much as the lesson being learned. Anything worth learning is worth working at until you do learn it.

homeschool tips (5 of 5)

 “It is not what you do for your children, but what you have taught them to do for themselves, that will make them successful human beings.”  –Ann Landers